Big Highland Cow Crochet Pattern
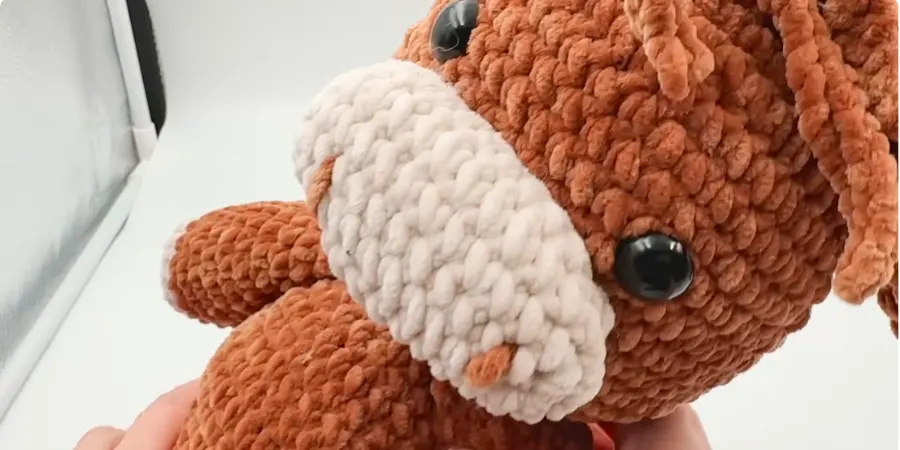
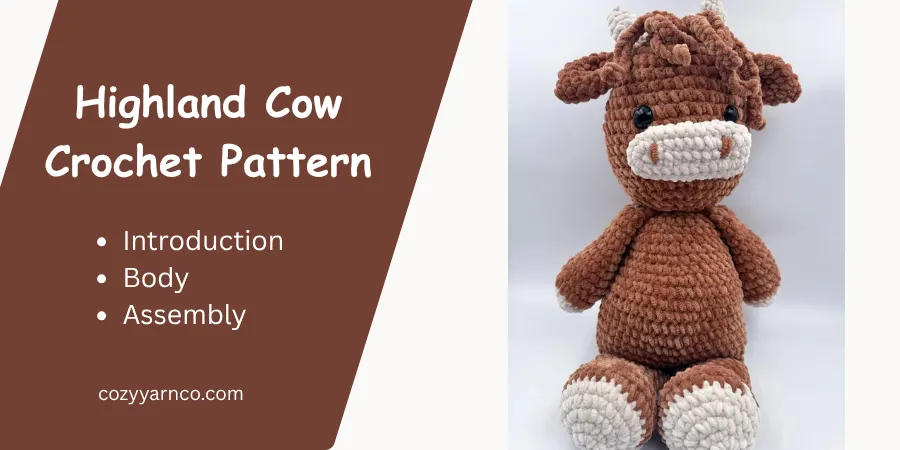
Create a soft, oversized Highland Cow amigurumi with chenille or velvet yarn. This version measures approximately 22 inches (over 50 cm) and features a large rounded head, soft horns, folded ears, shaggy chain-loop hair, chunky feet, and a fluffy tail.
The pattern follows the construction sequence demonstrated in the video.
Big Highland Cow Crochet Pattern- The short answer?
Finished Size
Approximately 22 inches (over 50 cm) tall.
Materials
- Chenille or velvet yarn
- Beige yarn
- Brown yarn
- Approximately 200 g yarn
- 4.5 mm crochet hook
- 20 mm safety eyes
- Fiberfill stuffing
- Tapestry needle
- Scissors
- Stitch marker
- Knitting needles for holding pieces in place during assembly
Abbreviations
- CH — Chain
- SC — Single Crochet
- INC — Increase
- DEC — Decrease
- SL ST — Slip Stitch
- FLO — Front Loop Only
General Notes
- Work the crocheted pieces in continuous rounds unless otherwise stated.
- Use a stitch marker to mark the beginning of each round.
- Count your stitches at the end of each round.
- The invisible decrease can be worked through the front loops of the next two stitches.
- Chenille yarn can make individual stitches difficult to see, so take care when counting.
1. The Head
Use brown yarn.
Head
· R1: Work 12 SC into a Magic Ring. (12)
· R2: Work INC in each stitch around. (24)
· R3: Work 2 SC, INC in the next stitch; repeat around. (30)
· R4: Work 4 SC, INC in the next stitch; repeat around. (36)
· R5: Work 5 SC, INC in the next stitch; repeat around. (42)
· R6: Work 6 SC, INC in the next stitch; repeat around. (48)
· R7–R16: Work 1 SC in each stitch around for 10 rounds. (48 each round)
Begin the Decreases
· R17: Work 6 SC, DEC; repeat around. (42)
· R18: Work 5 SC, DEC; repeat around. (36)
· R19: Work 4 SC, DEC; repeat around. (30)
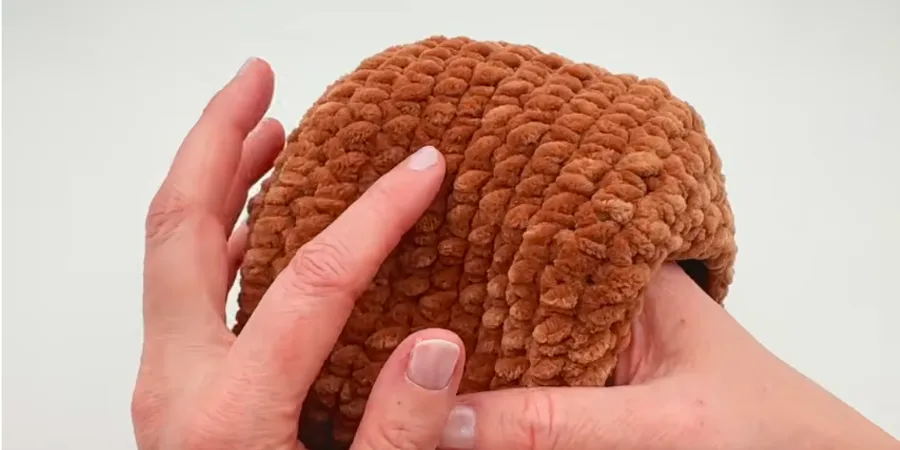
Safety Eyes
Place the safety eyes between approximately Rounds 10 and 11, with about 7 stitches between the eyes.
Check that the eyes are level and leave enough space below them for the mouth.
Secure the backs of the safety eyes.
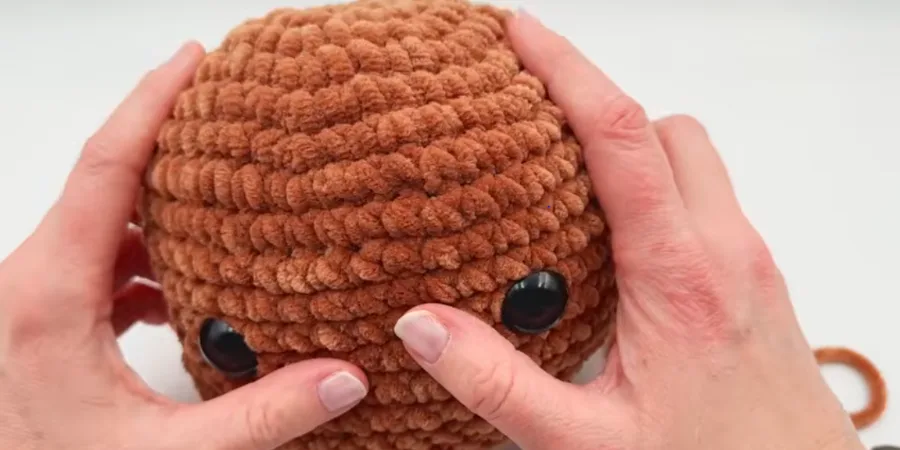
Continue the Head
· R20: Work 3 SC, DEC; repeat around. (24)
Begin adding stuffing to the head.
· R21: Work 2 SC, DEC; repeat 6 times. (18)
SL ST into the first stitch.
Fasten off, leaving a long yarn tail for attaching the head.
Add more stuffing and distribute it evenly throughout the head.
2. The Mouth
Switch to beige yarn.
Make a slip knot.
· Foundation: CH 13.
Work into the second chain from the hook.
· R1: Work across the foundation chain and continue around the opposite side. (30)
· R2: Work 1 SC, INC, 13 SC, INC, 13 SC, INC. (33)
· R3: Work 1 SC in each stitch around. (33)
SL ST into the first stitch.
Fasten off, leaving a long yarn tail for sewing.
Add a small amount of stuffing to the mouth.
Position the mouth just below the eyes.
Use knitting needles to hold it in place while sewing.
Using the long yarn tail and a tapestry needle, sew the mouth securely to the head.
Continue around the entire mouth.
Hide the remaining yarn tail inside the head.
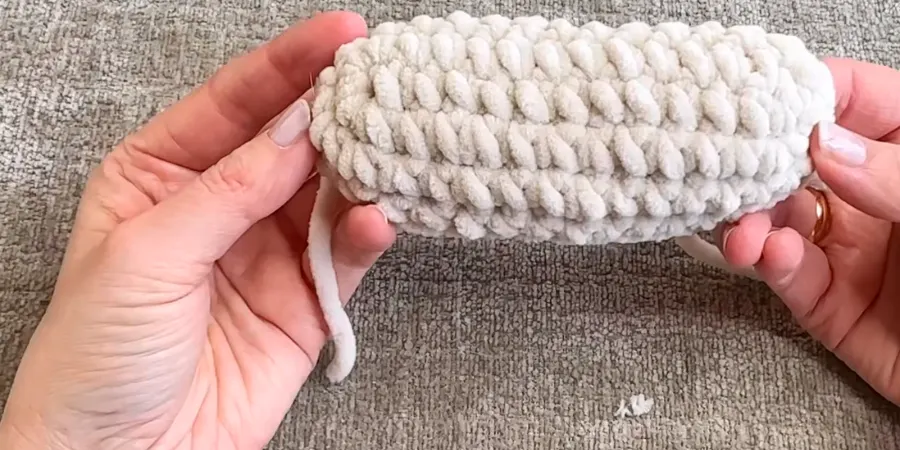
3. Horn
Make 2 horns using beige yarn.
Horn
· R1: Work 4 SC into a Magic Ring. (4)
· R2: Work 1 SC in each stitch around. (4)
· R3: Work INC in the first stitch, then 3 SC. (5)
· R4: Work INC in the first stitch, then 4 SC. (6)
· R5: Work INC in the first stitch, then 5 SC. (7)
· R6: Work INC in the first stitch, then 6 SC. (8)
· R7: Work INC in the first stitch, then 7 SC. (9)
SL ST into the first stitch.
Fasten off, leaving a long yarn tail.
Make the second horn in the same way.
Bend each horn slightly to create its shape.
4. Ears
Make 2 ears using brown yarn.
Ear
· R1: Work 4 SC into a Magic Ring. (4)
· R2: Work INC in each stitch around. (8)
· R3: Work 1 SC, INC; repeat 4 times. (12)
· R4–R6: Work 1 SC in each stitch around for 3 rounds. (12)
· R7: Work 1 SC, DEC; repeat 4 times. (8)
· R8: Work 1 SC in each stitch around. (8)
Fasten off, leaving a long yarn tail.
Fold the ear and weave back and forth through the stitches a couple of times to hold its shape.
Make the second ear in the same way.
5. Attaching Parts for the Head
Attach the Mouth
Place the stuffed mouth just below the eyes.
Use knitting needles to hold it securely in position.
Using the attached yarn tail and tapestry needle, sew the mouth to the head by working down and back up through the nearby stitches.
Continue around the entire mouth.
Keep the sewing yarn hidden as much as possible.
Weave in the remaining yarn tail.
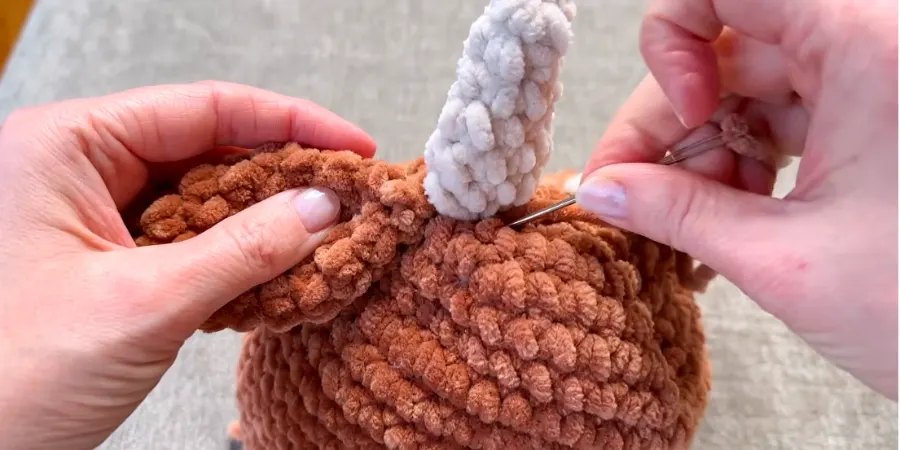
Attach the Horns
Position the horns toward the top of the head.
Secure each horn with its attached yarn tail and a tapestry needle.
Sew through the horn and corresponding stitches of the head until the horn is firmly attached.
Attach the Ears
Position each ear close to the middle of the head, just below its corresponding horn.
Use knitting needles to hold the ear in position.
Sew the ear securely to the head with the attached yarn tail.
Weave in the remaining yarn.
Repeat for the second ear.
6. Hair
Use brown yarn.
Attach the yarn directly to the head close to one ear with a slip knot.
Create the hair using chain strands.
· Hair Strand: CH to the desired length, then SL ST back down each chain.
Attach the strand to the head with a SL ST.
Continue making strands across the top of the head until you reach the other ear.
Hair Lengths
- First strand: 25 CH
- Second strand: 22 CH
- Next 3 strands: 17 CH each
- Next strand: 22 CH
- Final strand: 25 CH
When all the hair strands are complete, SL ST into the next stitch.
Fasten off and hide the yarn ends.
Nostrils
Use brown yarn.
Embroider one nostril by passing the yarn up and down twice.
Repeat for the second nostril.
Weave in the yarn ends.
7. The Feet
Make 2 feet, beginning with beige yarn.
Foot
· R1: Work 6 SC into a Magic Ring. (6)
· R2: Work INC in each stitch around. (12)
· R3: Work 1 SC, INC; repeat around. (18)
· R4: Work 2 SC, INC; repeat around. (24)
· R5: Work 3 SC, INC; repeat around. (30)
Change to brown yarn on the final pull-through of the last stitch.
· R6–R8: Work 1 SC in each stitch around for 3 rounds. (30)
Foot Shaping
· R9: Work 3 SC, DEC, 1 SC; repeat the shaping sequence 6 times, then work 9 SC. (24)
· R10: Work 6 DEC, then work 1 SC, INC; repeat 6 times. (24)
· R11: Work 1 SC in each stitch around. (24)
· R12: Work 4 DEC, then work 1 SC in each remaining stitch around. (20)
· R13–R17: Work 1 SC in each stitch around for 5 rounds. (20)
Add stuffing only to the lower portion of the foot so the finished cow can sit comfortably.
Make the second foot in the same way.
8. Joining the Feet
Place the two feet together.
Attach the yarn to the last foot at the back.
SL ST to join.
CH 1.
Work around the first foot and then continue around the second foot.
· Joining Round: Work 1 SC in each stitch around both feet. (40)
There should be 20 stitches around each foot.
Place a stitch marker at the beginning of the joined round.
Increase Round
· Next Round: Work 3 SC, INC; repeat 10 times. (50)
You should now have 50 stitches.
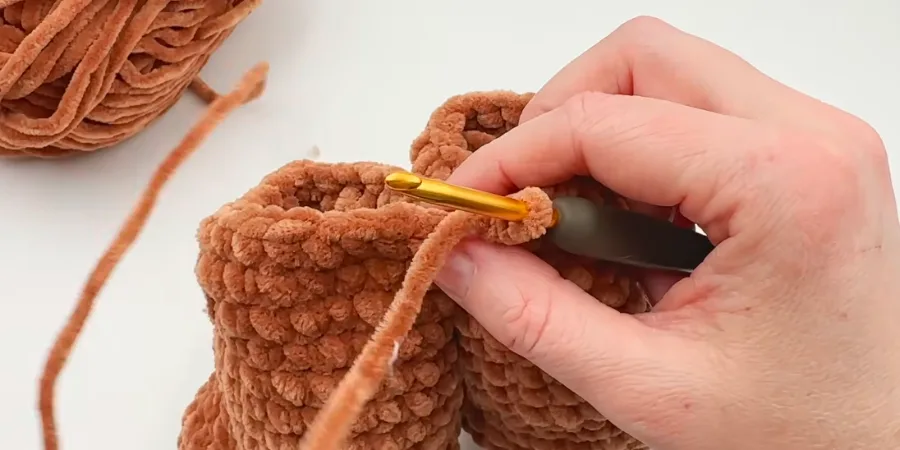
9. The Body, Head and Arms
Body
Continue from the joined feet.
· Body R1–R9: Work 1 SC in each stitch around for 9 rounds. (50 each round)
Add stuffing gradually as you work.
Keep the lower portions of the legs stuffed while leaving the upper leg area less firmly stuffed if you want the cow to sit.
Body Decreases
· Body R10: Work 3 SC, DEC; repeat 10 times. (40)
Add more stuffing.
· Body R11: Work 1 SC in each stitch around. (40)
· Body R12: Work 2 SC, DEC; repeat 10 times. (30)
· Body R13–R14: Work 1 SC in each stitch around for 2 rounds. (30 each round)
· Body R15: Work 3 SC, DEC; repeat 6 times. (24)
· Body R16: Work 1 SC in each stitch around. (24)
· Body R17: Work 2 SC, DEC; repeat 6 times. (18)
SL ST into the first stitch.
Fasten off.
Add more stuffing as needed.
Supporting the Head
For additional support, use a piece of cardboard or a toilet-roll tube cut to a suitable size.
Place the support inside the body and add stuffing around it.
Prepare the head with enough stuffing to maintain its shape while still allowing it to sit securely on the body.
Attach the Head
Position the feet correctly before sewing the head onto the body.
Use the long yarn tail from the head and a tapestry needle.
Sew from the body stitches into the corresponding stitches of the head.
Continue around the entire head.
Take care not to catch too much stuffing between the stitches.
Add extra stitches where needed to make the head secure.
Weave in the remaining yarn tail.
Arms
Make 2 arms using beige yarn.
Arm
· R1: Work 6 SC into a Magic Ring. (6)
· R2: Work INC in each stitch around. (12)
· R3: Work 1 SC, INC; repeat around. (18)
Change color on the final pull-through.
· R4–R14: Work 1 SC in each stitch around for 11 rounds. (18 each round)
Add stuffing to the lower portion of the arm.
Pinch the opening flat.
· Closing Round: Work SC through both sides of the opening across. (9)
Fasten off, leaving a long yarn tail.
Position the arm around the neck area of the body.
Sew the arm securely to the body using the attached yarn tail.
Repeat for the second arm.
10. Tail
Use brown yarn.
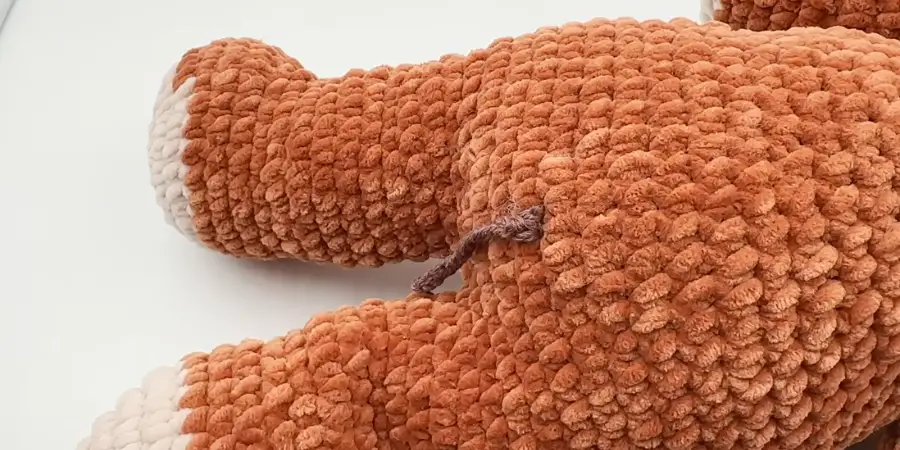
Choose a suitable position on the back of the body, approximately four rounds upward from the lower area.
Attach the yarn with a slip knot or SL ST.
· Tail: CH approximately 7–9.
Leave the tail as a chain without working SC or SL ST back down it.
Fasten off.
Pull and separate the yarn fibers to create a fluffy appearance.
Weave in the remaining yarn end.
Finished Big Highland Cow
Your oversized Highland Cow is now complete.
The finished cow is approximately 22 inches (over 50 cm) and has the large-head version demonstrated in the video.
The combination of chenille yarn, rounded shaping, folded ears, curved horns, chain-loop hair, and soft tail creates the characteristic shaggy Highland Cow appearance.