Crochet Heart Keychain
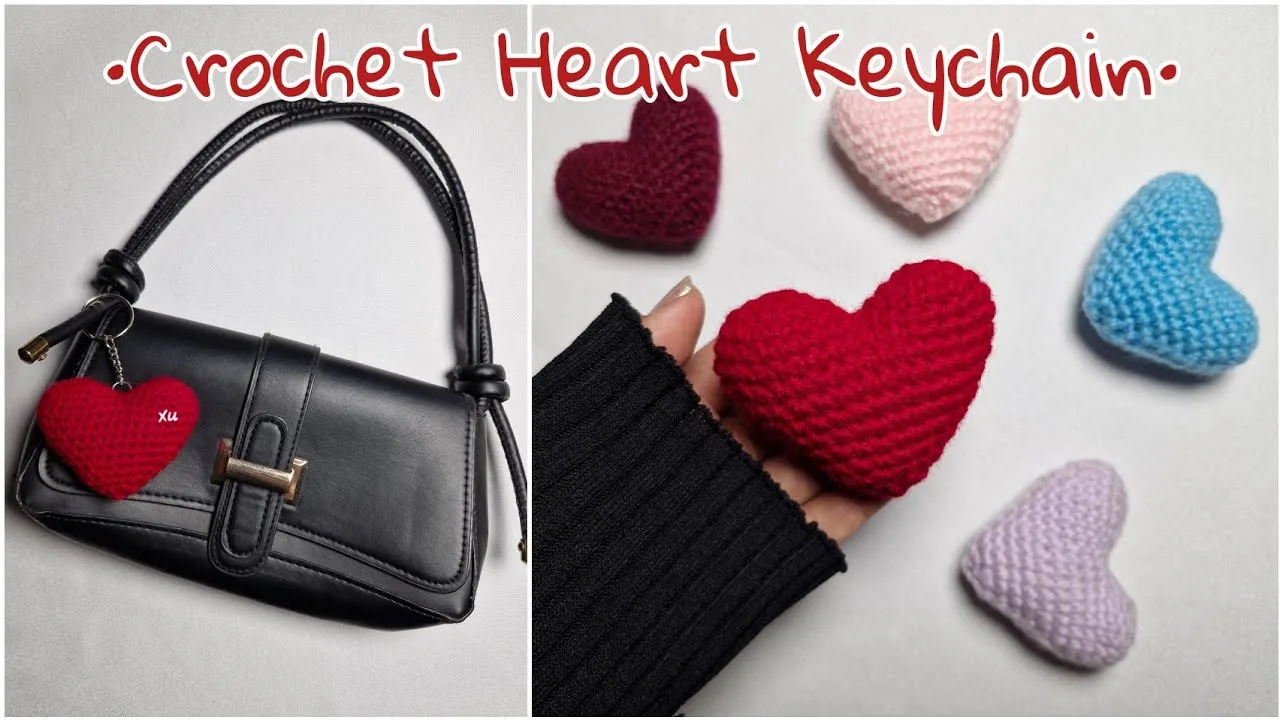
A crochet heart keychain is a small amigurumi project made by crocheting two matching heart components, joining them together, and shaping them into one stuffed heart. The project uses single crochet stitches, increases, decreases, fiber filling, and a yarn needle to close the final opening.
This project is suitable for crocheters who are familiar with basic crochet stitches. Follow the instructions round by round to create the two heart pieces, join them, and shape the finished heart.
Crochet Heart Keychain – The Short Answer?
Materials Needed
- Yarn in your preferred color
- Crochet hook suitable for your yarn
- Fiber filling
- Stitch marker
- Yarn or darning needle
- Scissors
Choose a yarn color that suits your project, whether you prefer a classic red heart, a soft pastel shade, or a bright color for a handmade gift. Keep your stitch tension consistent so both heart components have a similar shape and size.
Crochet Abbreviations
- MR: Magic ring
- ch: Chain
- sc: Single crochet
- inc: Increase (work two single crochet stitches into the same stitch)
- dec: Decrease
- st: Stitch
- sts: Stitches
First Heart Piece
Round 1: Make a Magic Ring
Start with a magic ring. Insert your crochet hook into the ring, yarn over, and pull through. Chain one to secure the starting loop.
Work 6 single crochet stitches into the magic ring. Pull the yarn tail to close the ring tightly.
Round 2: Increase in Every Stitch
Work 2 single crochet stitches into each stitch around. Place a stitch marker in the first stitch to help you identify the beginning of the round.
You should have 12 single crochet stitches at the end of this round.
Round 3: Increase Every Second Stitch
Repeat the sequence of 1 single crochet followed by 1 increase around the circle.
You should have 18 single crochet stitches at the end of Round 3.
Round 4: Single Crochet Around
Work 1 single crochet into every stitch around, without making any increases.
At the end of the round, leave a long yarn tail and cut the yarn. Secure the working loop by pulling the yarn tail through and making the chain stitches shown in the tutorial.
Set this heart component aside while you crochet the second one.
Crochet the Second Heart Piece
Repeat Rounds 1–4 to make a second heart component with the same stitch counts and shape.
When you finish Round 4 of the second piece, do not cut the yarn. Keep the working yarn attached because you will use it to join the two pieces together.
Joining the Two Heart Pieces
Place the two crocheted heart components together, aligning their edges. Use the attached working yarn from the second piece to crochet around the edges and join the components.
Work the joining stitches around the pieces, keeping the edges aligned as you go. The combined joining round should contain 36 single crochet stitches.
When you reach the section where the pieces meet, follow the joining movement shown in the tutorial to manage the yarn and close the gap. Turn your work as demonstrated, insert the hook, pick up the yarn, pull it through, and make the chain stitches shown.
Once the pieces are joined, continue with the next round to begin shaping the heart.
Shaping the Crochet Heart
Round 6: Single Crochet Around
Work 1 single crochet into every stitch around.
You should have 36 single crochet stitches at the end of this round.
Round 7: Decrease at the Corners
Work the following sequence around the heart:
- 7 single crochet
- 1 decrease
- 1 decrease
- 14 single crochet
- 1 decrease
- 1 decrease
- 7 single crochet
You should have 32 stitches at the end of Round 7.
Round 8: Single Crochet Around
Work 1 single crochet into every stitch around, without making any decreases.
You should have 32 single crochet stitches at the end of this round.
Round 9: Begin Shaping the Heart
Work the following sequence:
- 6 single crochet
- 1 decrease
- 1 decrease
- 12 single crochet
- 1 decrease
- 1 decrease
- 6 single crochet
You should have 28 stitches at the end of Round 9.
Round 10
Work the following sequence:
- 5 single crochet
- 1 decrease
- 1 decrease
- 10 single crochet
- 1 decrease
- 1 decrease
- 5 single crochet
You should have 24 stitches at the end of Round 10.
Round 11
Work the following sequence:
- 4 single crochet
- 1 decrease
- 1 decrease
- 8 single crochet
- 1 decrease
- 1 decrease
- 4 single crochet
You should have 20 stitches at the end of Round 11.
Round 12
Work the following sequence:
- 3 single crochet
- 1 decrease
- 1 decrease
- 6 single crochet
- 1 decrease
- 1 decrease
- 3 single crochet
You should have 16 stitches at the end of Round 12.
Round 13
Work the following sequence:
- 2 single crochet
- 1 decrease
- 1 decrease
- 4 single crochet
- 1 decrease
- 1 decrease
- 2 single crochet
You should have 12 stitches at the end of Round 13.
Add Fiber Filling
Before closing the heart, add fiber filling through the remaining opening.
Distribute the filling evenly throughout the heart so the shape looks smooth and rounded. Add small amounts at a time, adjusting the filling as needed. Avoid overpacking, as too much filling can make the stitches stretch and affect the heart’s shape.
Make sure the filling is in place before you complete the final round.
Round 14: Finish the Heart
Continue making single crochet decreases around the opening until 6 stitches remain.
Keep the decreases even as you work around the heart. Once you have 6 stitches left, remove the stitch marker and make a slip stitch to finish the round.
Leave a long yarn tail and cut the yarn.
Close the Crochet Heart
Thread the yarn tail through a darning needle. Pass the needle through the remaining 6 stitches, then pull the yarn tail gently to close the opening.
Secure the yarn so the opening stays closed, and weave the remaining tail into the heart. Adjust the filling and shape the heart with your fingers to create a neat finish.
Adding a Keychain Attachment
To turn your finished crochet heart into a keychain, you can add a keyring or clasp using a suitable yarn loop or another secure attachment method. Position the attachment at the top of the heart and make sure it is firmly secured before using it.
Tips
- Use a stitch marker: Mark the first stitch of each round to keep track of your progress.
- Keep your tension consistent: Even stitches help both heart components match and create a smooth finish.
- Check your stitch counts: Count your stitches after increases and decreases to help maintain the intended shape.
- Join the pieces carefully: Keep the edges aligned while crocheting around both components.
- Add filling gradually: Distribute the fiber filling evenly before closing the final opening.
- Secure the yarn tails: Weave in loose ends carefully so the finished heart stays neat.
Once the opening is closed and the yarn tails are secured, your crochet heart is ready to use as a small handmade decoration or to finish as a keychain with your chosen attachment.