No-Sew Crochet Cat Pattern
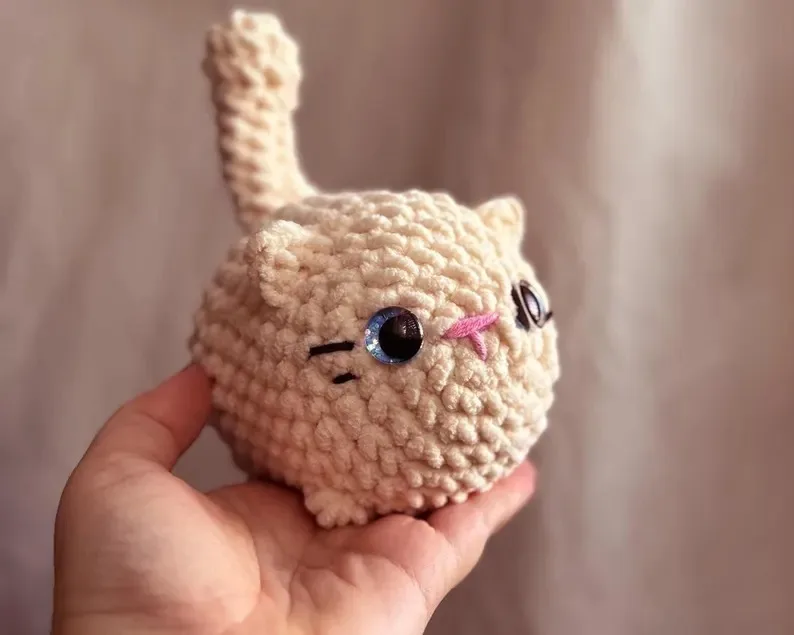
If you love making small amigurumi animals, this cat crochet pattern is a fun project to try. It uses simple single crochet stitches, increases, invisible decreases, and four puff stitches to create the cat’s little legs. The ears are worked directly into the body, while the tail is crocheted separately and sewn on at the end.
The tutorial is presented as beginner-friendly and starts with a magic ring. You’ll work the main body in joined rounds, add the ears and legs as you go, place the safety eyes between Rounds 3 and 4, and finish the cat with embroidered facial details, stuffing, and a separately crocheted tail.
No-Sew Crochet Cat Pattern-The Short Answer
Materials
The tutorial uses a few basic crochet supplies:
- Yarn
- Crochet hook suitable for your yarn
- Stitch marker
- Safety eyes
- Pink or black yarn for the nose, mouth, and whiskers
- Darning or yarn needle
- Scissors
- Polyfill or scrap yarn for stuffing
The tutorial does not specify a particular yarn brand, yarn weight, hook size, or safety-eye size, so those details are best chosen according to the materials you have available.
Crochet Abbreviations
This pattern uses US crochet terminology.
- sc — single crochet
- inc — increase; two single crochets worked in the same stitch
- invdec — invisible decrease
- ch — chain
- sl st — slip stitch
- FLO — front loop only
- st/s — stitch/stitches
- pc — puff stitch
The body is worked in joined rounds. At the end of each round, join with a slip stitch to the first single crochet and chain one before starting the next round. The joining slip stitch is not counted as a regular stitch.
How to Make the Cat Body
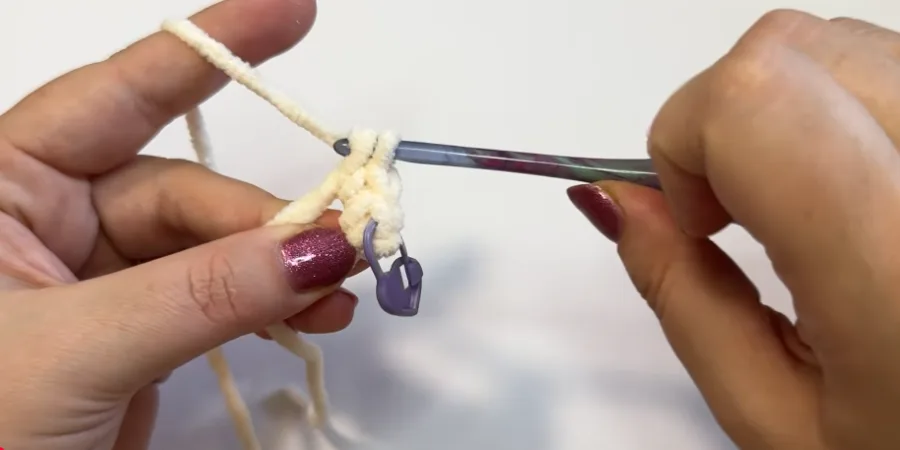
Round 1: Start with a Magic Ring
Begin with a magic ring and work 6 sc into the ring.
Place a stitch marker in the first single crochet so you can easily identify the beginning of the round. Pull the magic ring closed, then slip stitch into the first single crochet and chain one.
You should have 6 stitches.
Round 2: Increase Around
Work an increase in every stitch around.
An increase means working 2 sc into the same stitch.
Continue this pattern around until you have:
12 stitches
Slip stitch into the first single crochet and chain one to begin the next round.
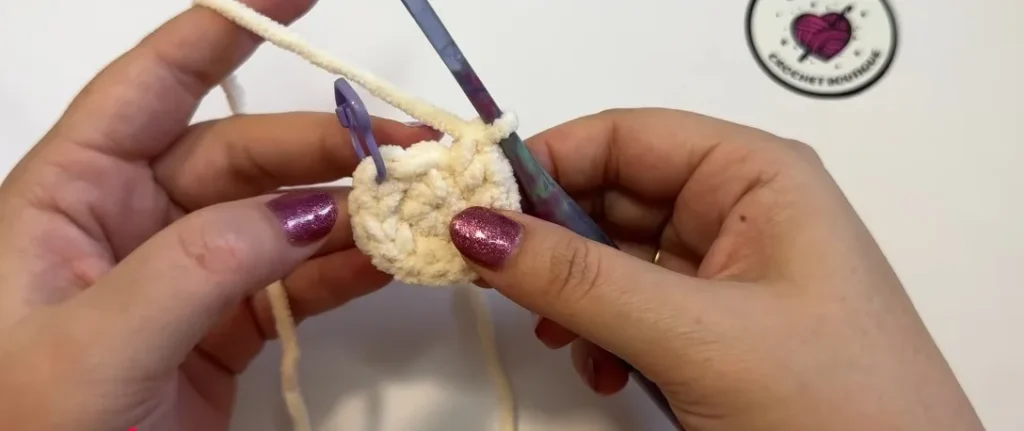
Round 3: Single Crochet and Increase
Start with 1 sc in the first stitch, then work an increase in the next stitch.
Repeat:
[1 sc, inc]
Continue the pattern around until you reach the end of the round.
You should have:
18 stitches
Slip stitch into the first single crochet and chain one.
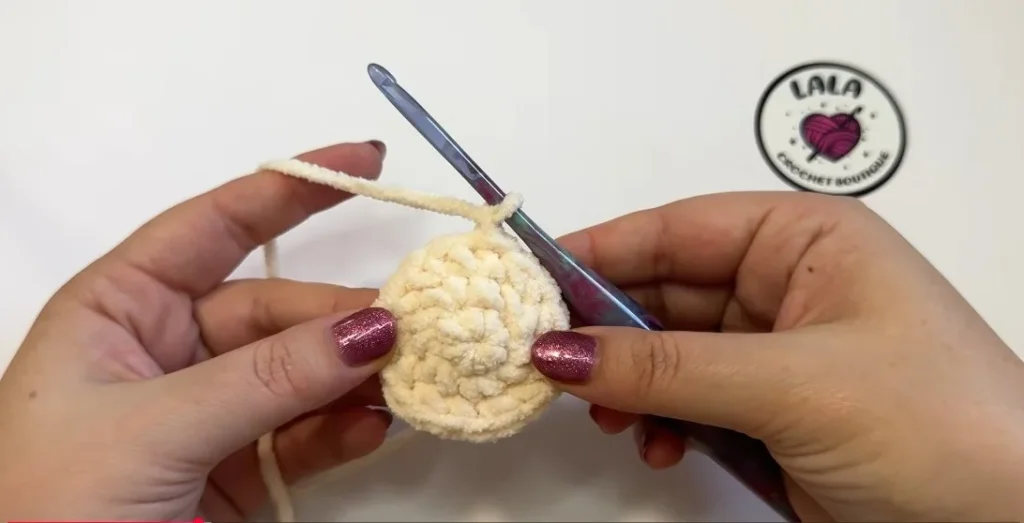
Round 4: Two Single Crochets and an Increase
Begin with 1 sc in the first stitch and mark it.
Continue with the repeating pattern of 2 sc followed by an increase. Work this sequence until one stitch remains at the end of the round, then work 1 sc into that final stitch.
You should have:
24 stitches
Slip stitch into the first single crochet and chain one.
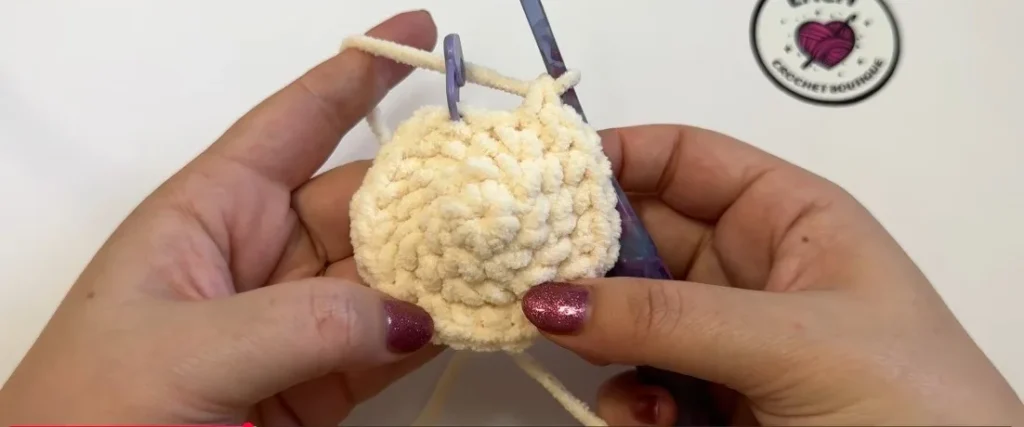
Round 5: Three Single Crochets and an Increase
Work 3 sc, followed by an increase.
Repeat:
[3 sc, inc]
Continue around until you reach the end of the round.
This increases the body from 24 to:
30 stitches
Slip stitch into the first single crochet and chain one.
Round 6: Single Crochet Around
Work 1 sc in every stitch around.
There are no increases in this round.
You should have:
30 stitches
Slip stitch into the first single crochet and chain one.
Shape the Cat’s Ears
Round 7 begins the ear construction.
Start with 1 sc in the first stitch and place your stitch marker.
The ears are worked into the front loop only. To make the first ear, work the following into the selected front loop:
- Slip stitch
- 1 sc
- Ch 1
- 1 sc in the same stitch
- 1 final slip stitch in the same stitch
This creates the first pointed ear.
After the ear, work 7 sc in the next seven stitches.
Then make the second ear using the same front-loop construction:
- Slip stitch
- 1 sc
- Ch 1
- 1 sc in the same stitch
- 1 final slip stitch
Continue with single crochet in each remaining stitch around.
At the end of the round, you should have 20 regular stitches in the round. Slip stitch into the first marked single crochet and chain one.
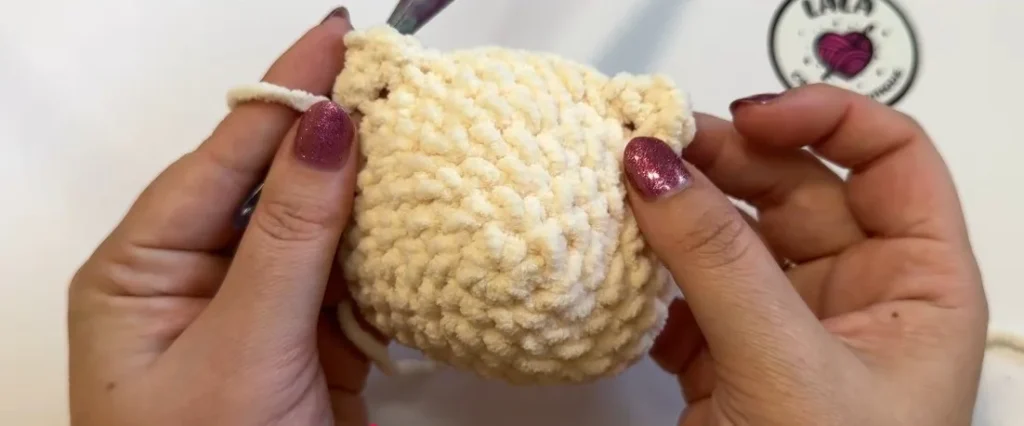
Add the First Two Legs
The next part of the construction uses the unused back loops behind the ears.
Start by working 17 sc from the first single crochet. When you reach the back loop behind an ear, work a single crochet into that unused back loop. This helps bring the ear into a perky upright position.
Next, make the first puff-stitch leg.
Puff Stitch
For the puff stitch shown in the tutorial:
- Yarn over.
- Insert the hook into the stitch.
- Yarn over and pull up a loop.
- Repeat the yarn-over and pull-up process until you have 7 loops on the hook.
- Yarn over and pull through all 7 loops.
After the first puff stitch, work 5 sc in the next five stitches.
Make the second puff stitch in the next stitch using the same technique.
Finish the round with 6 sc in the remaining stitches.
Slip stitch into the first single crochet and chain one.
At this point, the two front legs have been established.
Continue the Body Through Round 14
From here, the body continues with 30 sc around for six rounds.
Work:
- R9: 30 sc
- R10: 30 sc
- R11: 30 sc
- R12: 30 sc
- R13: 30 sc
- R14: 30 sc
Work one single crochet into each stitch around.
The puff stitches can make it slightly harder to identify the top of the stitch. When you reach one, look for the two loops at the top and insert your hook through them as you would with a regular stitch.
At the end of each round, slip stitch into the first single crochet and chain one.
Add the Back Legs
Round 15 creates the remaining two puff-stitch legs.
Work the following sequence:
18 sc, puff stitch, 6 sc, puff stitch, 4 sc
For each puff stitch, use the same technique as before, building the stitch until you have 9 loops on the hook, then yarn over and pull through all the loops together.
Once this round is complete, the cat will have four puff-stitch legs.
Slip stitch into the first single crochet and chain one.
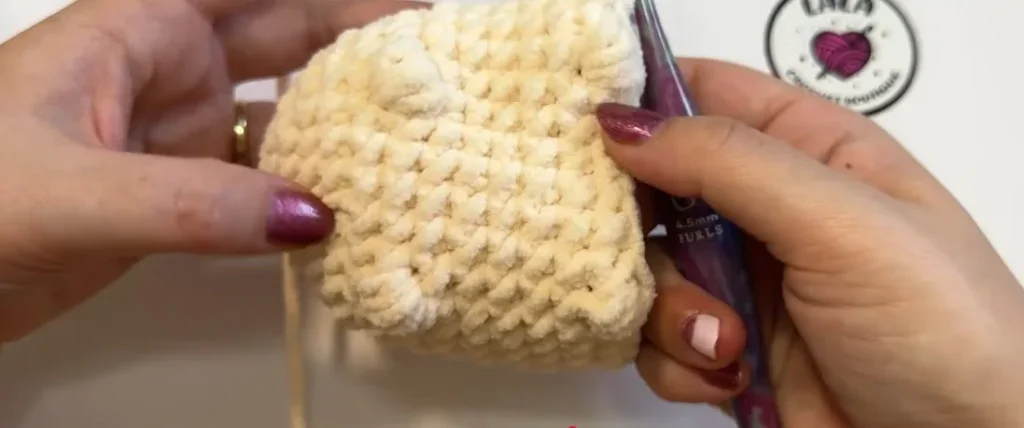
Place the Safety Eyes
Before finishing the body, add the safety eyes.
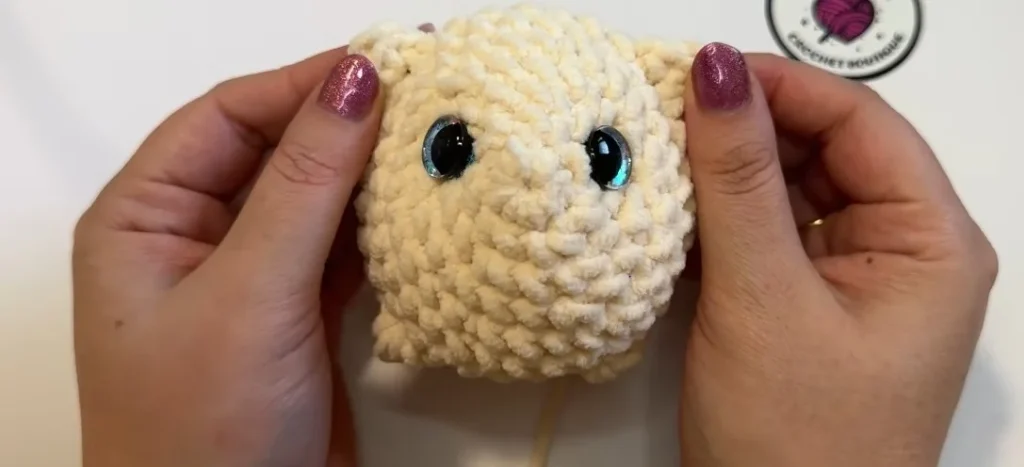
The tutorial places the eyes between Rounds 3 and 4.
Count carefully so both eyes sit at the same height. Place them so the face looks centered, then secure them.
Once the eyes are in place, you can add the embroidered nose, mouth, and whiskers.
Embroider the Face
Use your darning needle and either pink or black yarn for the facial details.
Add:
- Nose
- Mouth
- Whiskers
Keep the nose and mouth centered between the eyes. Once you are happy with the placement, gently secure the yarn ends inside the body.
For the whiskers, avoid pulling the yarn too tightly. The tutorial recommends securing the strands gently so they stay visible instead of being pulled into the body.
Add the Stuffing
Now fill the cat with polyfill or scrap yarn.
Add the stuffing gradually and make sure the body is filled well enough to give the cat a plump, rounded shape. Check the shape as you add the filling and add more where needed.
Leave enough room to comfortably complete the final decrease rounds.
Shape the Top of the Body
After the face and stuffing are in place, begin decreasing the body.
Round 16
Work:
[3 sc, invdec] × 6
You should have:
24 stitches
The invisible decrease is worked through the front loops of the next two stitches.
Slip stitch into the first single crochet and chain one.
Round 17
Work:
[2 sc, invdec] × 6
You should have:
18 stitches
Slip stitch into the first single crochet and chain one.
Round 18
Work:
[1 sc, invdec] × 6
You should have:
12 stitches
Slip stitch into the first single crochet and chain one.
Round 19
Work 6 decreases around.
The first decrease cannot be worked as a regular invisible decrease in the same way as the others, so follow the tutorial’s demonstrated method for joining the first two stitches.
You should finish with:
6 stitches
At this stage, the first single crochet can become difficult to see, so keeping the stitch marker in place is especially helpful.
Slip stitch into the first single crochet and chain one.
Close the Body
Check the stuffing once more and add a little more polyfill if needed.
Fasten off and leave a yarn tail for closing the remaining opening.
Thread the yarn tail onto a darning needle and sew the small opening closed through the stitch loops. Pull it closed securely, then weave the remaining yarn into the body.
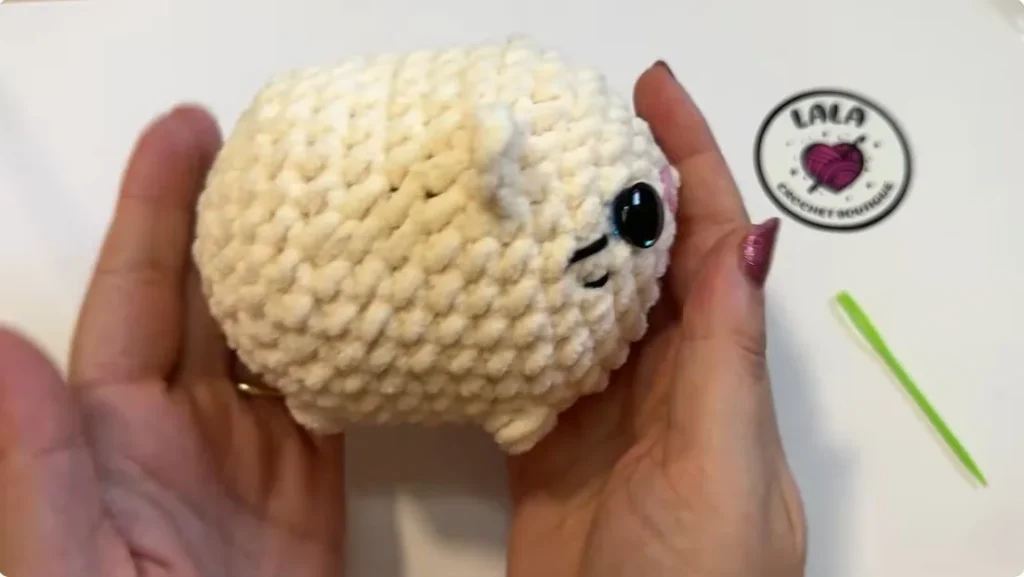
The cat’s main body is now complete.
Crochet the Tail
The tail is made separately and attached after the body is finished.
Tail Round 1
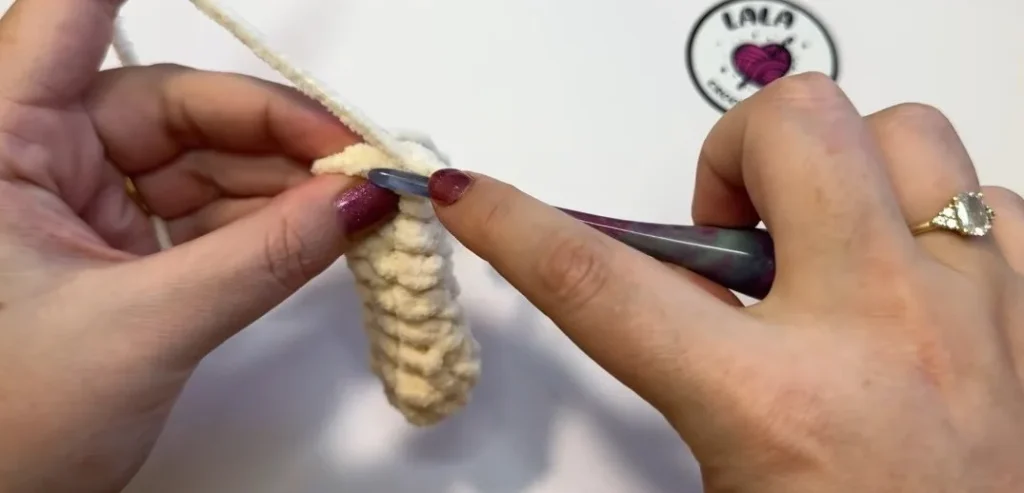
Start with a magic ring and work:
6 sc
Close the magic ring.
Slip stitch into the first single crochet and chain one.
Tail Round 2
Work:
[1 sc, inc] × 3
You should have:
9 stitches
Slip stitch into the first single crochet and chain one.
Tail Round 3
Work:
9 sc
Slip stitch into the first single crochet and chain one.
Tail Round 4
Work:
[1 sc, invdec] × 3
You should have:
6 stitches
Slip stitch into the first single crochet and chain one.
Tail Rounds 5–10
Work:
6 sc around
Repeat this for six rounds.
At the end of Round 10, slip stitch into the first single crochet and chain one. Leave a long yarn tail for sewing and fasten off.
Attach the Tail
The tail is attached to the back of the cat where the body begins to decrease.
The tutorial places it between Rounds 17 and 18, centered on the rear curve of the body.
Before sewing it in place, check the position from the back and side. The tail should sit in the middle of the curve rather than leaning noticeably to one side.
The strand from the tail’s original magic ring can be used to help locate the correct attachment point. After positioning the tail, use the longer yarn tail to sew it securely to the body.
Once the tail is attached, weave in the remaining yarn ends.
Finishing Your Crochet Cat
Give the finished cat a final check before trimming or hiding any remaining yarn ends.
Make sure:
- The ears are upright.
- The safety eyes are positioned evenly.
- The nose and mouth are centered.
- The whiskers are secure.
- All four puff-stitch legs are clearly defined.
- The body is filled evenly.
- The tail is centered on the back.
- The final opening is securely closed.
- Loose yarn ends are woven into the body.
Your small cat amigurumi is now finished and ready to enjoy or give as a handmade gift.
The construction stays fairly simple throughout: the body grows from a six-stitch magic ring, the ears and four puff-stitch legs are built directly into the body, and the separately crocheted tail is added during the finishing stage.