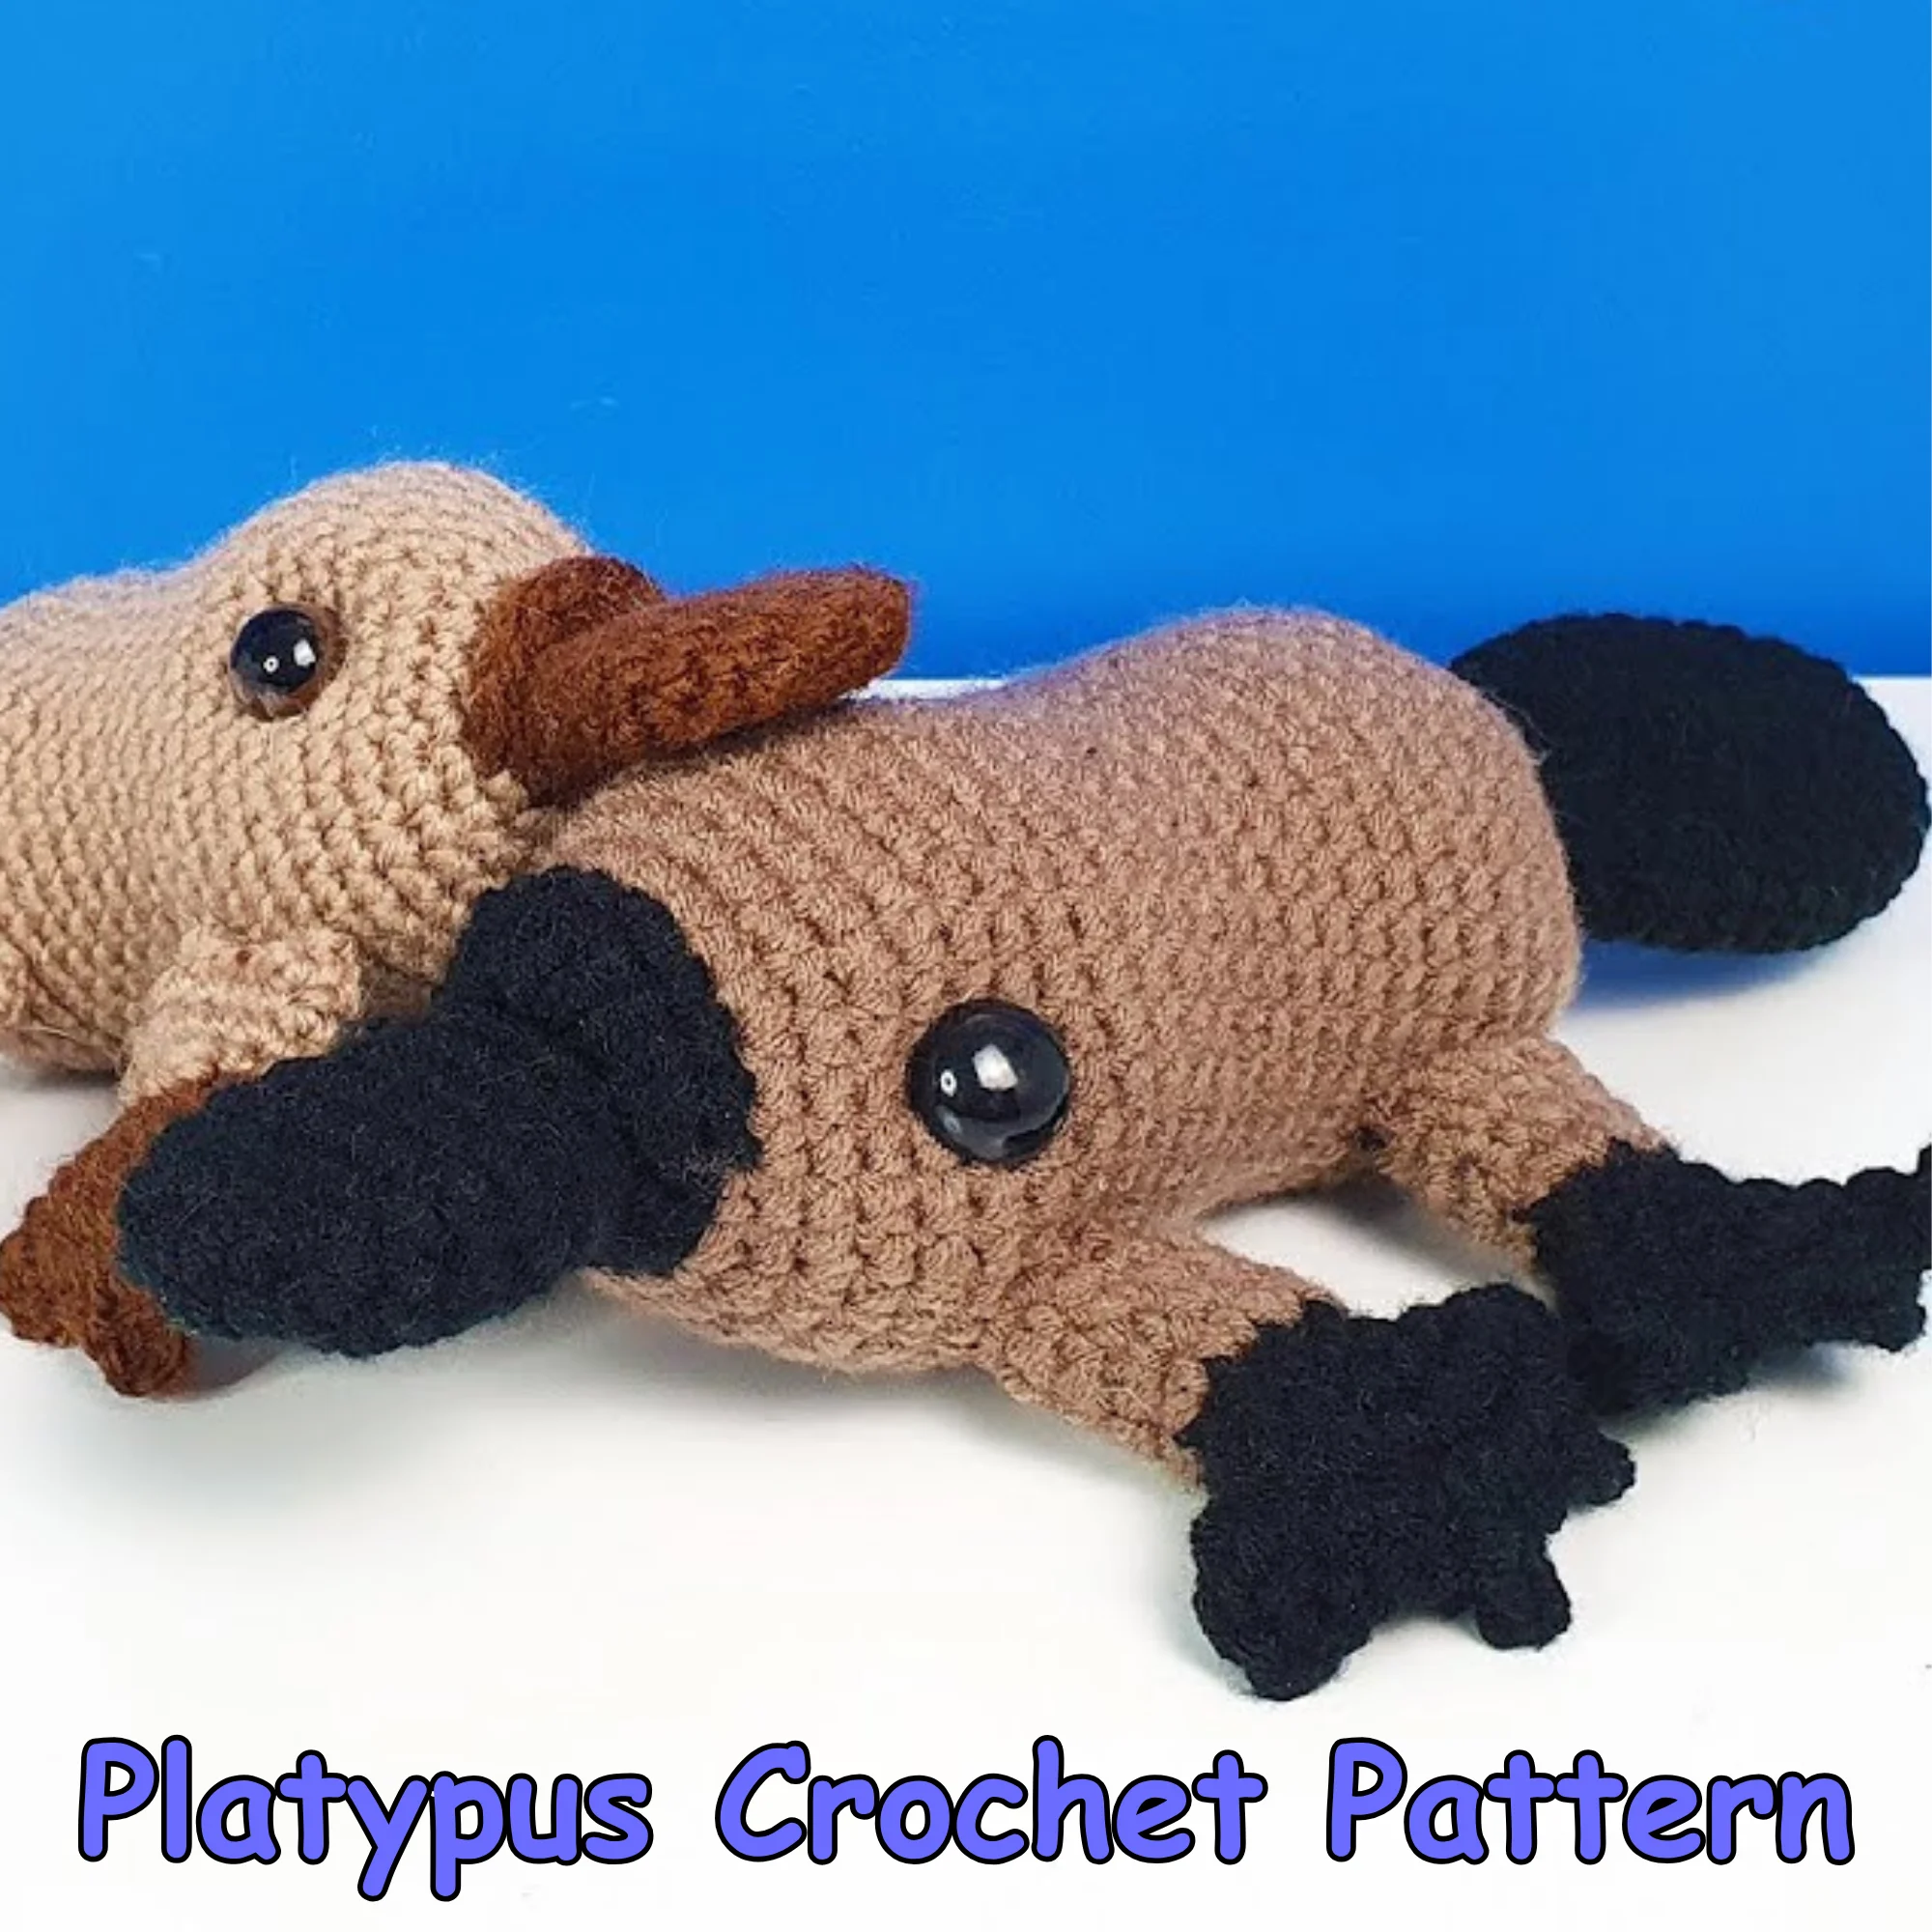
Platypus Crochet Pattern
This platypus crochet pattern has a simple construction, but a few details need to be followed carefully to keep the shape right. The bill, head, and body are crocheted as one continuous piece, while the tail is made separately. The four feet are also made separately, with the legs worked directly into the unused loops created during the foot construction.
The pattern uses 8-ply yarn, a 3.5 mm crochet hook, and 12 mm safety eyes. A little polyester fiberfill is used to give the head and body their shape without making the finished platypus too firm.
Platypus Crochet Pattern-The Short Answer
Materials
You will need:
- 8-ply yarn in black
- 8-ply yarn in brown
- 3.5 mm crochet hook
- 12 mm safety eyes
- Polyester fiberfill
- Tapestry or yarn needle
- Scissors
- Stitch markers
- Pins
The pattern uses black for the bill, tail, and feet, and brown for the head and body. Keep your stitch markers nearby, especially when working the longer continuous sections.
Crochet Abbreviations
- MR — Magic Ring
- SC — Single Crochet
- INC — Increase
- DEC — Invisible Decrease
- HDC — Half Double Crochet
- DC — Double Crochet
- FLO — Front Loop Only
- BLO — Back Loop Only
- SL ST — Slip Stitch
- CH — Chain
- ST — Stitch
The main piece is worked in continuous rounds. A stitch marker at the beginning of each round makes it much easier to keep track of the pattern.
Bill, Head and Body
The bill, head, and body are worked together as one continuous piece. This is an important part of the construction because the bill transitions directly into the head rather than being sewn on as a separate part.
Bill Foundation
Start with black yarn.
- R1: Chain 5.
- R1: Starting in the second chain from the hook, work 3 SC.
- R1: Work 3 SC in the same stitch.
- R1: Rotate the work.
- R1: Work 3 SC along the opposite side of the chain.
- R1: Work 3 SC in the final stitch (12)
This creates an oval foundation for the bill rather than starting with a Magic Ring.
Bill Shaping
- R2: [5 SC, INC] ×2 (14)
- R3: [6 SC, INC] ×2 (16)
- R4: 16 SC (16)
- R5: [6 SC, DEC] ×2 (14)
- R6: [5 SC, DEC] ×2 (12)
- R7: 12 SC (12)
- R8: 12 SC (12)
Use invisible decreases for the DEC stitches. By the end of R8, the bill is back to 12 stitches and ready for the front-loop shaping.
Bill Surface Shaping
R9 is intentionally more detailed because the stitch placement here creates the raised upper surface of the bill.
- R9: Work the first stitch in FLO with HDC INC.
- R9: Work the second stitch in FLO with HDC INC.
- R9: Work the third stitch in FLO with DC INC.
- R9: Work the fourth stitch in FLO with DC INC.
- R9: Work the fifth stitch in FLO with HDC INC.
- R9: Work the sixth stitch in FLO with HDC INC.
- R9: Work 1 SC through both loops in each of the remaining 6 stitches.
Complete the final SC of R9 with brown yarn. This creates the colour transition from the black bill into the brown head. The unused loops from the first six stitches are important because they are used in the next round to build the head.
Head
- R10: Work the first 6 stitches into the unused back loops of R9.
- R10: [SC, INC] ×6 (18)
- R11: [2 SC, INC] ×6 (24)
- R12: [3 SC, INC] ×6 (30)
- R13: 30 SC (30)
- R14: [4 SC, INC] ×6 (36)
- R15: 36 SC (36)
- R16: 36 SC (36)
- R17: 36 SC (36)
- R18: 36 SC (36)
- R19: 36 SC (36)
The head gradually widens until it reaches 36 stitches. Keep the tension even throughout these rounds so the shape stays smooth.
Eye Placement
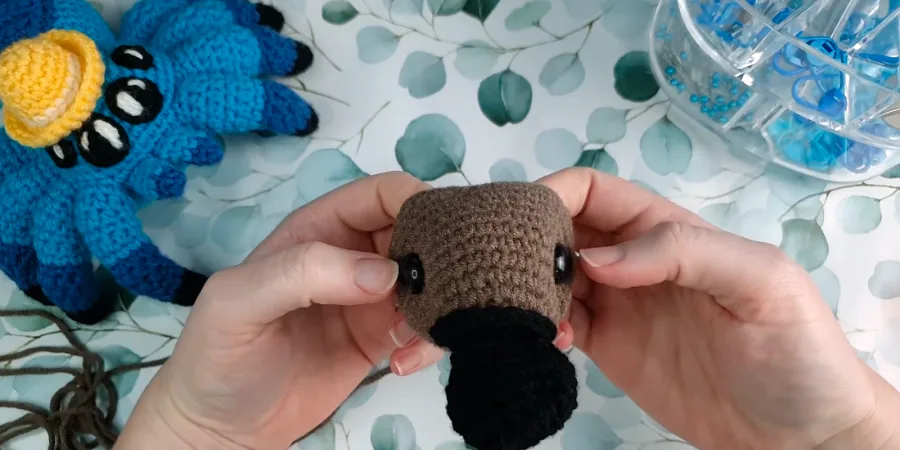
Place the 12 mm safety eyes between R15 and R16. Check the face from the front before securing them so both eyes sit at a similar height and distance from the bill.
The eye placement is not only about positioning the safety eyes. The finished face also uses a separate indentation technique later during assembly.
Head Shaping
- R20: [10 SC, DEC] ×3 (33)
- R21: 33 SC (33)
- R22: [9 SC, DEC] ×3 (30)
After R22, add a small amount of polyester fiberfill to the head. It is better to build the shape gradually than to fill it too tightly.
Body
- R23: 30 SC (30)
- R24: 30 SC (30)
- R25: 30 SC (30)
- R26: [9 SC, INC] ×3 (33)
- R27: 33 SC (33)
- R28: [10 SC, INC] ×3 (36)
- R29: 36 SC (36)
- R30: 36 SC (36)
- R31: 36 SC (36)
- R32: 36 SC (36)
- R33: 36 SC (36)
Continue adding small amounts of stuffing as you work. The aim is to support the shape rather than make the body bulky.
Body Decreases
- R34: [4 SC, DEC] ×6 (30)
- R35: [3 SC, DEC] ×6 (24)
- R36: [2 SC, DEC] ×6 (18)
- R37: [SC, DEC] ×6 (12)
- R38: 6 DEC (6)
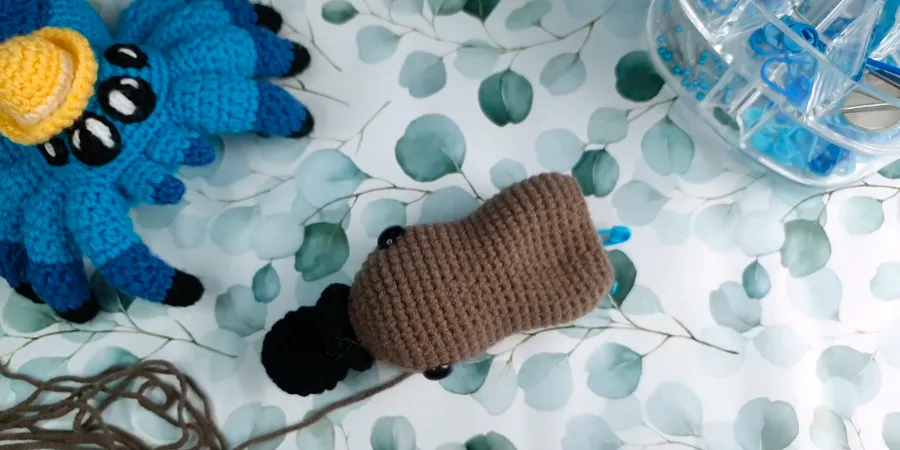
The final decrease sequence brings the body from 36 stitches down to the final 6 stitches.
Closing the Body
Once R38 is finished, leave a long yarn tail for closing.
- Cut the yarn and pull up the final loop.
- Thread the yarn tail onto a tapestry needle.
- Pass the needle through the front loop of each of the final 6 stitches.
- Pull the yarn firmly to close the opening.
- Pass the needle through the centre of the final round.
- Weave the yarn through the body several times.
- Secure the yarn and hide the remaining tail.
Make sure the yarn passes through all six final stitches. This is what allows the opening to close neatly.
Tail
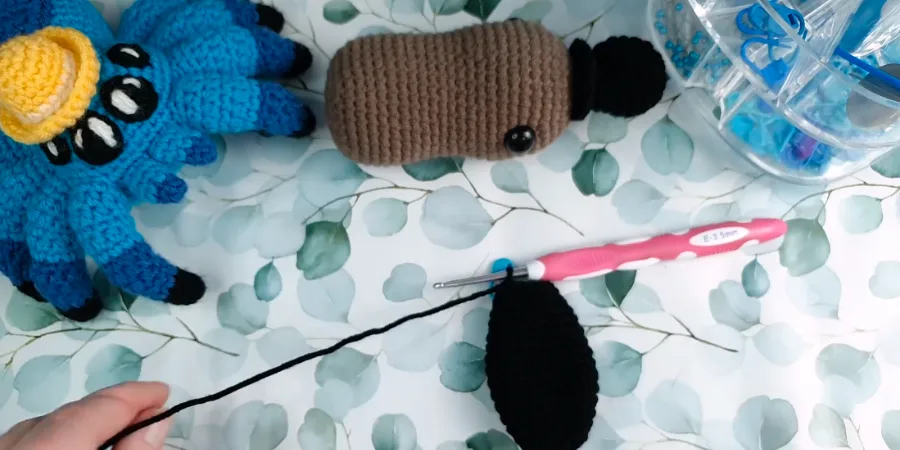
The tail is crocheted separately in black yarn. Like the bill, it begins with a chain foundation and is worked around both sides of the chain.
- R1: Chain 5. Starting in the second chain, work 3 SC.
- R1: Work 3 SC in the same stitch.
- R1: Rotate the work and work 3 SC along the opposite side.
- R1: Work 3 SC in the final stitch (12)
- R2: [5 SC, INC] ×2 (14)
- R3: [6 SC, INC] ×2 (16)
- R4: [7 SC, INC] ×2 (18)
- R5: [8 SC, INC] ×2 (20)
- R6: 20 SC (20)
- R7: 20 SC (20)
- R8: 20 SC (20)
- R9: 20 SC (20)
- R10: [8 SC, DEC] ×2 (18)
- R11: 18 SC (18)
- R12: [7 SC, DEC] ×2 (16)
- R13: 16 SC (16)
- R14: [6 SC, DEC] ×2 (14)
- R15: [5 SC, DEC] ×2 (12)
Leave a long yarn tail at the end. You will use it later to sew the tail securely to the body.
Feet
Make 4 feet in black yarn.
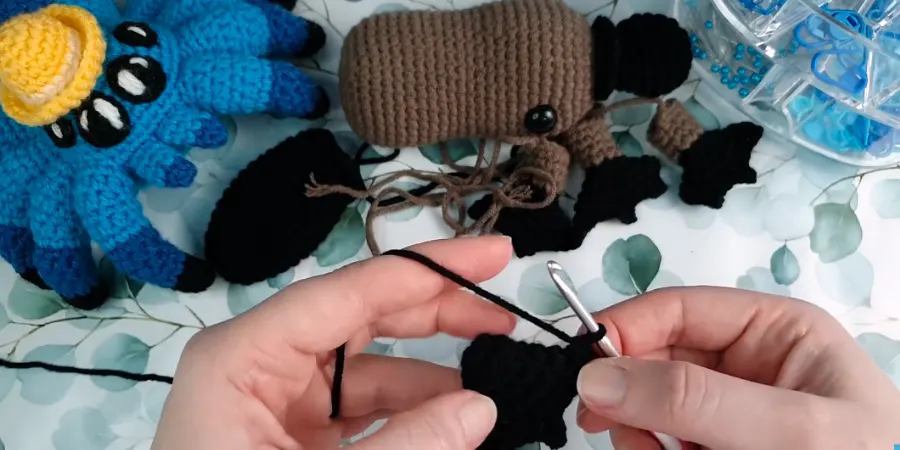
There is an important little detail in the foot construction: R3 is worked in BLO. This leaves the front loops free, and those loops are later used to create the legs. So make sure you do not accidentally work through both loops on this round.
- R1: 6 SC in MR (6)
- R2: [2 SC, INC] ×2 (8)
- R3: Work in BLO, [3 SC, INC] ×2 (10)
- R4: [4 SC, INC] ×2 (12)
- R5: [SC, INC] ×6 (18)
Do not stuff the feet.
After R5, flatten the foot and join the two sides with SC stitches while forming three picot toes.
For each toe:
- Join the corresponding front and back stitches with SC.
- Chain 3.
- Work 1 SC into the back bump of the first chain.
- Continue to the next foot stitches.
- Repeat until 3 toes are formed.
Make the remaining three feet using the same construction.
Legs
Make 4 legs.
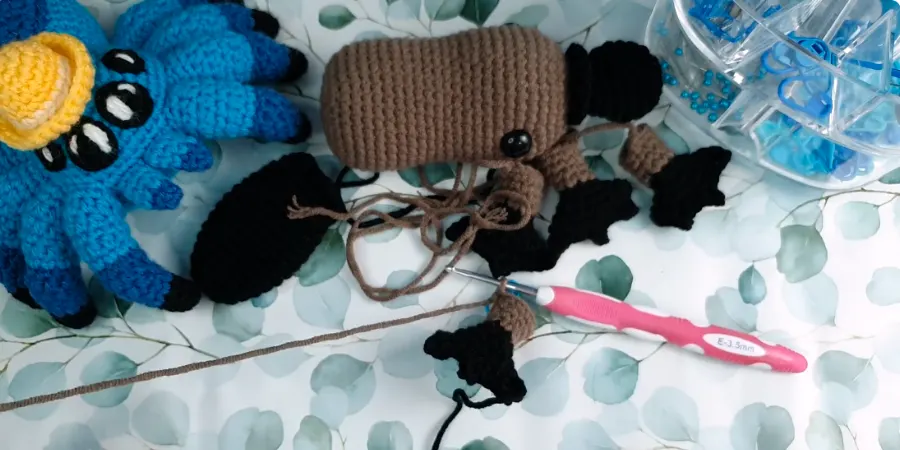
The legs are worked directly into the 8 unused front loops from R3 of each foot. This keeps the foot and leg connected without requiring a separate leg piece.
- R1: Attach brown yarn to one of the 8 available front loops.
- R1: SL ST to join.
- R1: SC into the same stitch, then work 8 SC total (8)
- R2: [3 SC, INC] ×2 (10)
- R3: 10 SC (10)
- R4: [4 SC, INC] ×2 (12)
Leave a long yarn tail on each leg for sewing.
Assembly
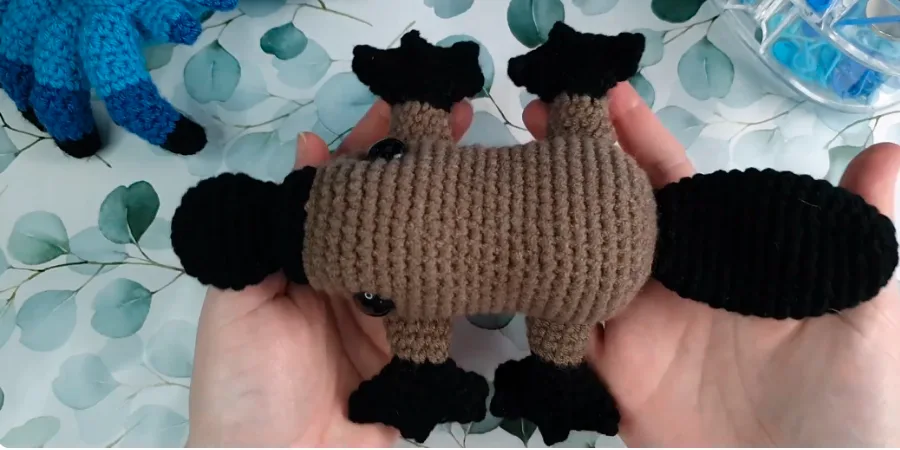
Once all the crocheted pieces are ready, take a little time to pin them before sewing. This makes it easier to check the proportions and keep the finished platypus balanced.
Step 1: Attach the Tail
Place the tail centrally on the back of the body and pin it before sewing.
Check the position from the front and back. Once it is centred, sew it securely using the long yarn tail and weave the remaining yarn into the body.
Step 2: Shape the Eyes
The eye indentation gives the face its characteristic expression.
Use brown or body-colour yarn and work around the inside/top area of each eye.
- Insert the needle into the body.
- Bring it out near the inside/top of the first eye.
- Move across the head.
- Bring the needle out near the inside/top of the second eye.
- Pull gently to begin the indentation.
- Repeat for the other side.
- Compare both eyes from the front.
- Add another pass if needed.
- Avoid pulling too tightly.
- Once the eyes are symmetrical, secure the yarn.
- Hide the knot inside the body.
The important thing here is gradual tension. Pulling too hard can make the eye shaping uneven.
Step 3: Attach the Legs
Pin all four legs before sewing any of them permanently.
Check their position:
- From the front
- From the side
- Against each other
Using the first leg as a reference helps keep the remaining legs balanced. Once everything looks even, sew each leg firmly to the body.
Step 4: Secure the Bill
The upper portion of the bill is sewn down against the head.
Pin the bill first and check its position from the front. Once it is sitting evenly, sew the upper section securely to the head.
Helpful Pattern Notes
A few construction details are especially worth remembering while working on this pattern:
- The bill, head, and body form one continuous piece.
- The bill uses FLO shaping.
- The unused loops from the bill shaping are used to begin the head.
- The feet use BLO in R3.
- The unused front loops from Foot R3 are used directly for the legs.
- There are 4 feet and 4 legs.
- The tail is made separately.
- The main piece is worked in continuous rounds.
- Stuff the head and body lightly.
- Do not stuff the feet.
- Use a stitch marker to track the beginning of each round.
- The documented safety-eye size is 12 mm.
- The final body decreases follow the 36 → 30 → 24 → 18 → 12 → 6 progression.
- R11 is written as [2 SC, INC] ×6 (24) so the stitch progression remains consistent with the engineered pattern.
The most important thing is to keep the structural relationships intact: the bill flows into the head and body, while the BLO foot construction deliberately leaves loops for the legs. Once those connections are preserved, the rest of the assembly becomes much more straightforward.