crochet christmas coaster free pattern
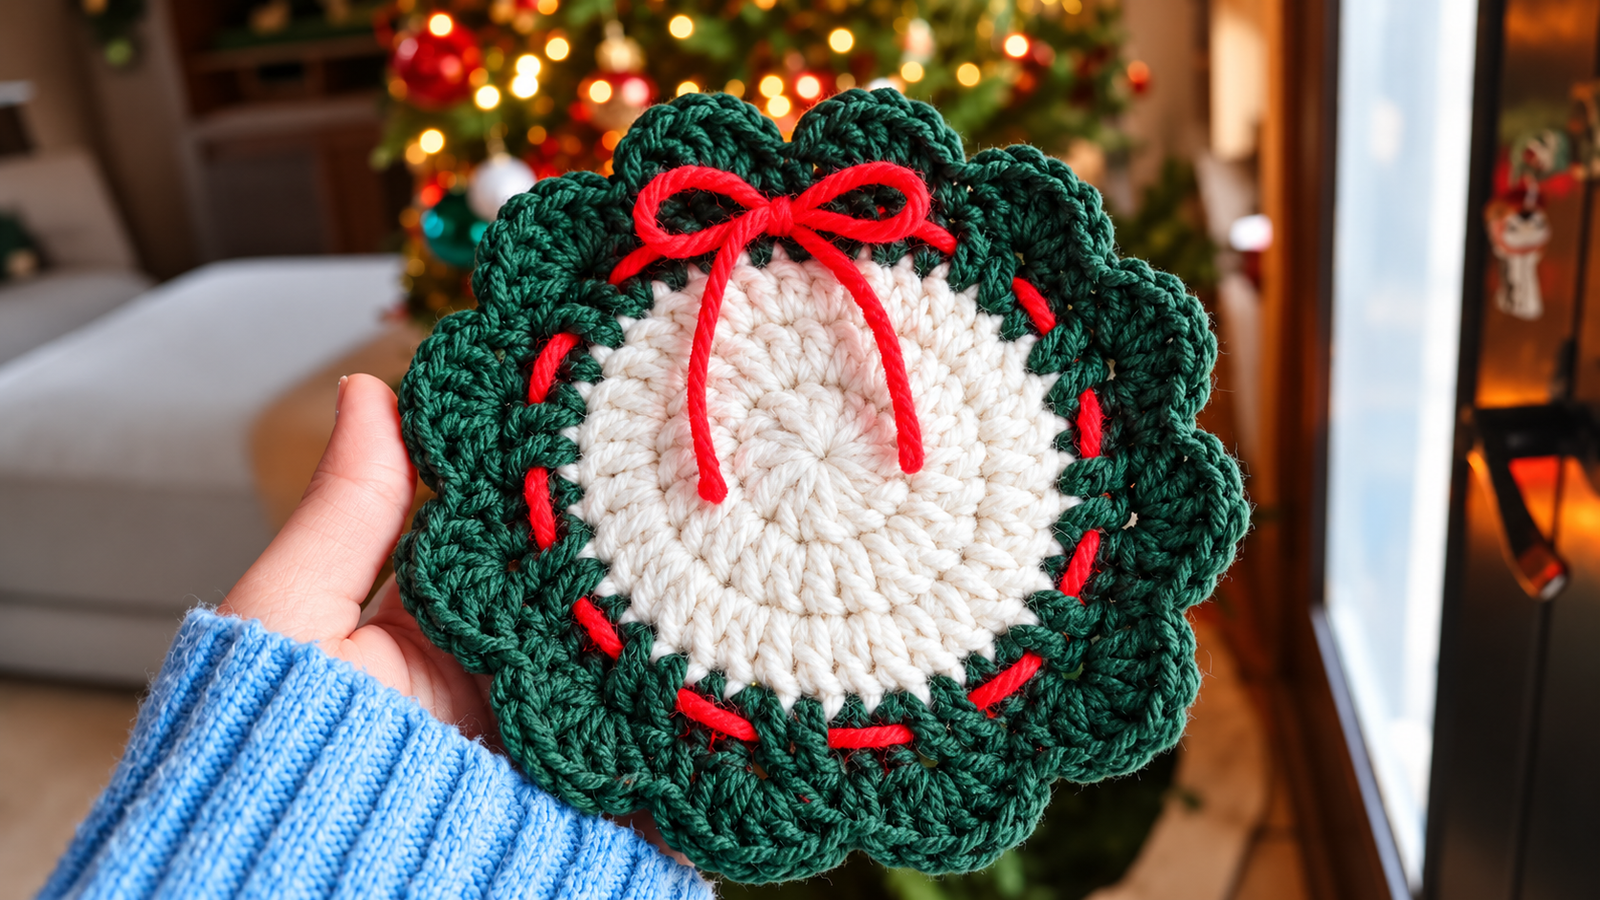
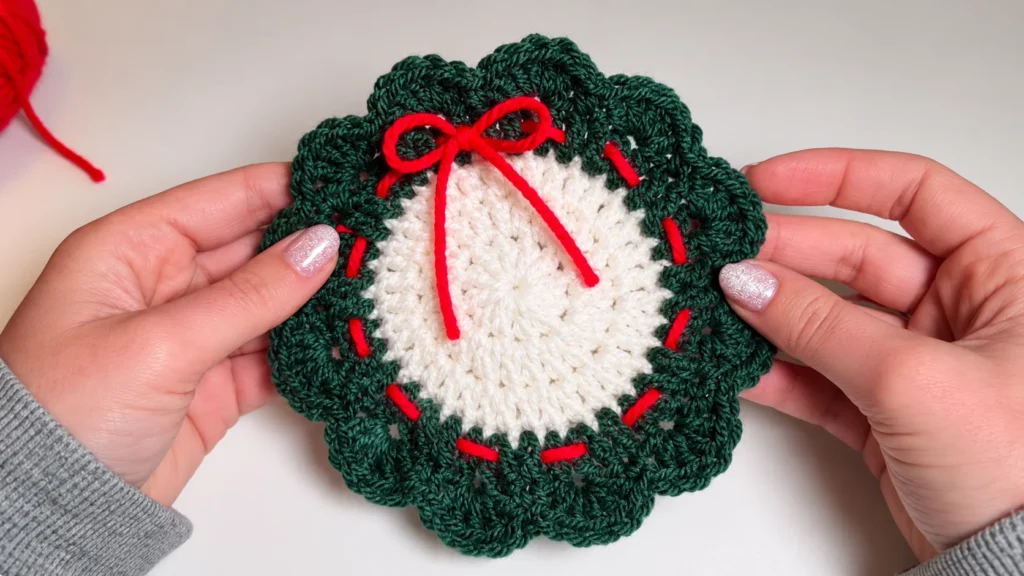
Make a festive Christmas wreath coaster with this simple crochet pattern. The coaster starts with a cream-colored circular center, followed by a green wreath section with a ruffled edge. A woven red yarn detail and small bow finish the Christmas design.
The coaster is worked in rounds using double crochet, single crochet, and stacked single crochet. The main body uses medium-weight yarn with a 5 mm crochet hook, while the final decorative round creates the raised wreath shape.
crochet christmas coaster free pattern – The Short Answer?
Materials
- Cream-colored medium-weight yarn for the center
- Green yarn for the wreath section
- Red yarn for the decorative woven detail and bow
- 5 mm crochet hook
- Yarn needle
- Scissors
- Small amount of glue, optional, for securing the bow
Medium-weight acrylic yarn is used for the demonstrated version. Cotton can also be used when you prefer a more structured coaster. The pattern does not specify a fixed yarn quantity, so no yardage or gram amount is given.
Size
The finished diameter is not specified in the pattern instructions.
Because the transcript does not provide a finished measurement, the coaster should not be assigned a fixed diameter from another Christmas coaster pattern.
Abbreviations
- ch – chain
- dc – double crochet
- sc – single crochet
- sl st – slip stitch
- st – stitch
- YO – yarn over
Stacked Single Crochet
The main rounds begin with a stacked single crochet instead of the traditional chain-3 starting method.
To make one, insert the hook into the indicated stitch, yarn over and pull up a loop, then yarn over and pull through both loops. Insert the hook into the second loop of the completed single crochet, yarn over and pull up a loop, and yarn over and pull through both loops.
This creates the starting stitch used for the main circular rounds.
Crochet Christmas Wreath Center
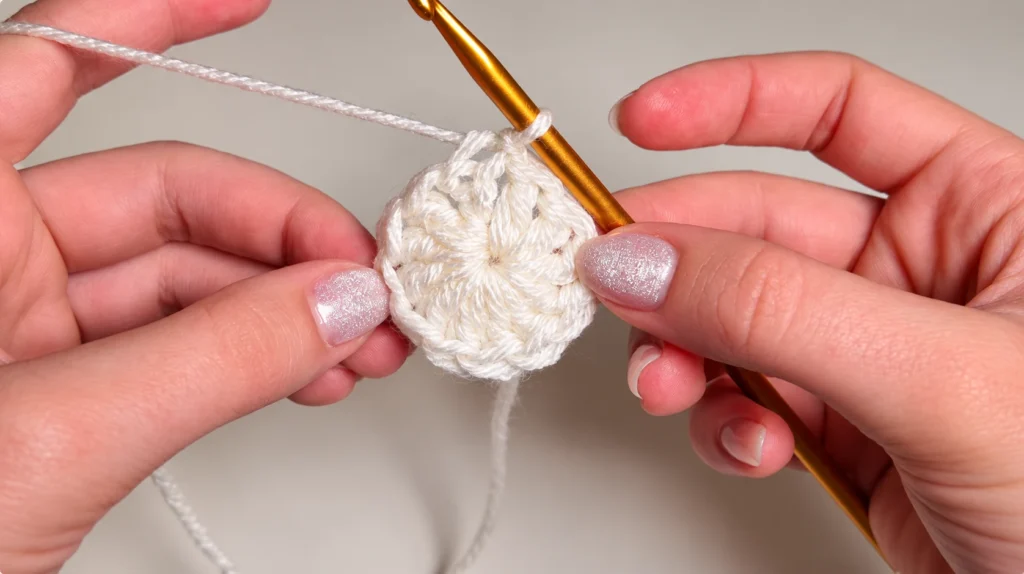
Start with cream-colored yarn and make a magic ring.
Round 1
Chain 3.
Work 11 dc into the magic ring. The beginning chain-3 counts as 1 dc.
Tighten the magic ring and join with a sl st to the top of the beginning chain-3.
You should have 12 stitches.
Round 2
Begin with a stacked single crochet in the same stitch where the previous round was joined.
Work 1 dc in the same stitch.
Continue working 2 dc in every stitch around.
Join with a sl st to the top of the beginning stacked single crochet.
You should have 24 stitches.
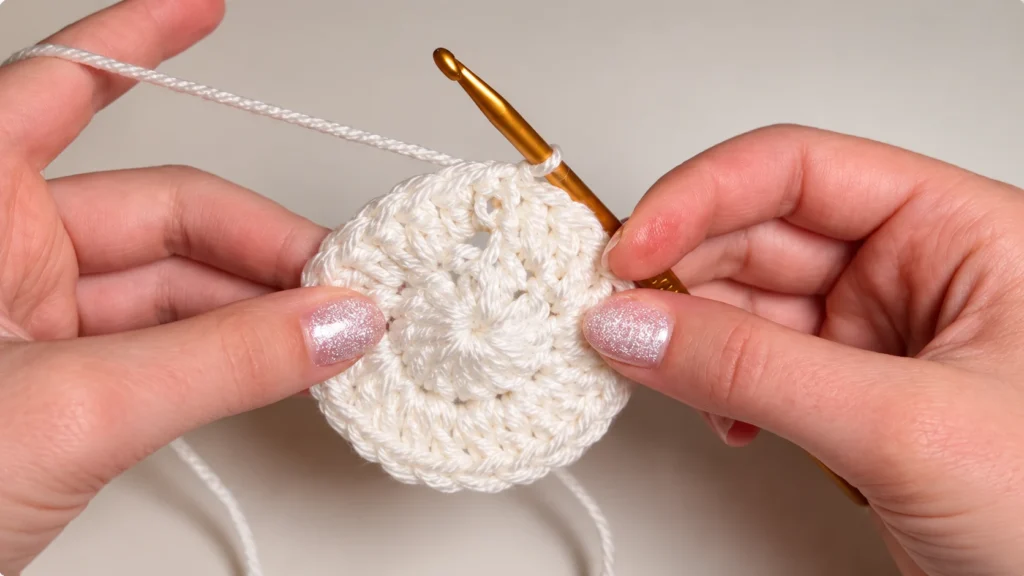
Round 3
Begin with a stacked single crochet in the first stitch.
Work 1 dc in the same stitch, then 1 dc in the next stitch and 2 dc in the following stitch.
Continue repeating:
1 dc, 2 dc
around the round.
Join with a sl st to the top of the beginning stacked single crochet.
You should have 36 stitches.
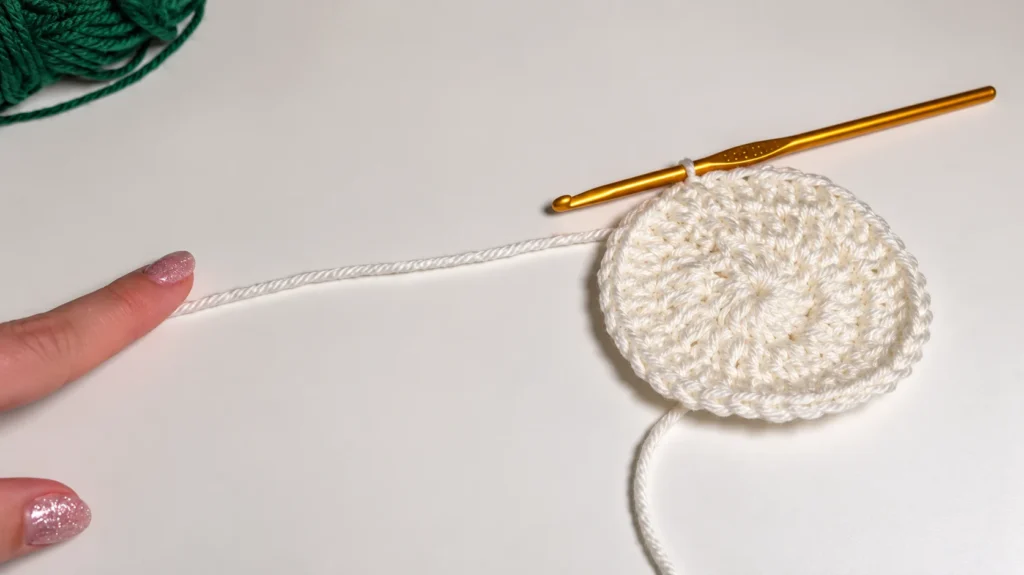
Fasten off the cream yarn and leave a tail for weaving in later.
Change to Green Yarn
Change to green yarn for the wreath section.
Attach the green yarn directly to a dc stitch. Insert the hook through the stitch, place the green yarn on the hook, and pull it through. Secure the yarn with a simple knot, then insert the hook back through the same stitch and pull up a loop.
The green section can now be worked around the circular center.
Green Wreath Section
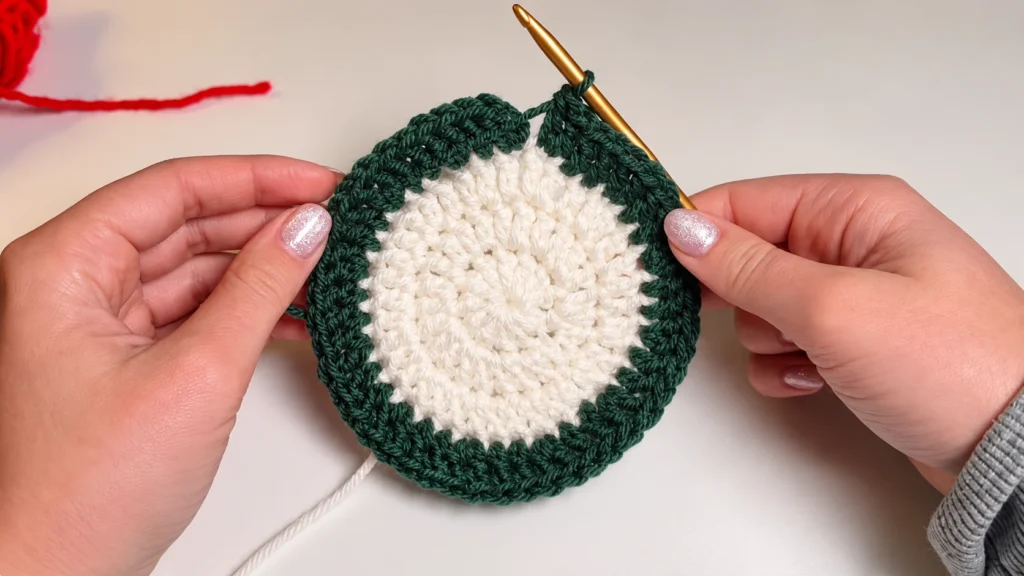
Round 4
Begin with a stacked single crochet in the stitch where the green yarn was attached.
Work 1 dc in the same stitch.
Work 1 dc in the next stitch.
Work 2 dc in the following stitch.
Continue repeating:
1 dc, 1 dc, 2 dc
around the coaster.
Join with a sl st to the top of the beginning stacked single crochet.
You should have 48 stitches.
Ruffled Wreath Edge
Round 5
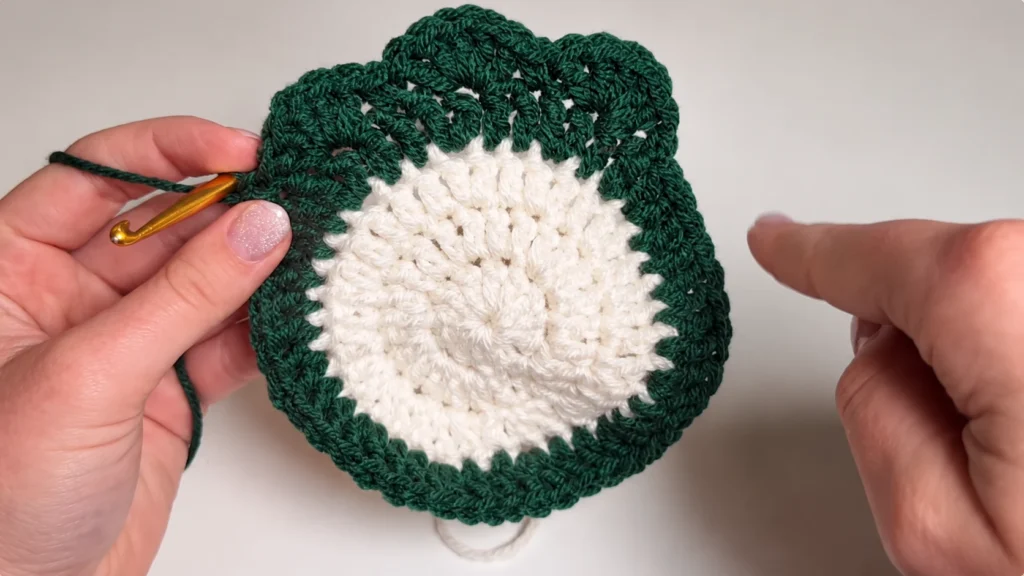
The final green round creates the raised, ruffled edge that gives the coaster its wreath appearance.
Begin in the first stitch where the previous round was joined.
Work 1 sc in the first stitch.
Skip the next stitch.
Work 5 dc in the next stitch.
Skip the next stitch.
Work 1 sc in the next stitch.
Continue repeating:
sc → skip 1 → 5 dc → skip 1 → sc
around the coaster.
The group of 5 dc worked into one stitch creates each raised curve around the outer edge.
With 48 stitches from Round 4, this produces 16 decorative repeats.
Join with a sl st to the first sc, tighten the join, and fasten off. Leave a tail for weaving in.
Add the Red Woven Detail
Once the green wreath edge is complete, add the red yarn detail.
Thread red yarn onto a yarn needle and choose where you want the bow to sit. The demonstrated placement begins around the fourth row.
Insert the needle between two dc stitches, skip two dc, and bring the needle back through.
Continue weaving the red yarn around the wreath while skipping groups of two dc.
Pull the yarn through gradually as you work. Keep it loose enough for the coaster to remain flat.
Tie the Christmas Bow
The bow can be placed at either the top or bottom of the coaster. The demonstrated preference is the top.
Bring the red yarn ends together and tie a simple securing knot.
Form the bow and adjust the loops until they look balanced. Tighten the bow and trim the yarn tails evenly.
A small amount of glue can optionally be used to help keep the bow secure.
Finishing
Use a yarn needle to weave in all remaining yarn tails.
Pass each tail through several stitches, preferably through the tighter lower portions of the stitches. Secure the yarn well and trim the excess.
Repeat with the remaining tails, taking care not to pull them so tightly that the coaster loses its shape.
Your Christmas wreath coaster is now ready to use or give as a handmade holiday gift.
Helpful Tips
Keep the stitch counts consistent as you work through the circular rounds. Round 1 should have 12 stitches, followed by 24 stitches in Round 2, 36 stitches in Round 3, and 48 stitches in Round 4.
When working the final wreath edge, keep the same sc → skip 1 → 5 dc → skip 1 sequence throughout the round so the ruffled edge stays even.
If the coaster begins to curl after adding the red yarn, loosen the woven yarn slightly. It should decorate the wreath without pulling the coaster out of shape.
When finishing the bow and yarn tails, secure everything firmly while keeping the coaster flat.
Stitch Count
- Round 1 – 12 stitches
- Round 2 – 24 stitches
- Round 3 – 36 stitches
- Round 4 – 48 stitches
- Round 5 – 16 decorative repeats
The pattern does not specify a finished diameter or exact yarn quantity, so those details are intentionally left unspecified.