crochet snowman free pattern
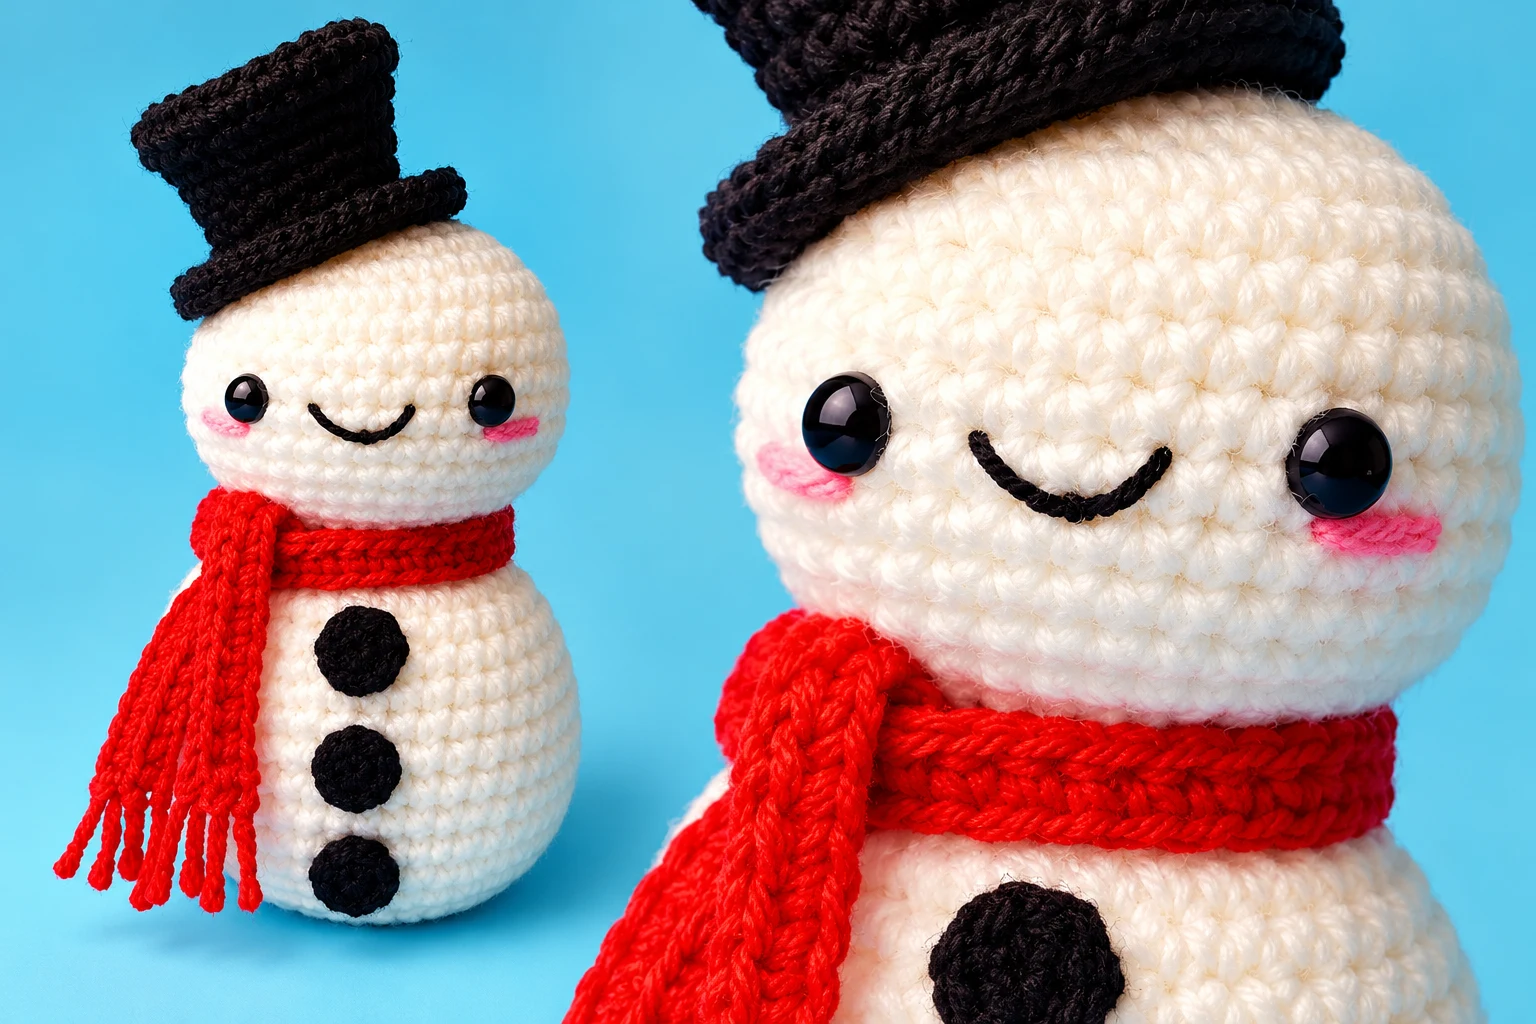
Alan the Snowman is a chunky amigurumi project with a simple rounded shape, a cheerful embroidered face, and a flat base that lets him stand on his own. The head and body are crocheted together as one piece, so once the main snowman is finished, only the smaller details need to be added.
The snowman uses Cygnet Chunky yarn and a 4 mm crochet hook. White yarn forms the body, while black yarn is used for the top hat and three crocheted coal buttons. A contrasting color adds the scarf, and a small amount of pink yarn is used for the cheeks.
The face is finished with 10 mm safety eyes and simple embroidery. The top hat is made separately and can be left removable or sewn onto the head.
crochet snowman free pattern – the final answer ?
Finished Size
No fixed finished height is provided for Alan.
Your finished snowman may vary in size depending on your yarn and crochet tension, so there is no specific finished measurement to work toward. For the best result, keep the stitch counts and shaping consistent throughout the pattern.
Materials
- White Cygnet Chunky yarn — 1 ball
- Black Cygnet Chunky yarn — 1 ball
- Contrasting yarn for the scarf
- Small amount of pink yarn for the cheeks
- 4 mm crochet hook
- 10 mm safety eyes
- Polyfill stuffing
- Large-eye darning needle
- Stitch marker
- Pins
A bright contrasting color works well for the scarf. Yellow gives Alan a cheerful look, while red creates a more traditional Christmas feel.
Abbreviations
- ch — chain
- sc — single crochet
- inc — increase
- dec — invisible decrease
- sl st — slip stitch
- BLO — back loop only
- FLO — front loop only
- MR — magic ring
- FO — fasten off
- Rnd — round
Before You Begin
The main snowman is worked in continuous rounds, beginning at the top of the head and gradually growing into the body. Keep a stitch marker in the first stitch of each round so you can easily see where each new round begins.
The head is shaped first and stuffed before you continue into the body. As the body grows, add the polyfill a little at a time. This makes it easier to control the shape and keep the stuffing evenly distributed.
One important detail is the flat bottom. Round 34 is worked in the back loop only and creates the ridge used to shape the base. Take care with this section because the flat bottom is what allows Alan to stand on his own.
The face, scarf, top hat, and three coal buttons are all completed separately after the main body is finished.
Part 1: Crochet the Main Snowman
Start the Head
The snowman begins with a magic ring. The first six rounds gradually increase from 6 stitches to 36 stitches, creating the rounded upper part of the snowman.
Round 1
Start with a magic ring.
Chain 1; this does not count as a stitch.
Work 6 sc into the magic ring.
You should have 6 stitches.
Place a stitch marker in the first stitch.
Round 2
Work an increase in every stitch around.
You should have 12 stitches.
Round 3
Repeat:
- sc
- inc
around.
You should have 18 stitches.
Round 4
Repeat:
- 2 sc
- inc
around.
You should have 24 stitches.
Round 5
Repeat:
- 3 sc
- inc
around.
You should have 30 stitches.
Round 6
Repeat:
- 4 sc
- inc
around.
You should have 36 stitches.
Rounds 7–12
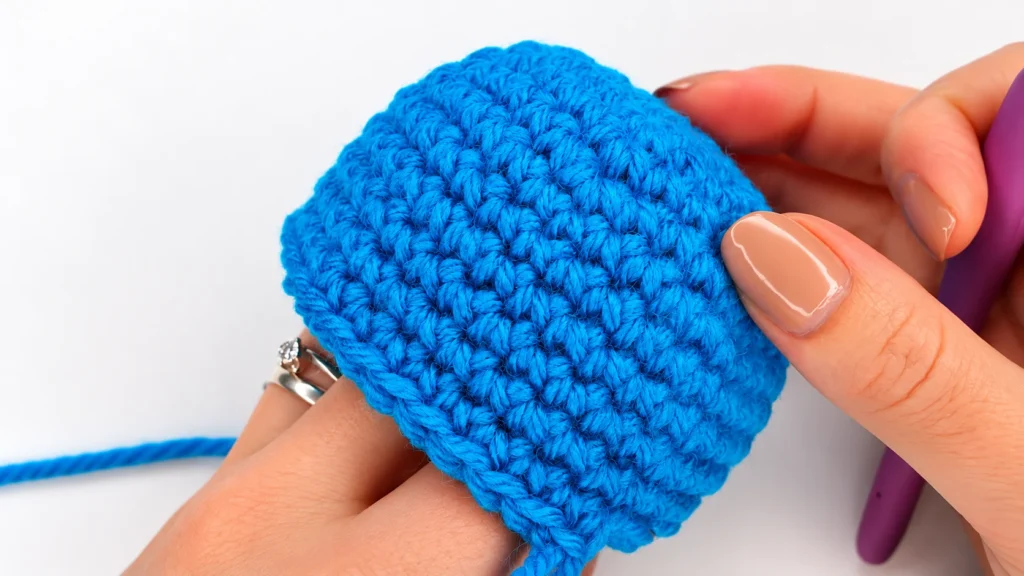
Work sc in every stitch around for 6 rounds.
You should have 36 stitches in each round.
These even rounds give the head its rounded shape before the decreases begin.
Shape the Head
The next four rounds gradually bring the stitch count down.
Round 13
Repeat:
- 4 sc
- invisible dec
around.
You should have 30 stitches.
Round 14
Repeat:
- 3 sc
- invisible dec
around.
You should have 24 stitches.
Round 15
Repeat:
- 2 sc
- invisible dec
around.
You should have 18 stitches.
Round 16
Repeat:
- sc
- invisible dec
around.
You should have 12 stitches.
The head is now shaped and ready for the eyes and stuffing.
Add the Safety Eyes
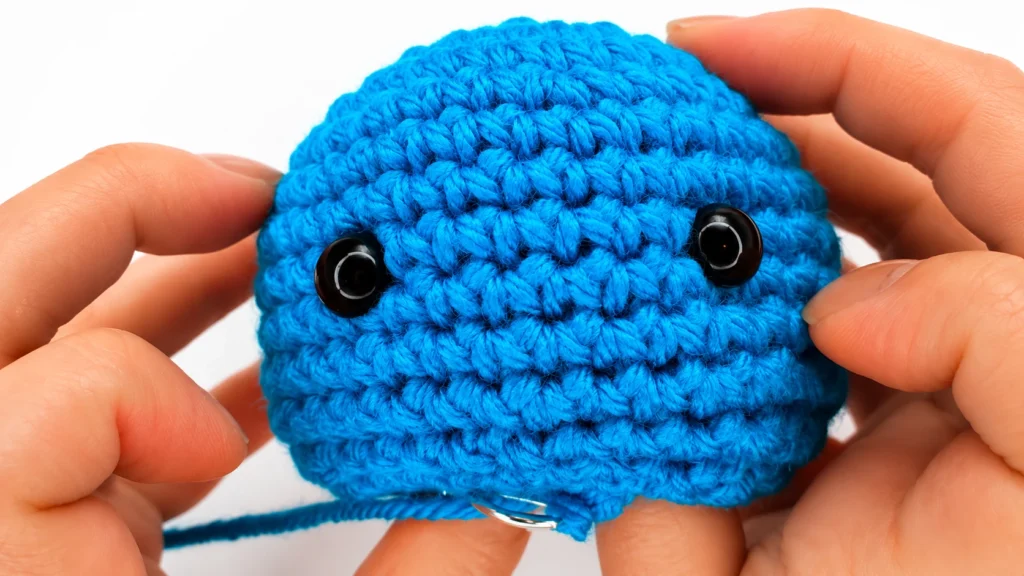
Use the 10 mm safety eyes.
Count down 9 rounds from the top of the head and place the first eye between Rounds 9 and 10. Place the second eye 6 stitches away from the first.
Before securing the backs, check that both eyes are sitting at the same height and that the spacing looks even.
Once the placement looks right, attach the safety-eye backs securely.
Stuff the Head
Add polyfill to the head before continuing.
Work with small amounts of stuffing rather than filling the head all at once. Push the filling toward the sides as you go so the head develops a smooth, rounded shape.
Keep the stuffing firm enough to hold the shape while leaving the opening clear enough to continue crocheting.
Continue into the Body
The body grows directly from the 12 stitches at the end of Round 16. Four increase rounds expand the shape until it reaches 42 stitches.
Round 17
Work an increase in every stitch around.
You should have 24 stitches.
Round 18
Repeat:
- 3 sc
- inc
around.
You should have 30 stitches.
Round 19
Repeat:
- 4 sc
- inc
around.
You should have 36 stitches.
Round 20
Repeat:
- 5 sc
- inc
around.
You should have 42 stitches.
By the end of Round 20, the body has reached its widest point.
Rounds 21–30
Work sc in every stitch around for 10 rounds.
You should have 42 stitches in each round.
These rounds create the main body. Continue adding polyfill as you work, keeping the filling evenly distributed so the snowman remains nicely rounded.
Shape the Lower Body
The next three rounds gradually decrease the body before the flat base is formed.
Round 31
Repeat:
- 5 sc
- invisible dec
around.
You should have 36 stitches.
Round 32
Repeat:
- 4 sc
- invisible dec
around.
You should have 30 stitches.
Round 33
Repeat:
- 3 sc
- invisible dec
around.
You should have 24 stitches.
Make the Flat Bottom
Round 34
Work sc in the back loop only of each stitch around.
You should have 24 stitches.
This round creates the ridge that forms the flat bottom of the snowman. Keep the lower section shaped evenly so the finished base can sit flat.
Finish the Body
Before closing the body, finish adding the polyfill.
Pay particular attention to the lower section. The bottom needs to remain flat, so avoid pushing excess stuffing underneath the ridge created by Round 34.
Round 35
Return to working through both loops.
Repeat:
- 2 sc
- invisible dec
around.
You should have 18 stitches.
Round 36
Repeat:
- sc
- invisible dec
6 times.
You should have 12 stitches.
Check the stuffing once more before moving on to the final round.
Round 37
Work an invisible decrease 6 times.
You should have 6 stitches.
Fasten off, leaving a long yarn tail.
Thread the tail onto the darning needle. Pick up the outside loops of the remaining 6 stitches and pull the yarn to close the opening.
Continue passing the needle through the body to secure the end and help the lower section sit flat. Weave in the remaining yarn and trim the excess.
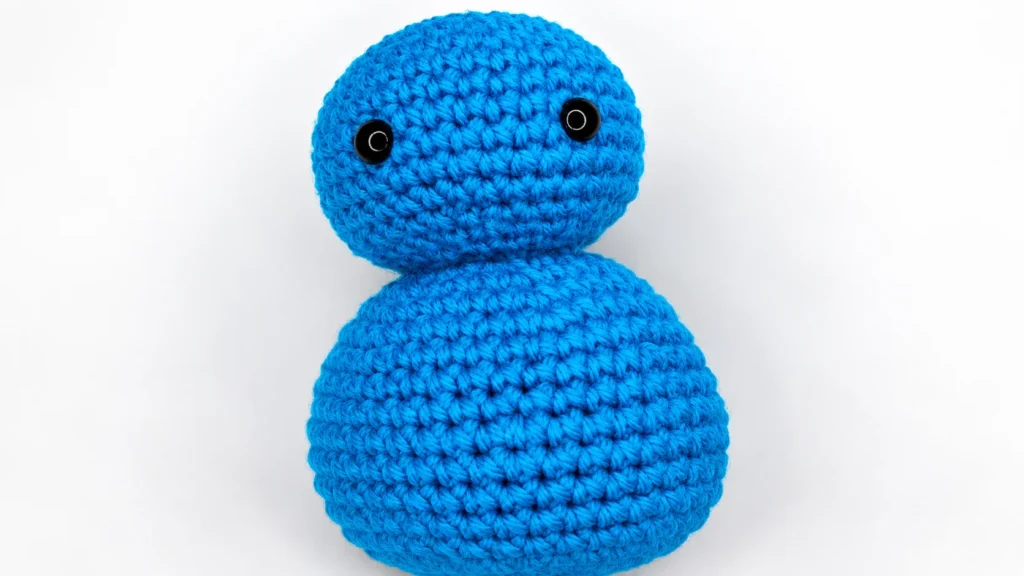
The main snowman is now finished, with a flat bottom that allows him to stand independently.
Part 2: Add the Face
Embroider the Pink Cheeks
Use a small amount of pink yarn for the cheeks.
Place each cheek approximately one or two stitches below its corresponding eye.
Keep both cheeks similar in size and position so the face stays balanced.
Once the cheeks are in place, secure the yarn ends inside the head and trim the excess.
Embroider the Smile
Use black yarn for the smile.
Begin approximately one stitch inward from one eye, keeping the smile on the same row as the eyes.
Work across approximately 4 stitches, then bring the embroidery down to the row beneath to create the small smile shape.
Check the expression before securing the yarn. Once you are happy with it, hide the remaining yarn ends inside the head.
Part 3: Crochet the Scarf
The scarf is made separately as a simple narrow strip.
Choose a contrasting color that complements the white snowman and black hat.
Make the Scarf
Chain 56.
Starting in the second chain from the hook, work sc in each remaining chain.
You should have 55 sc.
At the end of the row:
- Chain 1.
- Turn.
Return Row
Work a loose slip stitch in each of the 55 stitches across.
Keep these slip stitches loose so the scarf remains flexible.
Fasten off, leaving the yarn tails for the tassels.
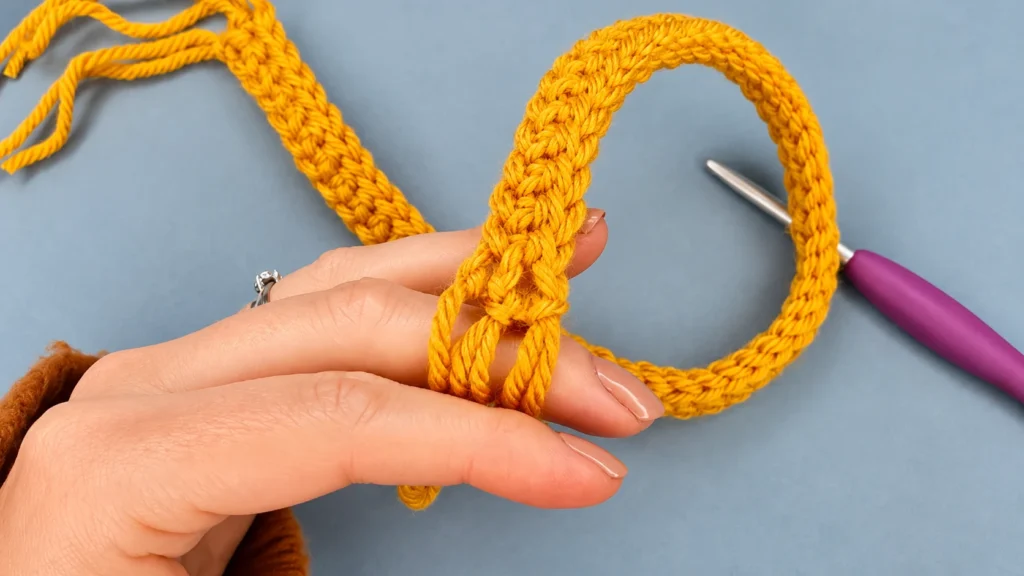
Add the Tassels
Cut 4 lengths of yarn.
For each tassel:
- Fold one length in half.
- Insert the hook near the end of the scarf.
- Pull the folded section through the stitch.
- Bring the loose ends through the loop.
- Pull gently to secure.
- Repeat at the remaining positions.
Trim the tassels evenly.
Tie the finished scarf around Alan’s neck.
Part 4: Crochet the Top Hat
The top hat is worked separately in black yarn.
It is designed to be removable, so you can place it on Alan’s head without permanently attaching it. If you prefer a fixed hat, you can sew it into place after finishing.
Crochet the Hat Crown
Round 1
Start with a magic ring.
Chain 1.
Work 6 sc into the magic ring.
You should have 6 stitches.
Round 2
Work an increase in every stitch around.
You should have 12 stitches.
Round 3
Repeat:
- sc
- inc
around.
You should have 18 stitches.
Round 4
Repeat:
- 2 sc
- inc
around.
You should have 24 stitches.
Create the Hat Ridge
Round 5
Work sc in the back loop only of each stitch around.
You should have 24 stitches.
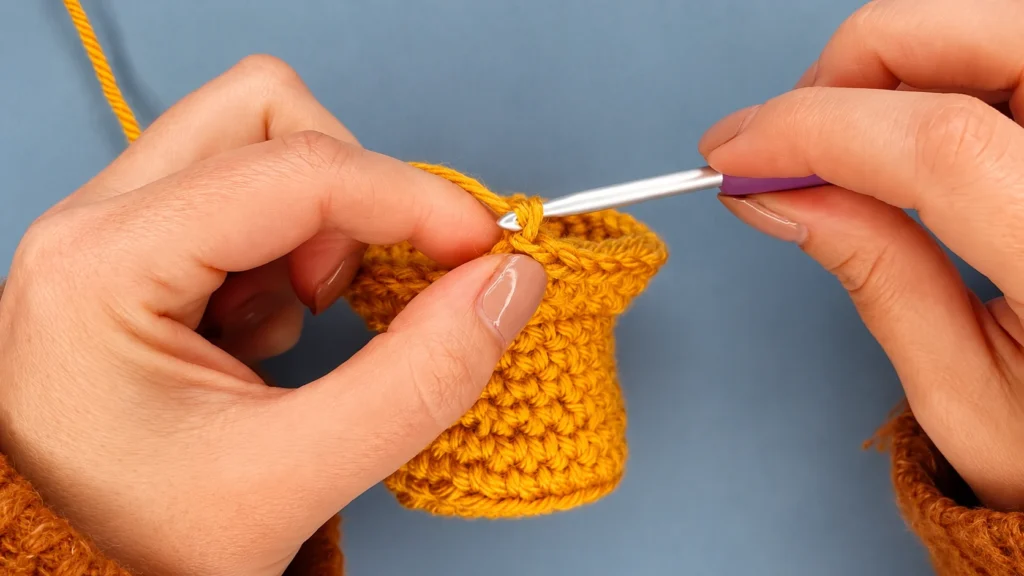
This creates the ridge that separates the crown from the lower part of the hat.
Turn the work so the ridge faces outward and the yarn tail sits inside the hat.
Round 6
Work sc in every stitch around.
You should have 24 stitches.
Round 7
Repeat:
- 2 sc
- invisible dec
around.
You should have 18 stitches.
Rounds 8–10
Work sc in every stitch around for 3 rounds.
You should have 18 stitches in each round.
These rounds build the height of the top-hat crown.
Shape the Brim
Round 11
Work into the front loops only.
Repeat:
- sc
- sc
- inc
around.
You should have 24 stitches.
The brim begins to flare outward here.
Round 12
Return to working through both loops.
Repeat:
- 3 sc
- inc
around.
You should have 30 stitches.
The wider edge now gives the hat its recognizable top-hat shape.
Final Hat Round
Work a loose slip stitch in each of the 30 stitches around.
You should have 30 stitches.
Keep the slip stitches loose.
Chain 1 and fasten off, leaving a long yarn tail.
Finish the Top Hat
If you want the hat to remain removable, weave in the yarn end and place the finished hat on Alan’s head.
If you prefer to keep it in place, leave the long yarn tail and use it to sew the hat onto the head.
A tiny amount of stuffing can be added if needed to help the hat hold its shape.
Part 5: Crochet the Coal Buttons
Three small black crochet pieces are used as Alan’s coal buttons.
Make the Buttons
Make 3 identical buttons.
Start with a magic ring.
Chain 1.
Work 6 sc into the magic ring.
You should have 6 stitches.
Pull the magic ring closed.
Slip stitch to the first sc.
Fasten off, leaving a yarn tail for sewing.
Repeat until you have 3 buttons.
Sew the Buttons onto the Body
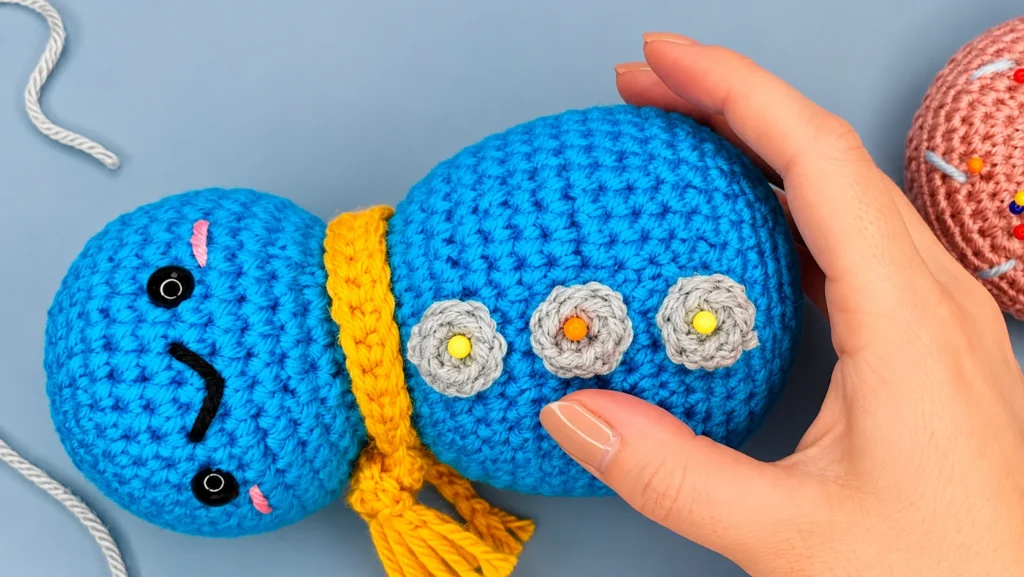
Place the three buttons down the front of Alan’s belly.
Use pins first so you can adjust their positions before sewing.
When the placement looks right:
- Thread the yarn tail onto the darning needle.
- Sew through the button and into the body.
- Catch the surrounding crochet stitches.
- Continue until the button is secure.
- Make a small securing knot.
- Weave the remaining yarn through the body.
- Trim the excess.
- Repeat for the other two buttons.
Final Assembly
At this point, Alan has his main body, face, scarf, top hat, and three coal buttons.
Give each part a quick check before finishing:
- The 10 mm safety eyes are secure.
- The pink cheeks sit evenly below the eyes.
- The embroidered smile is firmly secured.
- All three coal buttons are firmly attached.
- The scarf has its tassels attached.
- The top hat sits comfortably on the head.
- The bottom remains flat.
Wrap the scarf around Alan’s neck and place the top hat on his head.
If you chose to attach the hat permanently, sew it securely into position.
Finally, gently shape the head and body with your hands. This helps the polyfill settle evenly and gives Alan a neat, rounded finish.
Alan the Snowman is now ready to join your Christmas decorations, sit on a shelf, or become a cozy handmade gift.