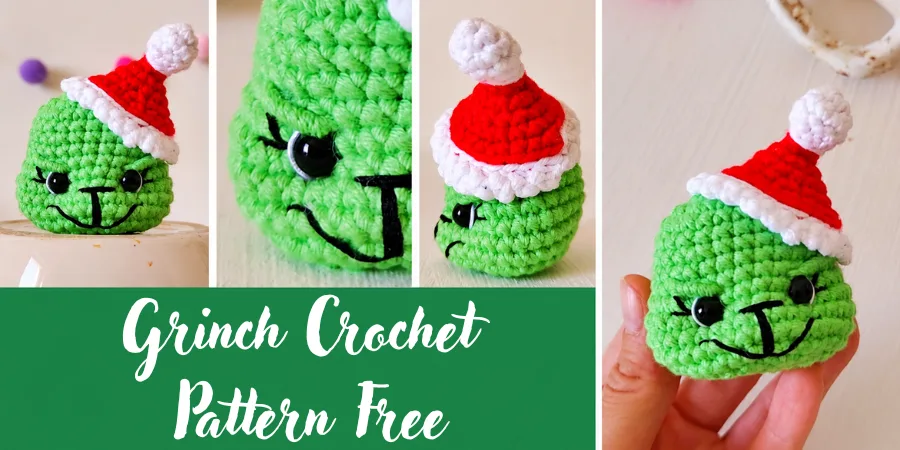
Grinch Crochet Pattern Free
This Grinch crochet pattern makes a small Christmas ornament with a green crocheted head, embroidered facial details, and a red-and-white Christmas hat. The head is worked in continuous rounds, then shaped and finished with embroidered details to create the Grinch expression.
Grinch Crochet Pattern Free – the short answer ?
Materials
For the written pattern, use DK-weight yarn.
- Grass green DK-weight yarn — approximately 8.5 g
- White DK-weight yarn — approximately 1.75 g
- Red DK-weight yarn — approximately 2 g
- 3 mm crochet hook
- 7 mm safety eyes
- Polyester or fiberfill stuffing
- Yarn needle
- Stitch markers
- Embroidery floss or suitable yarn for the facial details
- Scissors
The grass green yarn is used for the head and facial shaping, while the white and red yarns are used for the Christmas hat. Stuffing gives the head its rounded shape, and embroidery yarn is used for the facial details.
Pattern note: You can use DK-weight yarn with a 3 mm crochet hook for the written pattern, or worsted-weight yarn with a 4 mm hook. Changing the yarn or hook size may change the finished size and yarn amount needed.
Abbreviations
- MR — Magic Ring
- CH — Chain
- SC — Single Crochet
- INC — Increase
- DEC — Decrease
- SL ST — Slip Stitch
- BLO — Back Loop Only
- FO — Fasten Off
The head is worked in continuous rounds unless otherwise stated. Use a stitch marker to identify the beginning of each round.
Grinch Head
Work the head with grass green yarn.
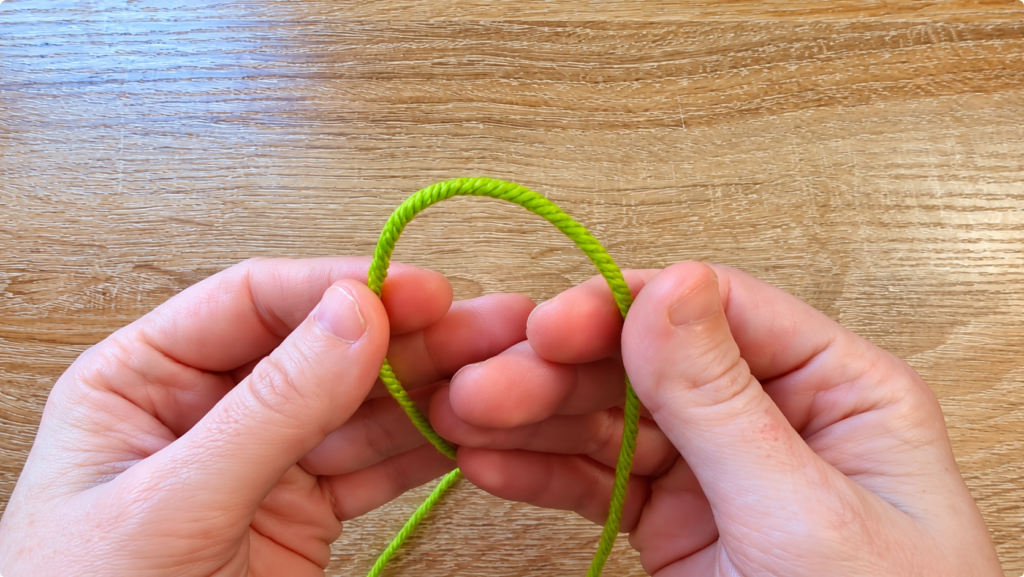
Start with a Magic Ring.
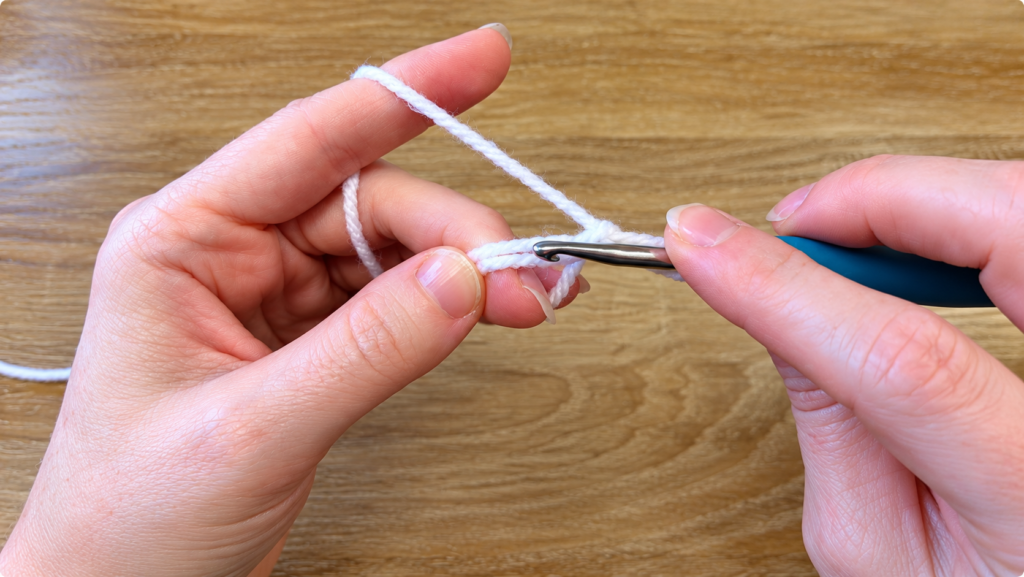
- Round 1: 8 SC into the magic ring — 8 stitches
- Round 2: INC in every stitch — 16 stitches
- Round 3: SC, INC around — 24 stitches
- Rounds 4–5: SC around — 24 stitches each round
- Round 6: 5 SC, INC; repeat 4 times — 28 stitches
- Rounds 7–8: SC around — 28 stitches each round
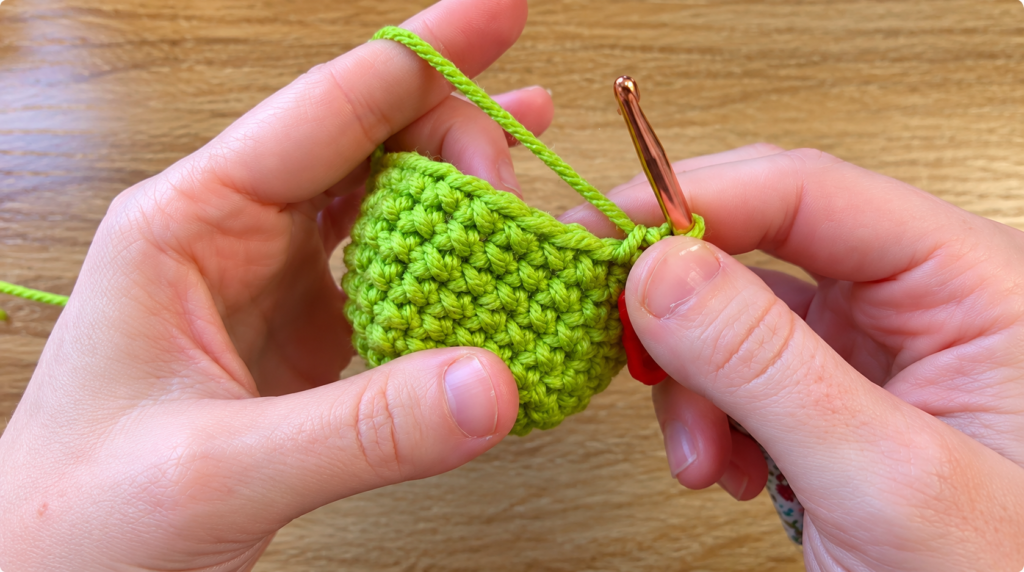
For Round 9, work:
9 SC, 4 consecutive INC, 6 SC, 4 consecutive INC, 5 SC.
The two increase groups create the shaping for the facial area.
- Rounds 10–13: SC around — 28 stitches each round
Move the stitch marker at the beginning of each round.
Place the Safety Eyes
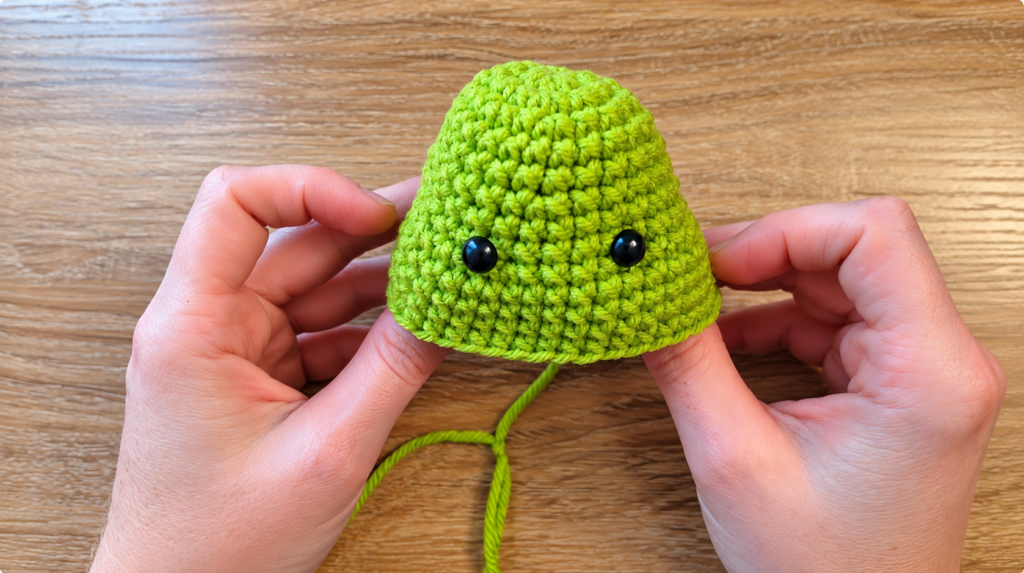
Place the 7 mm safety eyes after completing Round 13.
Position them around the space between Rounds 9 and 10, approximately 4 stitches apart and centered between the two increase areas from Round 9.
Before securing the backs, look at the head from the front and check that both eyes are even. Adjust their position if necessary.
Close and Stuff the Head
Continue with the decreases:
- Round 14: SC, DEC around — 12 decreases
- Round 15: 2 SC, DEC; repeat 6 times
- Round 16: SC, DEC; repeat 6 times
Add stuffing before closing the head completely. Fill it firmly enough to maintain a rounded shape, but avoid stretching or distorting the stitches.
- Round 17: DEC around
Close the remaining opening and fasten off, leaving a long green yarn tail for the facial shaping and eyebrows.
Shape the Eyes
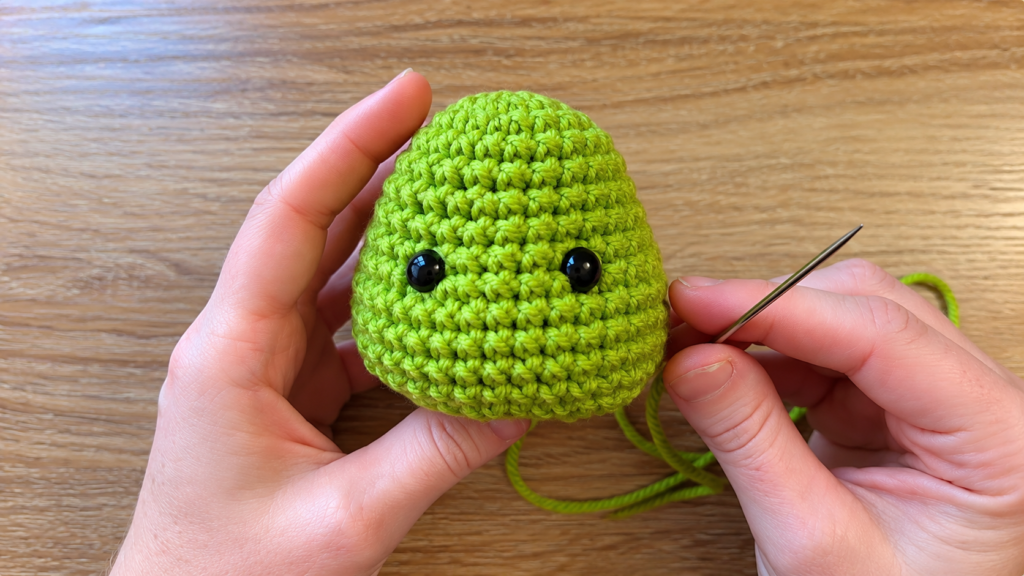
Thread the remaining green yarn tail onto a yarn needle.
Insert the needle through the center of the closed bottom of the head and bring it up underneath one eye. Make a straight shaping stitch beneath the eye.
Bring the needle underneath the opposite eye and pull gently. Repeat the same process on the other side.
The shaping should pull the lower areas around the eyes slightly inward. Use your fingers to guide the fabric and keep both sides balanced.
Embroider the Eyebrows
Use the same green yarn for the eyebrows.
Bring the needle up toward the upper area of one eye and make two long straight stitches at a slight angle.
Pass the needle underneath the stitches and wrap around them to build the eyebrow.
Repeat on the opposite eye. Keep the eyebrows balanced, then secure and hide the yarn tail inside the head.
Embroider the Nose and Mouth
Use black yarn for the nose and mouth.
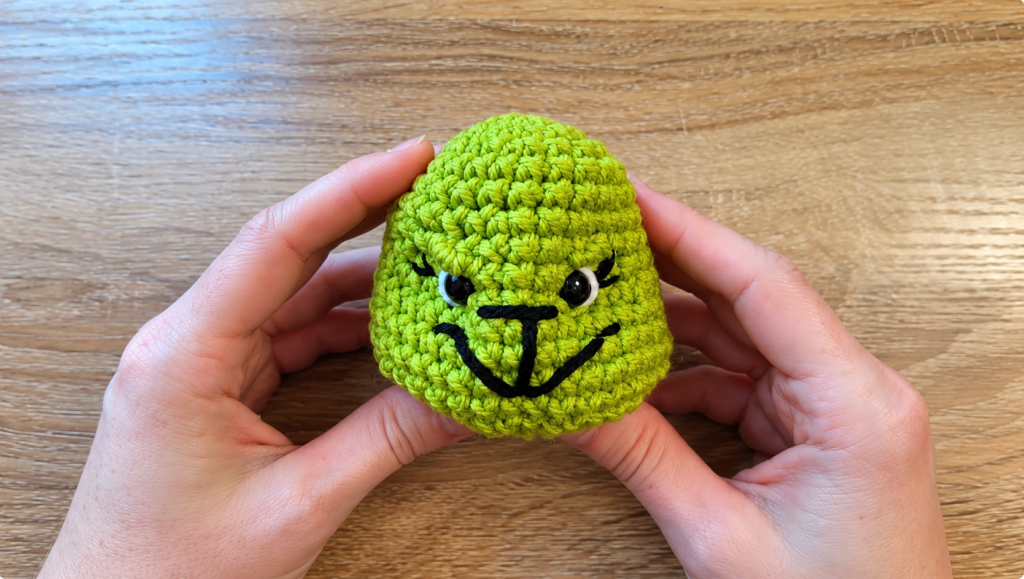
The nose begins between the eyes, approximately around Rounds 10–11. Make a long horizontal stitch between the eyes.
For the center of the mouth, make a vertical stitch approximately three rounds below the nose.
To create the Grinch smirk, add stitches between the nose and mouth center and extend them slightly outward. Add a short straight stitch on each outer side.
Tie the embroidery ends inside the head and hide the knot.
Add the White Eye Details
Use a small amount of white yarn.
Insert the needle through the stitches and bring it up around the lower or outer part of the eye. Sew around the outside edge and add the small white detail.
Secure the yarn ends inside the head and repeat for the other eye.
Add the Eyelashes
Use black yarn.
Make the first straight stitch outward beside one eye, followed by a second angled lash.
Repeat the same two stitches on the opposite eye.
Tie the yarn ends inside the head, trim the excess, and hide the ends.
Crochet the Christmas Hat
The hat starts with white yarn and changes to red.
White Hat Tip
- Round 1: 6 SC into a magic ring — 6 stitches
- Round 2: SC, INC; repeat 3 times — 9 stitches
- Round 3: SC around — 9 stitches
- Round 4: SC, DEC; repeat 3 times
Make the final decrease with the new red color.
Red Hat
Continue with red yarn.
- Round 5: SL ST around in BLO
- Round 6: SC in each BLO around
- Round 7: INC in every stitch
- Round 8: SC around
- Round 9: SC, INC; repeat 6 times
- Round 10: 2 SC, INC; repeat 6 times
Make the final increase with white yarn.
White Hat Edge
- Round 11: SL ST around in BLO
- Round 12: CH 2, SL ST in the next BLO around
Fasten off and leave a yarn tail for attaching the hat.
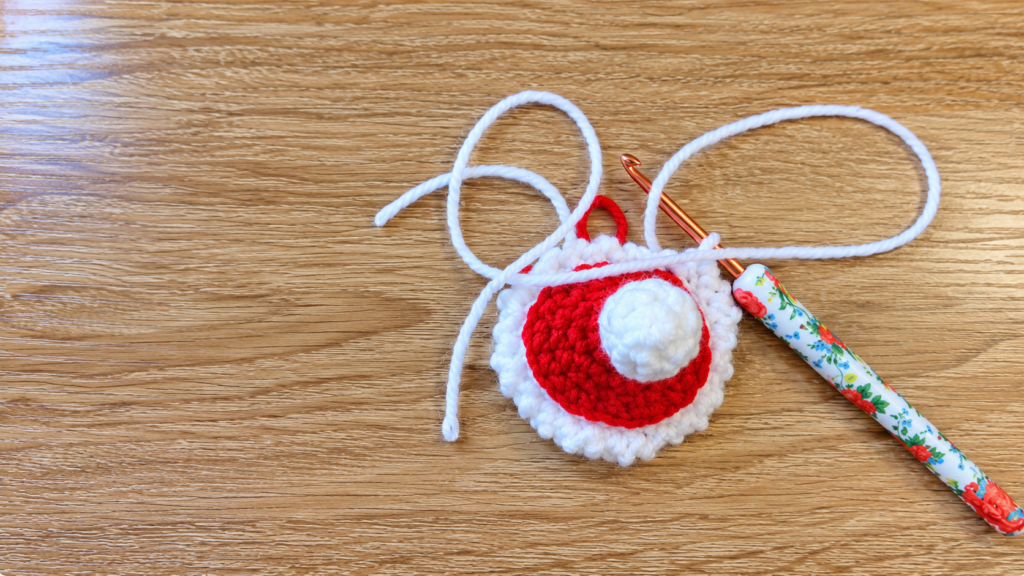
Attach the Hat
Push the yarn tails inside the hat.
Add a small amount of stuffing so the hat holds its shape without becoming bulky.
Position the hat slightly to one side of the head. Thread the white yarn tail onto a yarn needle and sew through the hat’s back-loop edge and into the head.
Continue around until the hat is secure. Knot the yarn and hide the remaining tail inside the head.
Final Assembly
This design does not have separate arms, legs, or a body section. The project consists of the crocheted head or ornament form, facial details, and Christmas hat.
Complete the project in this order:
- Crochet and finish the head.
- Place and secure the safety eyes.
- Stuff and close the head.
- Shape the eyes.
- Embroider the eyebrows.
- Embroider the nose and mouth.
- Add the white eye details.
- Add the eyelashes.
- Crochet the hat.
- Add a small amount of stuffing to the hat.
- Sew the hat to the head.
- Secure and hide all yarn ends.
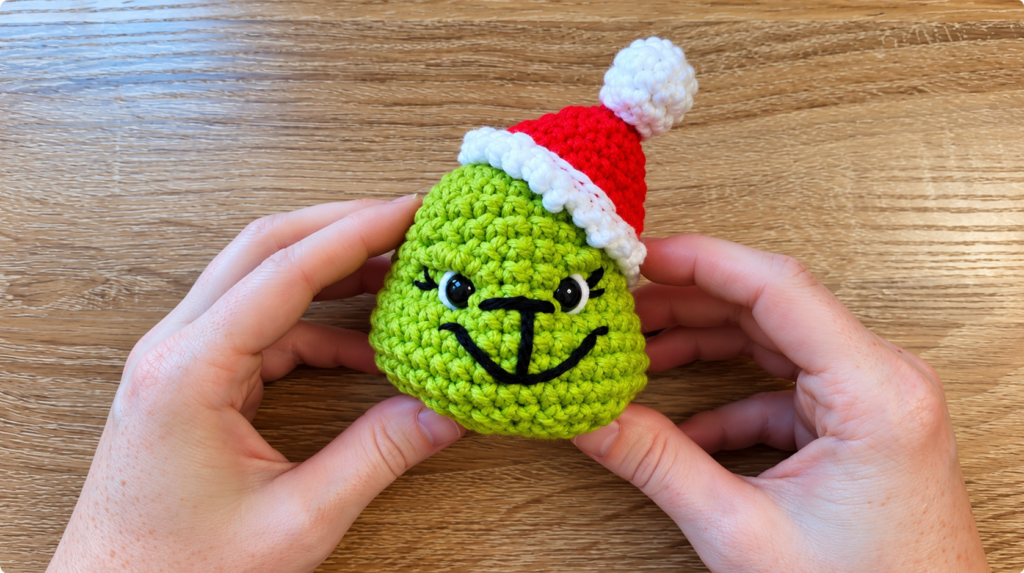
Video Tutorial and Yarn Changes
You can use DK-weight yarn with a 3 mm crochet hook for the written pattern, or worsted-weight yarn with a 4 mm hook. Changing the yarn or hook size may change the finished size and yarn amount needed.
Changing the yarn weight or hook size can affect the finished size, yarn consumption, fabric density, safety-eye proportion, and overall shape. A larger yarn and hook combination will generally produce a larger ornament, while a smaller combination will generally produce a smaller one.
Common Problems
The Eyes Look Uneven
Check the eye placement before securing the safety-eye backs. Use the Round 9 increase areas as reference points and compare both sides before making the placement permanent.
The Head Does Not Hold Its Shape
Add enough stuffing before the final decrease. The stuffing should be firm and evenly distributed without stretching the stitches.
The Face Looks Flat
Check the eye shaping and eyebrow embroidery. These details help create the intended facial expression.
The Mouth Does Not Look Right
Check the outer mouth stitches. They should extend slightly outward, with the additional short stitches helping create the smirk.
The Hat Loses Its Shape
Add a small amount of stuffing inside the hat before attaching it. Avoid overstuffing.
The Finished Size Is Different
The finished size can change when the yarn weight or hook size changes. The written pattern uses DK-weight yarn with a 3 mm hook, while the demonstrated sample uses worsted-weight yarn with a 4 mm hook.
Finishing
Check that all knots are secure and hide any loose yarn ends.
Make sure the safety eyes are firmly attached and the hat is securely sewn to the head. Gently shape the head and hat, then trim any visible excess yarn.
Your Grinch Christmas ornament is ready for holiday display.
Pattern Notes
Keep these specifications in mind when making the written version of the pattern:
- DK-weight yarn
- Approximately 8.5 g grass green yarn
- Approximately 1.75 g white yarn
- Approximately 2 g red yarn
- 3 mm crochet hook
- 7 mm safety eyes
- Continuous-round head construction
- Green eye shaping and eyebrow embroidery
- Black nose, mouth, and eyelashes
- White and red Christmas hat
- Small amount of stuffing in the hat
- Sewn hat attachment
.