Rose Crochet Pattern
Crocheting roses is a beautiful way to add handmade flowers to your creative projects. A rose crochet pattern can help you create decorative flowers, make a crochet bouquet, or add a floral touch to handmade gifts. With different petal colors and a green sepal, crocheted roses can suit a variety of occasions and styles.
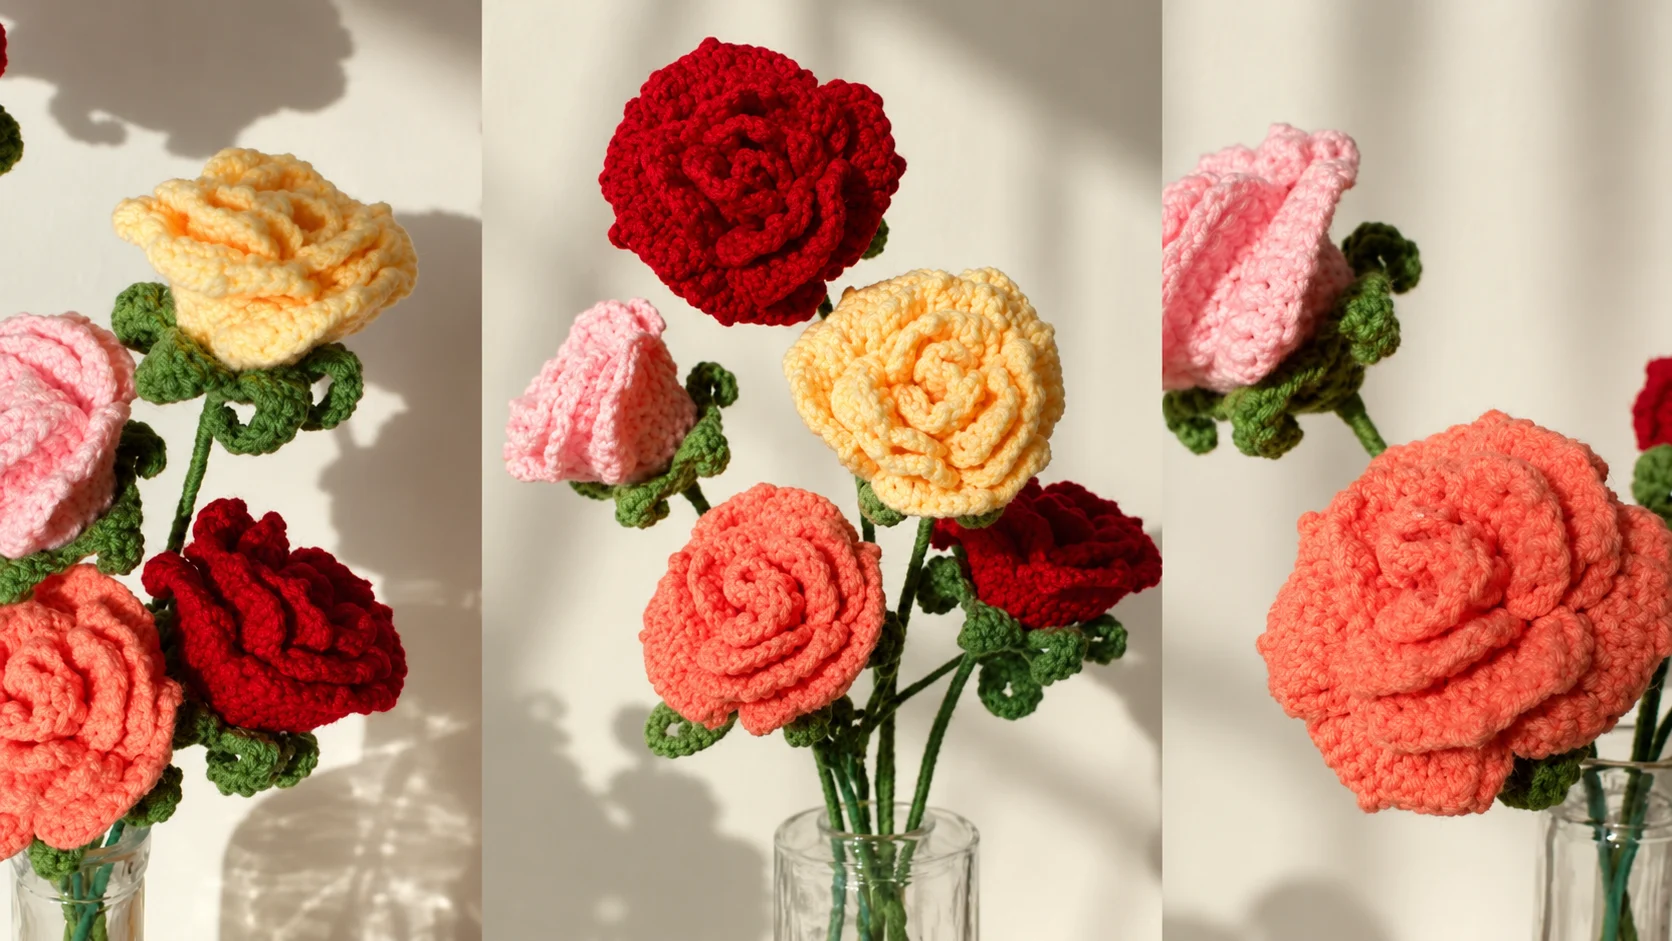
This rose crochet pattern features a red crocheted flower made from a shaped petal strip, a separate green sepal, and a stem wrapped in green yarn. The petal strip is rolled into a rose and secured around a floral stem or wire to create a finished flower.
The design uses a 3 mm Tulip crochet hook and 4-ply milk cotton yarn. The creator describes the project as suitable for beginners and demonstrates how to crochet the petals, make the green sepal, and assemble the flower.
Rose Crochet Pattern – The Short Answer?
Materials for a Rose Crochet Pattern
Before starting your crochet rose, gather the materials and equipment needed to make the petals, sepal, and stem.
- 3 mm Tulip crochet hook
- 4-ply milk cotton yarn in red or another preferred petal color
- Green yarn for the sepal and stem wrapping
- Floral stem or floral wire
- Hot glue gun and hot glue
- Scissors
- Stitch marker for the sepal rounds
- Tapestry needle, optional, for finishing yarn ends
The original tutorial does not specify exact yarn quantities, finished dimensions, gauge, or completion time. These details are therefore not estimated.
Crochet Abbreviations
The following abbreviations are used in the pattern:
- ch: chain
- sl st: slip stitch
- sc: single crochet
- inc: increase, working two stitches into the same stitch
- dc: double crochet, following the creator’s terminology
- tr: treble crochet, following the creator’s terminology
- picot: a decorative detail made by chaining one and slip stitching into the two top loops of the stitch just made, as demonstrated in the tutorial
The spoken tutorial sometimes uses inconsistent names for the taller stitches. For the petal-shaping row, check the original demonstration wherever a stitch name or placement is unclear.
How to Crochet a Rose
The rose begins with a crocheted strip that is shaped into petals and rolled into a flower. The green sepal is crocheted separately and attached underneath the rose during assembly.
Step 1: Make the Foundation Chain
Begin with a slip knot and make 40 chains. Add one extra chain as the creator demonstrates.
This foundation is specific to this rose design and should not be replaced with a different chain count from another crochet rose pattern.
Step 2: Crochet the Base Row
Starting in the second loop from the hook, work one double crochet into each loop across. The creator states that this row contains 40 double crochet stitches.
Step 3: Work the Increase Row
Chain one and turn your work. Work a double crochet increase in each of the first 39 stitches, then work one double crochet into the final stitch.
The tutorial states that this row contains 79 double crochet stitches in total.
Step 4: Work the Increase-and-Skip Row
Chain one and turn. The creator demonstrates a double crochet increase followed by skipping one stitch, repeating the sequence across the row. The stated total at the end is 80 double crochet stitches.
The automatic transcript does not make every repeat and final stitch placement sufficiently clear to reconcile the sequence with the stated total. Confirm the exact placement against the original video before treating this row as a fully verified written instruction.
Step 5: Shape the Rose Petals
The next row creates the decorative edge of the rose. The creator demonstrates four petal-group styles, using taller crochet stitches, chain-3 edges, slip stitches, and picot details. Each successive group is wider than the previous one, helping form the layered appearance of the flower.
First Petal Group
Chain three and turn. The creator works taller stitches across the next stitches, then finishes the group with a chain-3 edge and a slip stitch into the same loop.
The tutorial makes this first group once. Because the spoken stitch names alternate between double crochet and treble crochet, confirm the exact stitches from the video.
Second Petal Group
Slip stitch into the next loop and chain three. Work a treble crochet into the same loop, then continue with taller stitches across the following loops.
At the designated stitch, make a treble crochet, chain one, and slip stitch into the two top loops to form the picot detail. Work another treble crochet into the same loop.
Continue toward the edge and finish with chain three and a slip stitch into the same loop. The creator repeats this group until there are four in total.
Third Petal Group
Slip stitch into the next loop and chain three. Work a treble crochet into the same loop, followed by treble crochet stitches across the next two loops.
Work the treble-crochet-and-picot detail at the designated loop, then continue the remaining stitches toward the edge. Finish with chain three and a slip stitch into the same loop.
The transcript describes four groups of this style, although some stitch placements around the picot require visual confirmation.
Fourth Petal Group
Slip stitch into the next loop and chain three. Work a treble crochet into the same loop, followed by treble crochet stitches across the next three loops.
At the designated loop, make the treble-crochet-and-picot detail. Continue with the remaining taller stitches and finish with chain three and a slip stitch into the same loop.
The repeat wording for this final group is inconsistent in the transcript. Verify the final number of groups against the original video rather than relying on an unconfirmed count.
Step 6: Fasten Off and Roll the Rose
When the petal strip is complete, chain one to fasten off and cut the yarn, leaving a short tail of approximately 3 cm as specified by the creator.
Roll the strip from one end to form the rose. Arrange the petals as you roll, keeping the base as even as possible. Apply hot glue in small sections to secure the layers, holding each section until it stays in place.
This design uses hot glue during assembly rather than the long sewing tail used in some other crochet rose patterns.
How to Crochet the Green Sepal
The green sepal sits underneath the rose and covers the join between the flower and its stem. It begins with a magic ring and is shaped through four rounds.
Round 1
With green yarn, make a magic ring and work 6 single crochet stitches into the ring. Close the centre enough to shape it, but leave room for the floral stem to pass through. Join with a slip stitch to the first single crochet.
Round 2
Chain one and work 2 single crochet stitches into each stitch around. The tutorial states that the round contains 12 stitches. Join with a slip stitch to the first stitch, then chain one.
Round 3
Work 1 single crochet into the next stitch and 2 single crochet stitches into the following stitch. Repeat this sequence six times. The tutorial states that the round contains 18 stitches. Join with a slip stitch to the marked stitch, then chain one.
Round 4
Work 18 single crochet stitches evenly around. Join with a slip stitch to the first stitch to complete the round.
Make the Sepal Extensions
Chain 9. Starting in the second chain from the hook, the transcript describes working 2 slip stitches, 1 single crochet, 2 half double crochet stitches, and double crochet stitches along the remaining chain spaces.
Skip two stitches at the base and attach the extension with a slip stitch into the third stitch. Repeat to make six extensions in total.
The automatic transcript does not clearly resolve the placement of every stitch in the final chain spaces. Check the original video to confirm this section before following it as a complete, count-verified instruction.
How to Assemble the Crochet Rose
Once the petal strip and green sepal are ready, assemble the flower and stem.
- Position the floral stem against the base of the petal strip.
- Apply hot glue and fold the beginning of the strip around the stem.
- Continue rolling the strip into a rose, securing the layers with small amounts of glue.
- Keep the bottom of the flower as level as possible.
- Insert the floral stem or wire through the centre of the green sepal.
- Position the sepal underneath the rose to cover the join, then secure it with hot glue.
- Wrap the stem neatly with green yarn, keeping the wrapping snug and even.
- Secure the end of the green yarn with glue and trim the excess.
Use care when working with a hot glue gun and allow glued areas to cool before handling them.
Tips for Making a Neat Crochet Rose
Keep the Petal Layers in Place
Roll the petal strip gradually and secure it in small sections. This helps the rose maintain its shape while the layers are arranged.
Leave Space in the Sepal Centre
Do not pull the magic ring too tightly. The floral stem needs to pass through the centre when the flower is assembled.
Wrap the Stem Evenly
Keep the green yarn close together as you wrap the stem. Avoid bulky overlaps and secure the yarn at the end for a neat finish.
Choose Your Favorite Rose Color
Red is the demonstrated petal color, but the creator also mentions peach, pink, purple, blue, yellow, and other preferred colors. Green yarn is used for the sepal and stem wrapping in this design.
Where to Use Crochet Roses
Handmade crochet roses can be used in decorative arrangements, floral gifts, and other creative projects. A single rose can be displayed on its own, while several crocheted flowers in complementary colors can be arranged into a bouquet.
You can also choose different petal colors to suit an occasion or personal preference. The separate green sepal and wrapped stem give this design the appearance of a complete flower.
Frequently Asked Questions
What hook size is used for this rose crochet pattern?
The original tutorial uses a 3 mm Tulip crochet hook.
What yarn is used to crochet the rose?
The creator uses 4-ply milk cotton yarn, with red for the demonstrated petals and green for the sepal and stem wrapping.
Can I make the crochet rose in another color?
Yes. The creator mentions peach, pink, purple, blue, yellow, and other colors as alternatives for the petals.
How is the crochet rose assembled?
The petal strip is rolled into a flower and secured with hot glue. The floral stem passes through the green sepal, which is attached beneath the rose, and the stem is wrapped with green yarn.
Does the pattern specify the finished size?
No. The original tutorial does not provide a finished measurement, yarn quantity, gauge, or completion time.
Final Notes
This rose crochet pattern combines a shaped petal strip, a separate green sepal, and a wrapped floral stem to create a handmade rose. The materials, foundation chain, stated row totals, sepal rounds, and assembly method follow the supplied source. Some petal stitch placements, repeat counts, and sepal-extension details still need confirmation from the original video, so those points should be verified before the article is presented as a fully count-verified standalone pattern.