Crochet Christmas Sweater Pattern
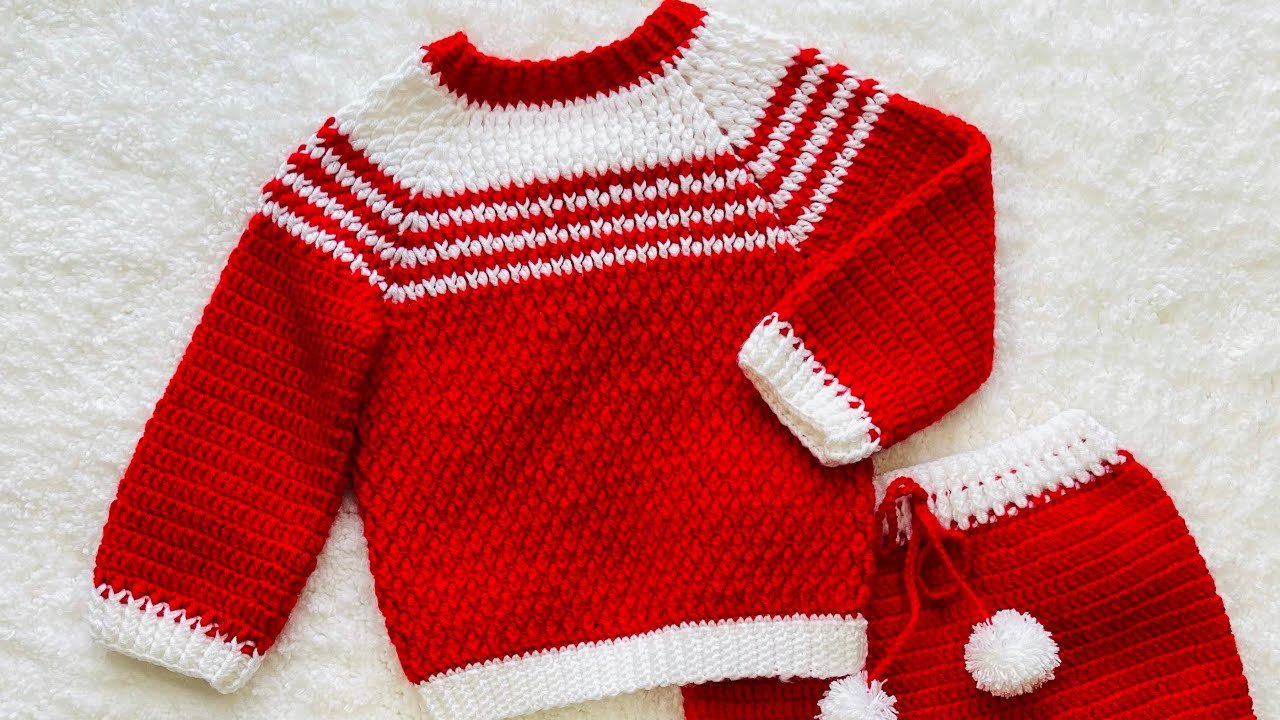
Create a festive crochet Christmas sweater for a baby using a circular yoke, textured Alpine-stitch variation, and classic red-and-white Christmas stripes. This demonstrated version is designed for approximately 6–9 months and is worked from the neckline downward, with the body and sleeves completed separately.
The sweater features a four-corner yoke, red-and-white colorwork, a ribbed waistband, separate sleeves, ribbed cuffs, and a finished ribbed neckline.
Crochet Christmas Sweater Pattern – The Short Answer?
Finished Size
Approximately 6–9 months.
Finished measurements:
- Chest width: approximately 26 cm (10.25 inches)
- Body length: approximately 34 cm (13.25 inches)
- Sleeve length from underarm: approximately 19 cm (7.5 inches)
- Sleeve width: approximately 9.5 cm (3.75 inches)
- Neckline to sleeve end: approximately 34.5 cm (13.5 inches)
The body measures approximately 29 cm (11.5 inches) from the center neckline to the final body row before the waistband.
Materials
- No. 3 yarn or DK-weight yarn
- Main sweater color yarn
- Red yarn
- White yarn
- 3.5 mm crochet hook
- 3 mm crochet hook
- Tapestry needle
- Scissors
- Stitch markers
Four stitch markers are used when establishing the four-corner yoke.
Abbreviations
- CH — Chain
- SC — Single Crochet
- DC — Double Crochet
- SL ST — Slip Stitch
- FPDC — Front-Post Double Crochet
- FPHDC — Front-Post Half Double Crochet
- BPHDC — Back-Post Half Double Crochet
- BLO — Back Loop Only
General Notes
- The main sweater is worked with a 3.5 mm crochet hook.
- The waistband and neckline ribbing use a 3 mm hook.
- The demonstrated sweater is approximately 6–9 months.
- The yoke is worked around four marked corners.
- Each yoke increase round adds 8 dc.
- The Christmas stripes are worked in alternating red and white rounds.
- The body is worked after separating the sleeve sections.
- The sleeves are worked separately after the body.
- Count your stitches at the end of each round.
- The optional Christmas decorations are not part of the core sweater construction.
1. The Foundation and Circular Yoke
Foundation Chain
Use the 3.5 mm crochet hook.
- Foundation: CH 60.
The foundation measures approximately 31 cm (12.25 inches).
Chain 1 additional chain, giving you 61 chains in total.
Work across the foundation:
- Insert the hook into the second chain from the hook.
- Work 1 SC.
- Continue working 1 SC in each chain across.
Total: 60 SC.
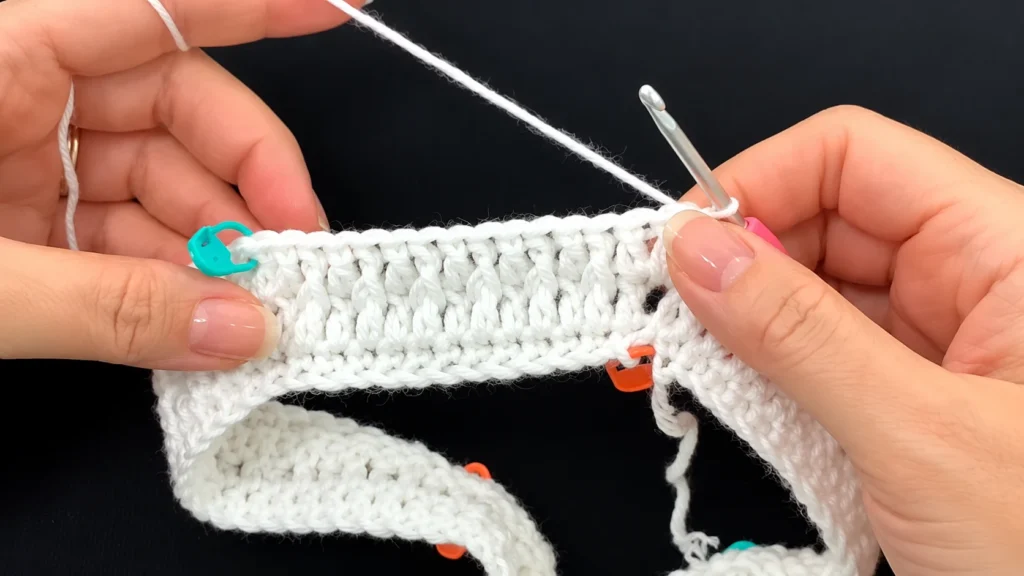
Establish the Four Corners
The next stage establishes the four sections of the circular yoke.
Work the sections in this order:
- 11 SC
- Corner
- 17 SC
- Corner
- 11 SC
- Corner
- 17 SC
- Corner
Corner
Work 2 DC into the same stitch.
Place a stitch marker between the two DC stitches.
Continue around the yoke, placing a marker at each of the four corners.
Yoke Round 2
Work across the established sections in DC.
At each marked corner, work:
2 DC in the corner stitch.
Continue around and join as demonstrated.
Total: 64 DC.
2. The Alpine-Stitch Yoke
The yoke uses a variation of the Alpine stitch combining DC and FPDC.
Work the DC and FPDC pattern around each section while continuing the increase at each of the four corners.
At every corner, work 2 DC into the corner stitch and keep the stitch marker between the two corner stitches.
Each completed yoke round increases by 8 stitches.
Yoke Rounds
- R3: Work the Alpine-stitch variation with the four corner increases. (72 DC)
- R4: Continue the same stitch pattern and corner increases. (80 DC)
- R5: Continue the same stitch pattern and corner increases. (88 DC)
- R6: Continue the same stitch pattern and corner increases. (96 DC)
Keep the four corners aligned throughout the yoke.
3. Christmas Stripe Section
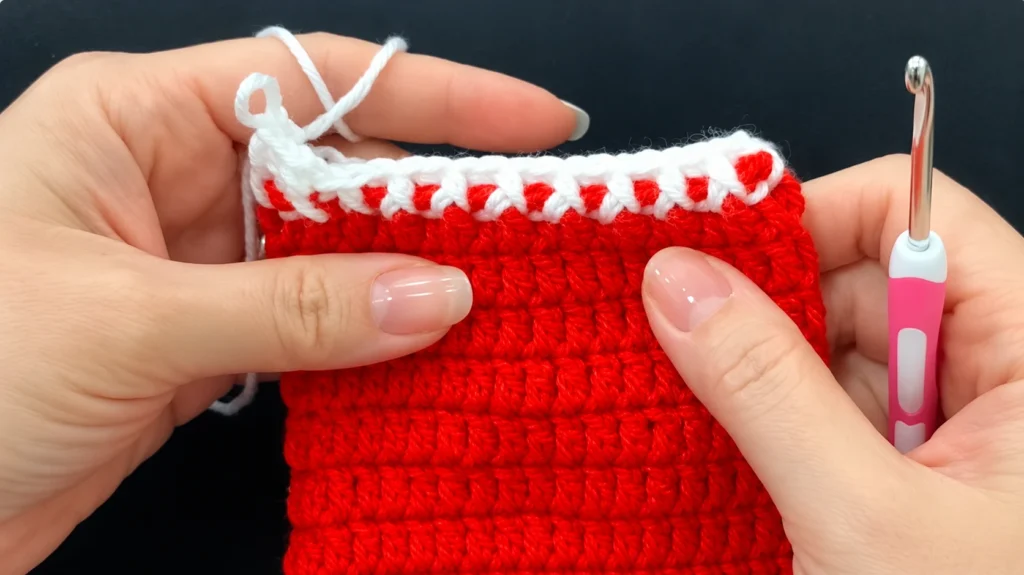
Beginning with Round 7, introduce the red-and-white Christmas colorwork.
Continue the same Alpine-stitch variation and four-corner increases.
Color Sequence
- R7: Red
- R8: White
- R9: Red
- R10: White
- R11: Red
- R12: White
- R13: Red
At the end of Round 13:
Total: 152 DC.
The completed yoke measures approximately 13 cm (slightly over 5 inches) across.
4. Divide the Yoke for the Body and Sleeves
After completing Round 13, separate the sleeve sections from the front and back.
Chain 2. The CH 2 does not count as a stitch.
Work 3 DC into the indicated space, then CH 3 across the sleeve section.
Work 3 DC into the next corner and continue across the front.
Front
47 DC
Chain 3 across the second sleeve section.
Continue across the back.
Back
47 DC
The divided construction now has:
- 47 DC front
- 47 DC back
- CH-3 underarm space on each side
First divided body round: 94 DC.
5. The Sweater Body
Continue around the body.
Work 3 DC into each CH-3 underarm space.
These two underarm sections add 6 stitches.
Body total: 100 DC.
Continue into the next stage of the body construction.
The beginning chain is counted as a stitch in the continuous-round section, giving:
101 DC.
Place a stitch marker at the beginning of the continuous round.
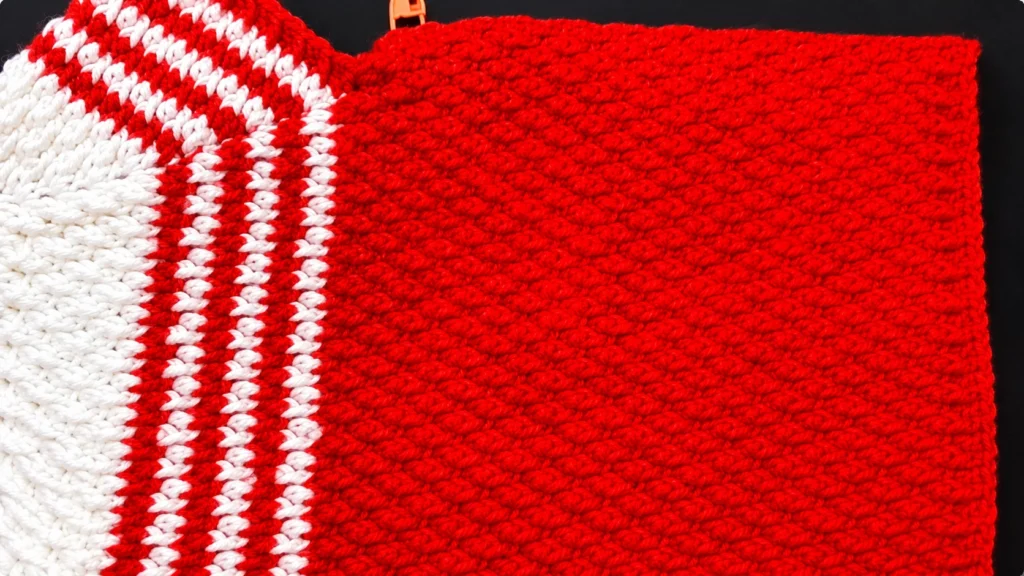
Continue the Alpine-stitch variation around the body without joining at the end of each continuous round.
Work until the body measures approximately:
29 cm (11.5 inches)
from the center neckline to the final body row before the waistband.
6. The Ribbed Waistband
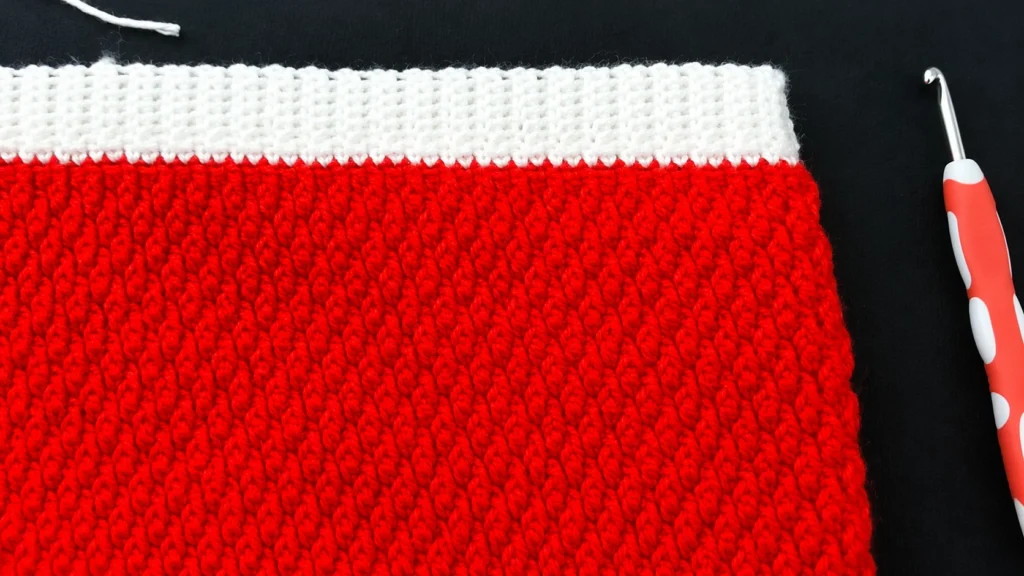
Switch to the 3 mm crochet hook.
Attach the yarn at the bottom edge of the sweater.
Ribbing Foundation
- CH 7.
- Starting in the second chain from the hook, work 6 SC.
- SL ST into the next 2 body stitches.
- Turn.
Ribbing Row
Work:
- 6 SC through BLO.
- CH 1.
- Turn.
Continue working the ribbing while attaching each section to the next 2 body stitches.
Repeat around the entire bottom edge.
For a wider waistband, increase the number of foundation chains.
When you reach the beginning, align the two ends of the ribbing and join them with SL ST.
Fasten off.
7. The Sleeves
Make the sleeves separately after completing the body.
Use the 3.5 mm crochet hook.
Attach the yarn at the center of the underarm.
Sleeve Round 1
Work the demonstrated underarm decrease construction around the sleeve section.
Total: 39 DC.
The exact decrease placement follows the demonstrated construction.
Sleeve Rounds 2–18
For each round:
- CH 2.
- DC in the same stitch.
- DC in each stitch around.
- Join with SL ST.
Total: 39 DC per round.
Work a total of 18 sleeve rounds.
Repeat the same construction for the second sleeve.
8. The Sleeve Cuffs
Change to white yarn.
Work the cuff using FPHDC and BPHDC.
Cuff Rounds
- R1: Alternate FPHDC and BPHDC around.
- R2: Repeat the same ribbing pattern.
- R3: Repeat the same ribbing pattern.
- R4: Repeat the same ribbing pattern.
Join the final round and fasten off.
If the post stitches are difficult to work, the demonstrated alternative is to use several rounds of SC with a slightly smaller hook.
Repeat for the second sleeve.
9. The Neckline
The neckline is completed after the body, waistband, sleeves, and cuffs.
Use red yarn and the 3.5 mm crochet hook.
Neckline Base
- CH 1.
- Work SC evenly around the neckline.
- Join with SL ST.
Total: 60 SC.
Neckline Ribbing
Switch to the 3 mm crochet hook.
- CH 5.
- Starting in the second chain from the hook, work 4 SC.
- SL ST into the next 2 neckline stitches.
- Turn.
- Work 4 SC through BLO.
- CH 1.
- Turn.
Continue the ribbing around the neckline, attaching each ribbing section to the next 2 neckline stitches.
Join the two ends of the ribbing when you reach the beginning.
10. Adjusting the Neckline
If the neckline needs additional room, use one of the demonstrated adjustments.
Option 1
Use the 3.5 mm hook instead of the 3 mm hook for the neckline ribbing.
Option 2
Use 1 SL ST between ribbing sections instead of 2.
These adjustments allow the neckline to be opened slightly without changing the main sweater construction.
11. Optional Christmas Decorations
The red-and-white yoke already gives the sweater a festive Christmas appearance.
Additional decorations can be added if desired.
Optional ideas include:
- Gingerbread motifs
- Reindeer
- Snowflakes
- Candy-inspired decorations
- Pom-poms
- Small Christmas-themed crochet motifs
A gingerbread-themed pouch or gift-card-holder-style decoration can also be adapted as a front embellishment.
These decorations are optional and are not part of the core sweater construction.
12. Finishing
Check the sweater carefully before wearing it.
Make sure:
- The four yoke corners remain aligned.
- The body has the intended 47-dc front and 47-dc back sections.
- The sleeves contain 39 dc.
- Each sleeve has 18 main rounds.
- Each cuff has 4 rounds.
- The neckline base contains 60 sc.
- Loose yarn ends are securely woven in.
- The waistband and neckline are joined securely.
The demonstrated finished sweater is approximately 6–9 months in size.
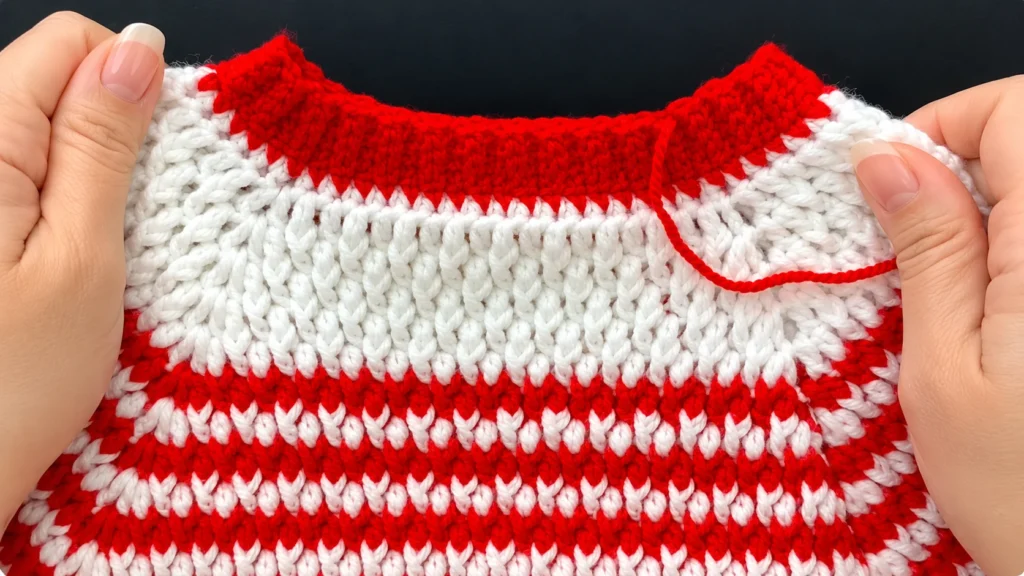
Finished Crochet Christmas Sweater
Your crochet Christmas sweater is now complete.
The finished design combines a four-corner circular yoke, textured Alpine-stitch variation, red-and-white Christmas stripes, a ribbed waistband, separate sleeves, ribbed cuffs, and a finished ribbed neckline.
The optional Christmas decorations can be added afterward to personalize the sweater while keeping the original construction intact.