angel crochet pattern free
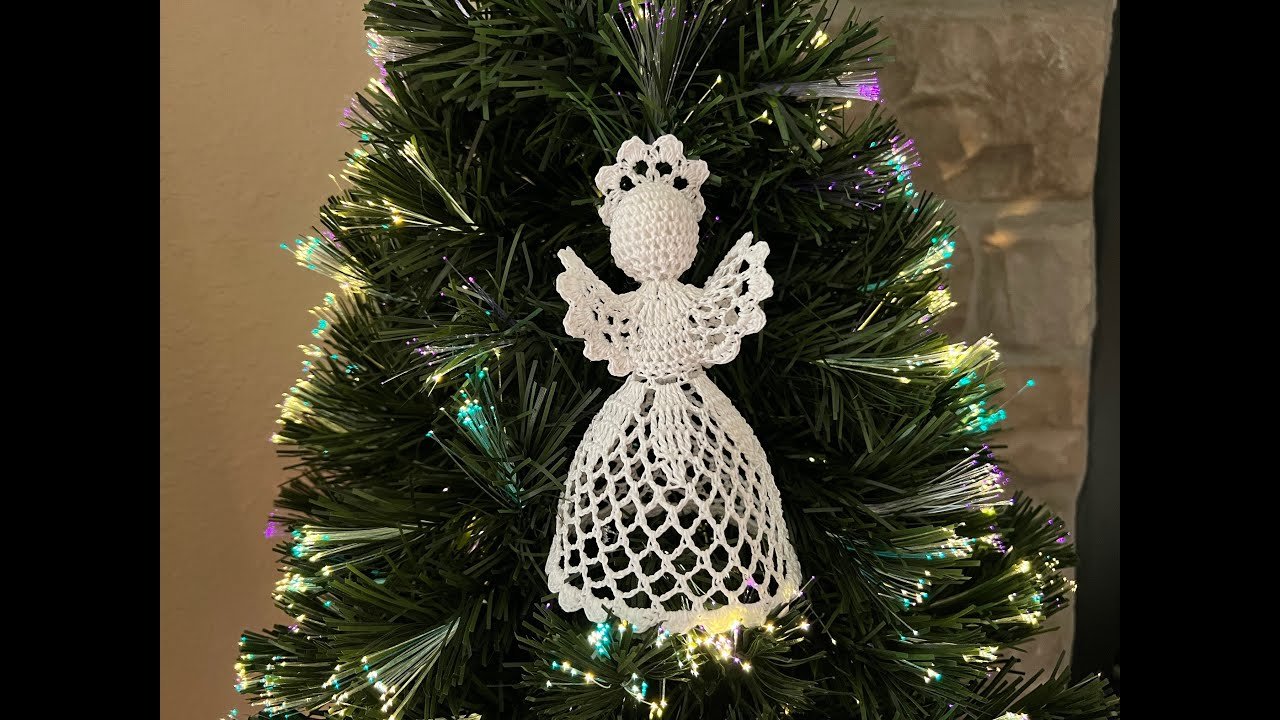
This pretty little crochet angel ornament is a sweet addition to your Christmas decorations. With delicate wings, a flared lacy skirt, and a tiny halo, it has a classic handmade look that works beautifully on a Christmas tree or as part of a festive display.
The angel measures approximately 6 inches tall and is crocheted from the top of the head down to the skirt. The head, neck, body, wings, and skirt are worked continuously, without cutting the thread between the main sections. The halo is made separately and attached at the end.
The pattern combines basic crochet stitches with decorative chain arches and double crochet groups to create the angel’s airy design. Once the crocheting is finished, starch helps the skirt and wings hold their shape.
Angel Crochet Pattern Free – The Short Answer?
Materials
- Cotton crochet thread
- Crochet hook measuring approximately 2 mm
- Fiberfill stuffing
- Stitch marker or contrasting thread
- Yarn needle
- Scissors
- Starch for stiffening the finished angel
- A cup, bowl, or another suitable object for shaping the angel while it dries
- Needle and thread or a glue gun for attaching the halo
Abbreviations
This pattern uses US crochet terminology.
- MR – Magic ring
- ch – Chain
- sc – Single crochet
- dc – Double crochet
- sl st – Slip stitch
- inc – Increase
- dec – Decrease
- st/sts – Stitch/stitches
- rnd – Round
- FO – Fasten off
Crochet Angel Head
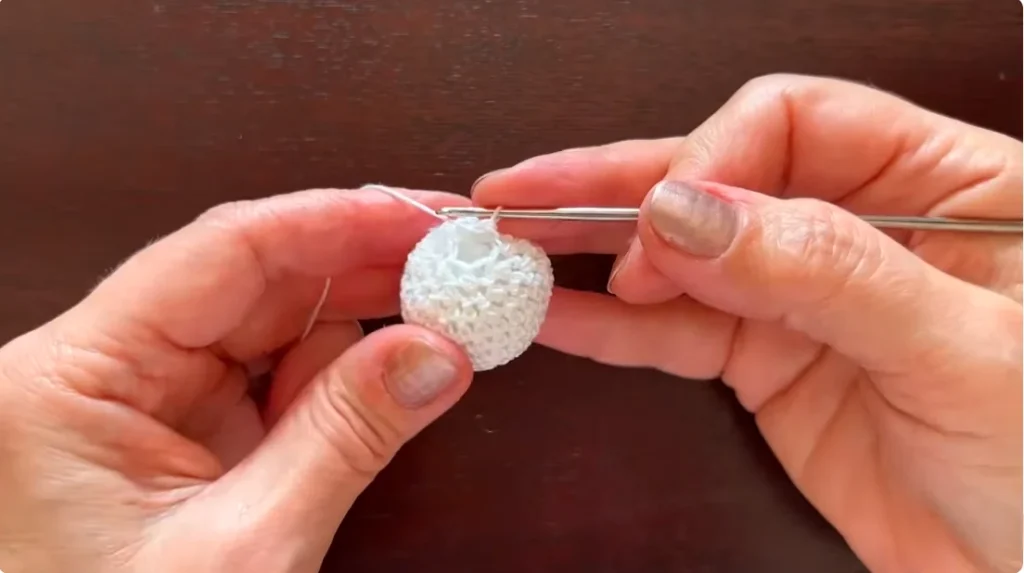
The angel begins at the top of the head. Work in rounds and use a stitch marker to keep track of the beginning of each round.
Round 1: Make a magic ring and work 6 sc into it. Pull the ring closed and join with a slip stitch. (6 sts)
Round 2: Work 2 sc into every stitch around. (12 sts)
Round 3: Repeat 1 sc in the next stitch and 2 sc in the following stitch around. (18 sts)
Round 4: Repeat 1 sc in each of the next 2 stitches, then work 2 sc in the following stitch around. (24 sts)
Rounds 5–8: Work 1 sc in each stitch around. (24 sts per round)
Round 9: Repeat 1 sc in each of the next 2 stitches, then decrease over the following 2 stitches. (18 sts)
Round 10: Repeat 1 sc in the next stitch, then decrease over the following 2 stitches. (12 sts)
Stuff the head with fiberfill, adding enough to give it a smooth, rounded shape.
Round 11: Decrease across the remaining stitches until 6 sts remain. Keep the stitches snug so the opening is ready for the neck.
Crochet the Neck
Continue directly from the head without cutting the thread.
For the first neck round, begin with ch 3 to replace the first dc. Work the remaining double crochets to make 15 dc in total, then join with a slip stitch in the third chain of the beginning ch-3.
For the second round, begin with ch 3 again and increase around to make 30 dc in total. Join with a slip stitch in the third beginning chain.
These two rounds create the narrow neck and the wider base that leads into the angel’s body and wings.
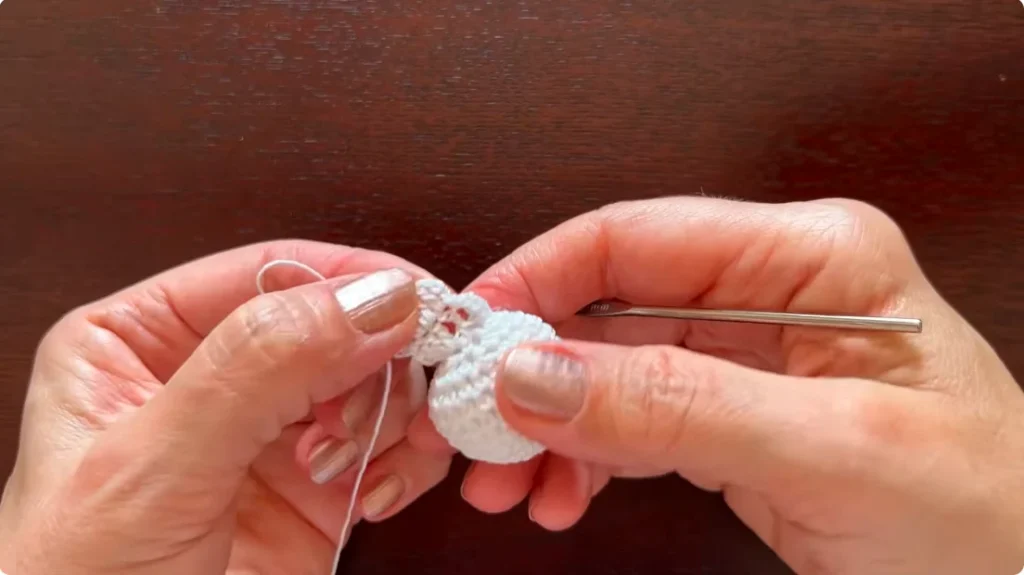
Crochet the Body and Wings
The body and wings are worked together using single crochet stitches and chain arches. These open arches give the wings their delicate, airy appearance.
Begin with ch 1 in place of the first sc, then work 5 more sc across the back of the body for 6 sc in total. Make chain-3 arches separated by single crochet stitches around the first wing section. Work 6 sc across the front of the body before making the chain arches for the other wing.
For the next round, repeat the single crochet sections and chain-3 arches. In the following round, change to chain-4 arches to create a slightly more open edge.
To finish the wings, work the decorative motif of a single crochet and 3 dc into the appropriate arch, followed by a single crochet in the next arch. Continue this pattern around the wing sections, leaving the arches closest to the body unused as you work the decorative edge.
Keep the stitches and chain arches even so both wings have a balanced appearance.
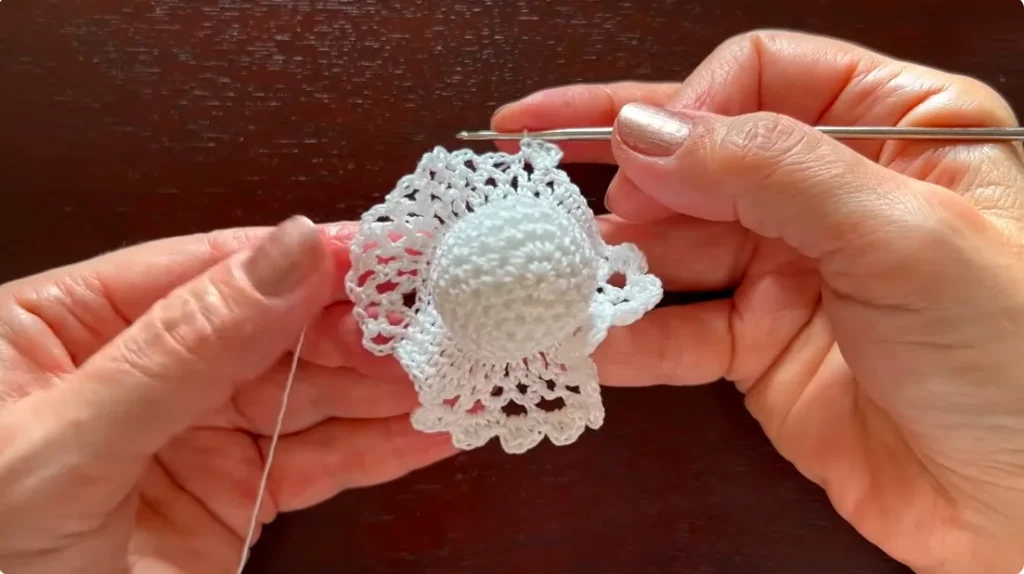
Join the Body and Begin the Skirt
The front and back of the body are joined to form the waist of the angel.
Begin with ch 1 and work 5 sc across the back section. Continue with 6 sc across the opposite side, then join with a slip stitch in the beginning chain.
Next, create the foundation for the skirt. Make a chain of 3, skip one stitch, and work a single crochet into the next stitch. Continue this sequence around the waist until you have 6 chain-3 arches. Join the round.
These small arches form the foundation for the flared skirt.
Work the First Skirt Rounds
The first decorative skirt round is worked into the chain-3 arches.
Slip stitch into the first arch and make ch 3 to replace the first dc. Work 4 more dc into the same arch, giving you 5 dc in total. Make ch 3 between the groups, then work 5 dc into the next arch.
Continue around the skirt, working a group of 5 dc into each foundation arch with chain-3 spaces between the groups. Join the round with a slip stitch in the third chain of the beginning ch-3.
For the next round, begin with ch 3 and work 4 more dc to complete the first group of 5 dc. Make ch 3, then work a single crochet into the chain-3 space from the previous round. Make another ch 3 before working the next group of 5 dc.
Repeat this arrangement around the skirt, keeping the double crochet groups and chain spaces consistent.
Shape the Skirt
The next rounds gradually reduce the double crochet groups, giving the skirt its tapered, decorative shape.
Begin the first shaping round with ch 2 in place of the first dc. Work the double crochet decreases described in the pattern to reduce the groups from 5 dc to 3 dc, with chain-3 spaces and single crochet stitches between the groups.
In the following round, work the remaining double crochets together to form smaller groups. Continue using chain-3 spaces and single crochet stitches between the shaped sections.
As the skirt narrows, the decorative groups become smaller while the open chain spaces remain visible. Keep the decreases evenly worked so the skirt maintains a neat, balanced shape.
Add the Lacy Skirt Edging
After the shaping rounds, work 6 rounds of chain-4 arches.
Begin each round with ch 1 in place of the first sc, then make a chain of 4 and work a single crochet into the next chain space. Continue alternating chain-4 arches and single crochet stitches around the skirt.
At the end of each round, follow the joining method used for this pattern, connecting the round at the beginning chain. A stitch marker can help you keep track of the start as the skirt becomes wider.
After the sixth round, make the final chain arch and slip stitch into the first chain. Slip stitch again if needed to position the yarn beneath the next arch.
For the final decorative edge, use the same motif as the wings. Begin with ch 1 in place of the first sc, work 3 dc into the appropriate arch, and place a single crochet into the next arch. Repeat the motif around the skirt to create a scalloped, lacy finish.
The chain arches and small double crochet groups give the skirt its delicate shape. Keep your tension consistent so the edging sits evenly around the angel.
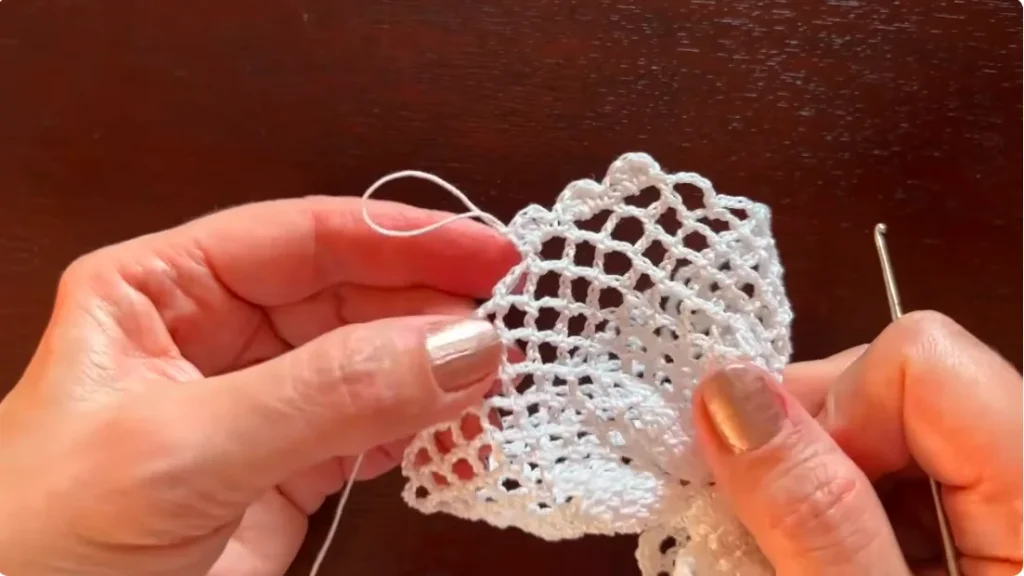
Crochet the Halo
The halo is crocheted separately and attached after the angel has been shaped and dried.
Make a magic ring and work 8 sc into it, separating the stitches with chain-3 spaces. Close the ring carefully.
For the next round, make chain-4 arches with single crochet stitches worked into the chain spaces. Continue around to create the open base for the halo’s decorative edge.
Finish the halo using the same small motif used on the wings and skirt. Begin with ch 1 in place of the first sc, work 3 dc into an arch, and place a single crochet into the next arch. Continue around to complete the lacy edging.
Fasten off and weave in the loose ends. Pay particular attention to the end at the center of the magic ring so it stays secure.
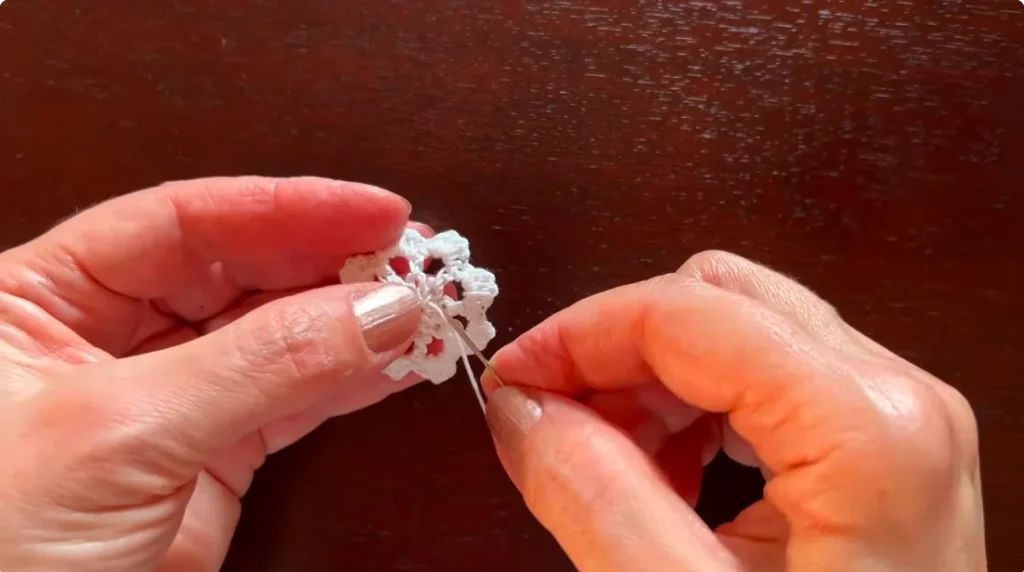
Stiffen and Finish the Angel
Once all the crochet sections are complete, shape the angel so it can be displayed neatly.
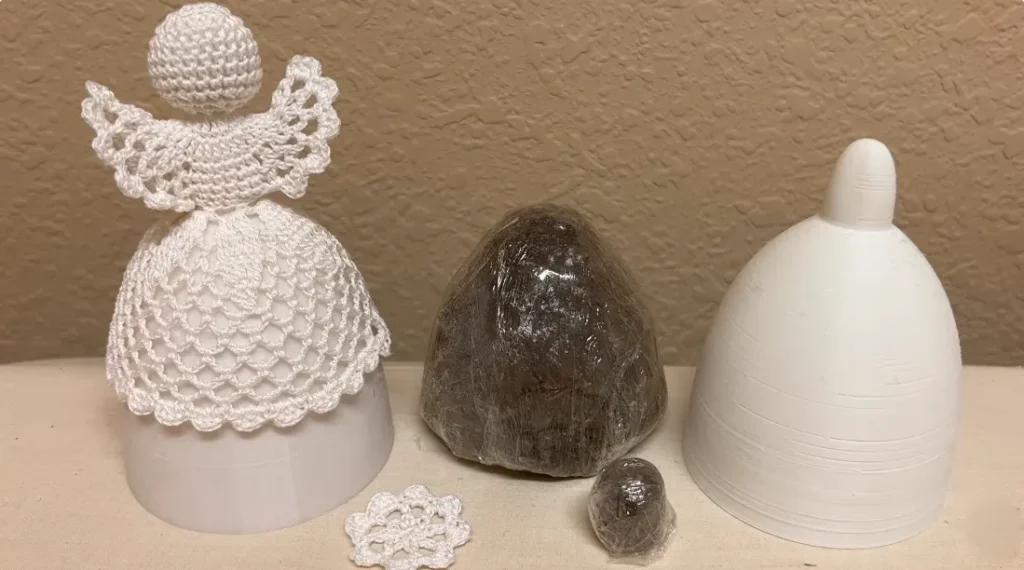
Prepare a starch solution according to the instructions on the product you are using. Place the angel over a suitable support, such as a cup or bowl, to help the skirt keep its flared shape while drying.
Arrange the wings and skirt carefully before leaving the angel to dry completely. Allow enough time for the thread to become firm and hold its shape.
When the angel is fully dry, attach the halo with a needle and thread or a glue gun. Check that it is secure and positioned neatly above the head.
Your little crochet angel is now ready to decorate your Christmas tree, brighten a festive display, or become a handmade gift for someone special.
Tips for a Neat Finish
- Use a stitch marker to keep track of the beginning of the head rounds.
- Stuff the head before closing it completely so the fiberfill can be distributed evenly.
- Keep the chain arches similar in size to help the wings and skirt look balanced.
- Weave in the ends securely, especially around the magic rings.
- Shape the skirt and wings while the starch solution is still workable.
- Let the angel dry fully before attaching the halo or moving it into its final display position.
This crochet angel combines a simple rounded head with delicate openwork details. The lacy wings, flared skirt, and small halo give it a traditional Christmas look, making it a charming handmade ornament to enjoy year after year.