Christmas Turtle Crochet Pattern: Santa, Gift Box, and Christmas Tree
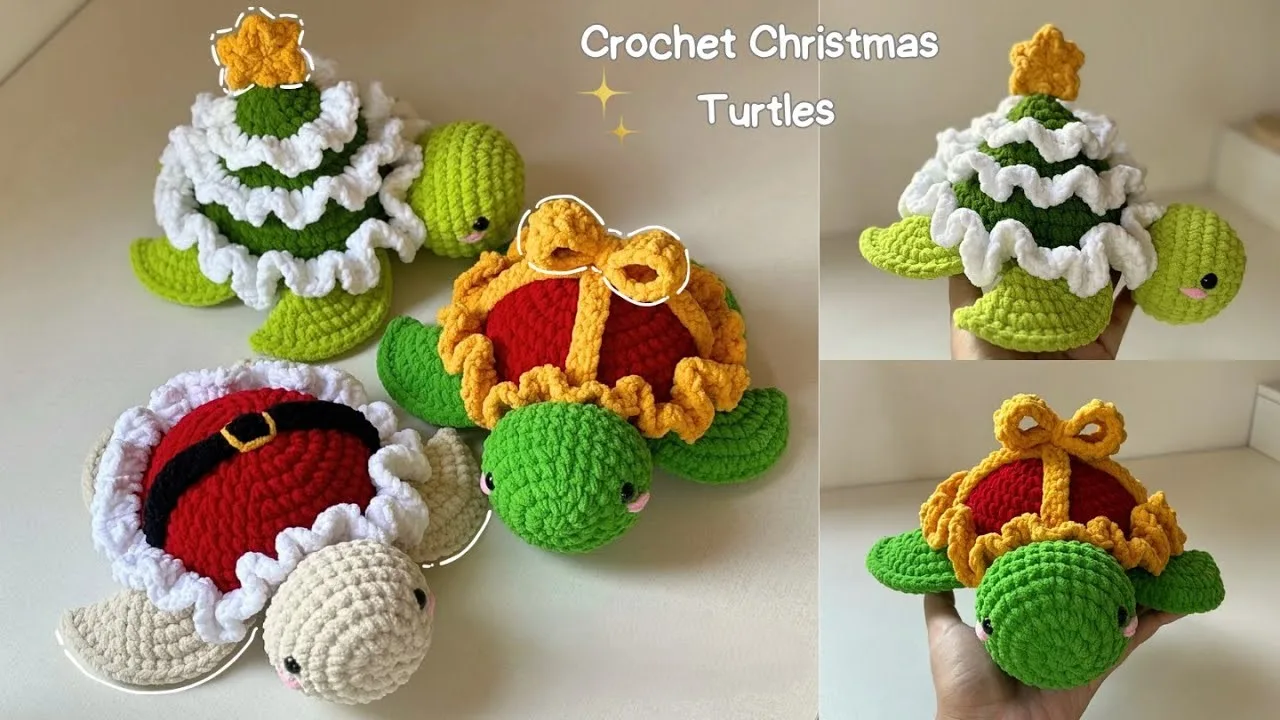
These Christmas turtles are cute, cuddly, and full of festive charm. Each little turtle has the same soft body and rounded shell, but the colors and decorations give them three different holiday looks.
You can make a Santa Claus turtle with a red shell and black belt, a gift box turtle with yellow crossed ribbons and a bow, or a Christmas tree turtle decorated with snowy layers and a little star.
All three designs use the same basic construction. You will crochet the head, four fins, and a two-part shell before adding the decorations for each Christmas style.
Christmas Turtle Crochet Pattern: Santa, Gift Box, and Christmas Tree – The Final Answer?
Materials
- Yarn in the colors needed for your chosen turtle design
- Crochet hook suitable for your yarn
- Safety eyes
- Fiberfill stuffing
- Stitch marker
- Yarn needle
- Scissors
- Craft glue for attaching the Christmas tree layers
The yarn brand, yarn weight, hook size, yarn quantity, safety-eye size, and finished measurements are not specified. Choose supplies that work well together for your project.
Color Guide
Santa Claus Turtle
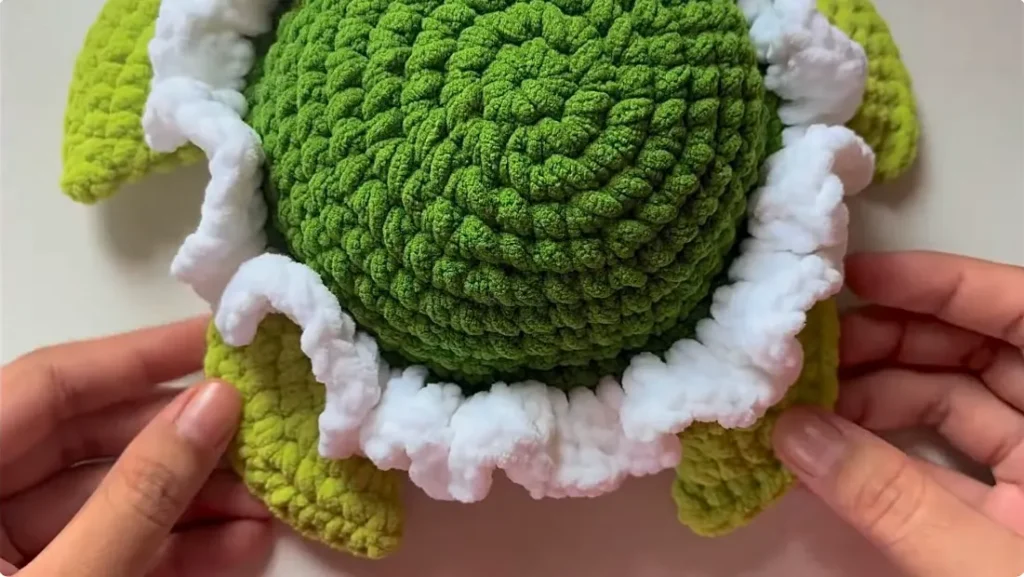
- Beige: head and lower shell/body
- Peach: four fins
- Red: upper shell
- White: shell edging
- Black: belt
- Yellow: buckle
- Pink: cheeks
Gift Box Turtle
- Green: head, lower shell/body, and four fins
- Red: upper shell
- Yellow: shell edging, straps, and bow
- Pink: cheeks
Christmas Tree Turtle
- Light green: head, lower shell/body, and four fins
- Dark green: upper shell
- White: shell edging and tree-layer trims
- Yellow: star
- Pink: cheeks
Abbreviations
The pattern uses US crochet terms.
- MR – Magic ring
- sc – Single crochet
- inc – Increase (2 sc in the same stitch)
- dec – Decrease
- hdc – Half double crochet
- dc – Double crochet
- sl st – Slip stitch
- ch – Chain
- FLO – Front loop only
- BLO – Back loop only
- st – Stitch
- sts – Stitches
- R – Round
The decreases are worked through the front loops of the next two stitches.
Crochet the Head
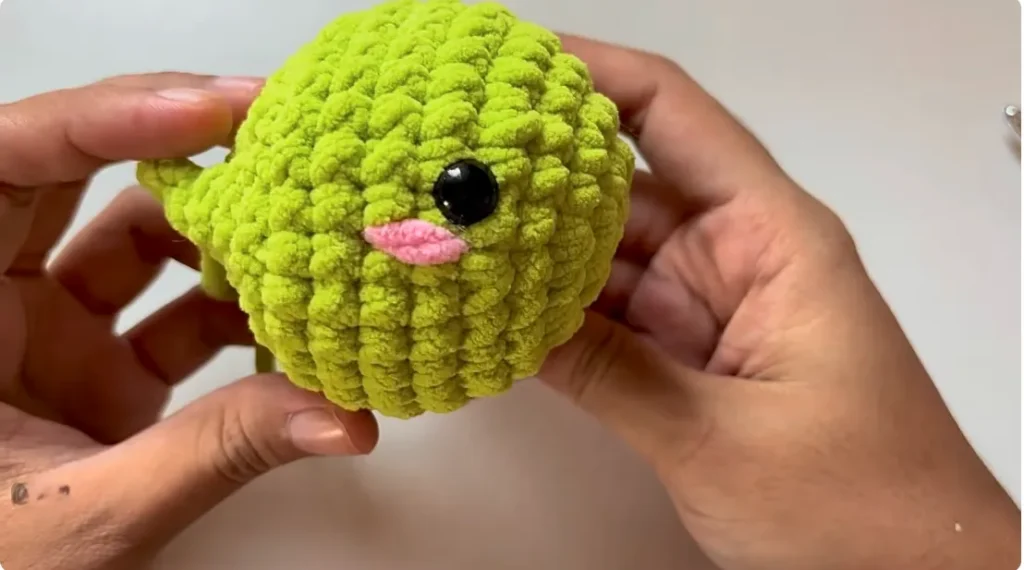
Use beige yarn for the Santa turtle, green for the gift box turtle, and light green for the Christmas tree turtle.
Work in continuous rounds and use a stitch marker to keep track of the beginning of each round.
Head Pattern
R1: Make 8 sc in a magic ring (8).
R2: Make 8 inc (16).
R3: Repeat (1 sc, 1 inc) 8 times (24).
R4: Make 24 sc (24).
R5: Repeat (2 sc, 1 inc) 8 times (32).
R6–R9: Make 32 sc in each round (32).
R10: Repeat (2 sc, 1 dec) 8 times (24).
R11: Repeat (1 sc, 1 dec) 8 times (16).
R12: Make 16 sc (16).
Attach the Safety Eyes
Attach the safety eyes between R5 and R6, leaving 13 stitches between them. Check that the eyes are aligned before securing them.
Stuff the head with fiberfill.
Close the Head
Skip the last stitch and flatten the opening. Insert your hook through the first stitch and the second-to-last stitch. Continue pairing the stitches across the opening.
Close the head with 7 sc. Make ch1, leave a long yarn tail for sewing, and cut the yarn.
Add the Cheeks
Use pink yarn and a yarn needle to embroider two small cheek details underneath the eyes. Tie the yarn ends securely and hide them inside the head.
Crochet the Hind Fins
Make 2 hind fins using peach for the Santa turtle, green for the gift box turtle, and light green for the Christmas tree turtle.
Hind Fin Pattern
R1: Make 6 sc in a magic ring (6).
R2: Make 6 inc (12).
R3: Repeat (1 sc, 1 inc) 6 times (18).
R4: Repeat (2 sc, 1 inc) 6 times (24).
R5: Repeat (3 sc, 1 inc) 6 times (30).
Do not stuff the fins.
Close the Hind Fins
Skip the last stitch and flatten the opening. Close it with 14 sc through both layers.
Make ch1, leave a long yarn tail for sewing, and cut the yarn.
Make 2 hind fins.
Crochet the Front Fins
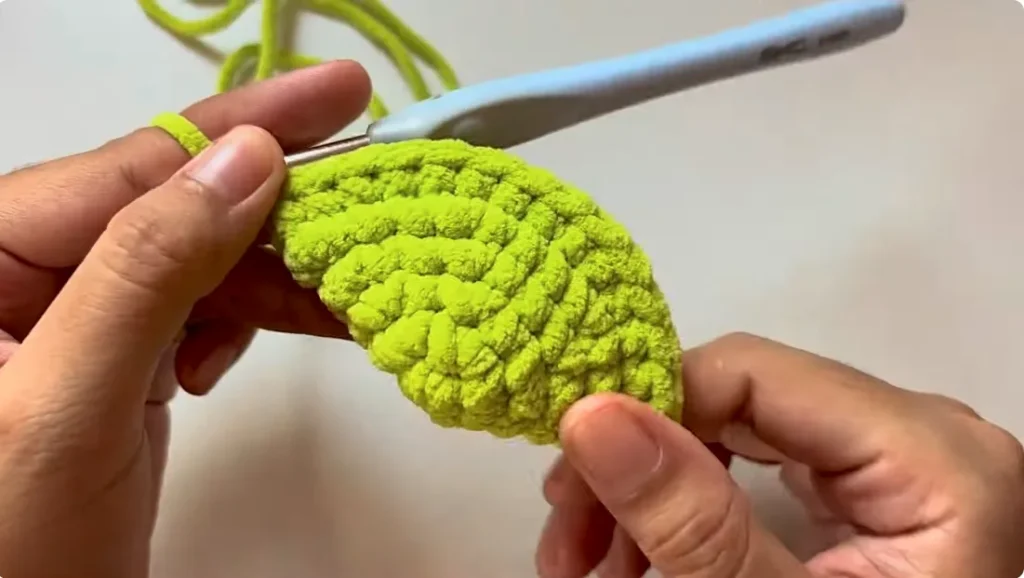
Use the same yarn color as the hind fins. Make 2 front fins.
Work R1–R5 exactly as instructed for the hind fins.
Front Fin Pattern
R6: Repeat (4 sc, 1 inc) 6 times (36).
Do not stuff the fins.
Close the Front Fins
Skip the last stitch and flatten the opening. Close it with 17 sc through both layers.
Make ch1, leave a long yarn tail for sewing, and cut the yarn.
You should now have 2 front fins and 2 hind fins.
Crochet the Upper Shell
Use red yarn for the Santa and gift box turtles, and dark green for the Christmas tree turtle.
Work in continuous rounds.
Upper Shell Pattern
R1: Make 8 sc in a magic ring (8).
R2: Make 8 inc (16).
R3: Repeat (1 sc, 1 inc) 8 times (24).
R4: Repeat (2 sc, 1 inc) 8 times (32).
R5: Repeat (3 sc, 1 inc) 8 times (40).
R6: Make 40 sc (40).
R7: Repeat (4 sc, 1 inc) 8 times (48).
R8: Make 48 sc (48).
R9: Repeat (5 sc, 1 inc) 8 times (56).
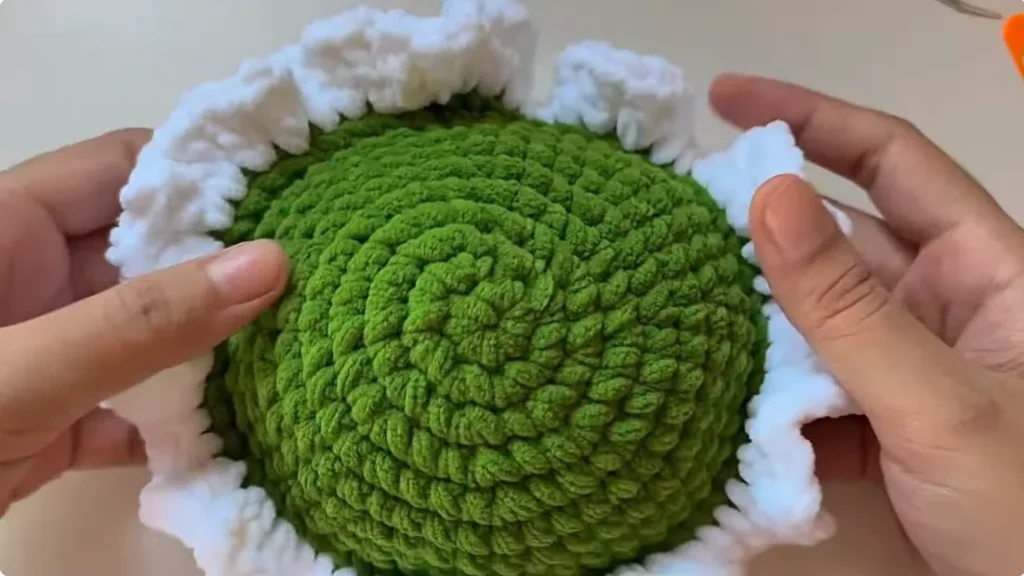
R10: Make 56 sc in FLO (56).
During the final stitch of R10, change to white yarn for the Santa and Christmas tree turtles, or yellow yarn for the gift box turtle. Join with a slip stitch to the first stitch.
Mark the back loop of the first stitch. These back loops will be used later to crochet the lower shell.
Shell Edging – R11
- Make ch2.
- In the same stitch, make 1 dc, ch1, and 1 dc.
- Repeat this combination in every stitch around the shell.
- You should have 56 decorative repetitions.
- Join with a slip stitch to the first stitch.
- Make ch1, cut the yarn, and hide the yarn tail.
The front-loop edging creates the decorative shell border, while the back loops left from R10 are used for the lower shell.
Crochet the Lower Shell and Body
Use beige yarn for the Santa turtle, green for the gift box turtle, and light green for the Christmas tree turtle.
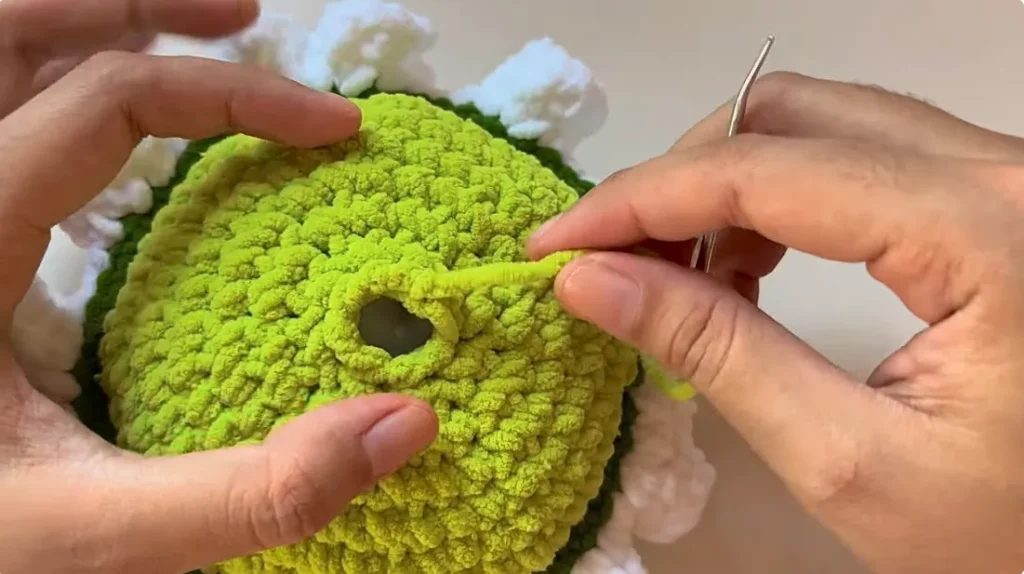
Attach the yarn to the marked back loop of the upper shell. Make ch1 and begin R1 in the same space.
Lower Shell Pattern
R1: Make 56 sc, working one sc into each available back loop (56).
R2: Repeat (5 sc, 1 dec) 8 times (48).
R3: Repeat (4 sc, 1 dec) 8 times (40).
R4: Repeat (3 sc, 1 dec) 8 times (32).
R5: Repeat (2 sc, 1 dec) 8 times (24).
R6: Repeat (1 sc, 1 dec) 8 times (16).
Stuff the body firmly after completing R6.
R7: Make 8 dec (8).
Close the Body
Cut the yarn, leaving a tail for closing. Thread the tail through a yarn needle and insert it through the front loops of the remaining 8 stitches.
Pull the yarn to close the opening. Pass the needle back through the center and hide the remaining yarn tail inside the body.
Assemble the Turtle
Once the head, four fins, upper shell, and lower shell are complete, sew the pieces together.
Attach the Head
Position the head at the front of the shell. The flattened closing edge should sit between the upper and lower shell, with the bottom part of the head facing downward.
Use the long yarn tail to sew the head in place across its 7 closing stitches. Insert the needle through the single crochet stitches rather than the chain stitches.
Add a few extra anchoring stitches in the row beneath the original attachment if needed to keep the head stable.
Secure the yarn tail and hide it inside the body.
Attach the Front Fins
Position the two front fins on either side of the lower shell, approximately 3 stitches away from the head.
Sew them between R1 and R2 of the lower shell. Attach each fin across approximately 3 stitches of its flattened edge.
Make sure the curved side of each fin faces forward. Secure the yarn tails inside the body.
Attach the Hind Fins
Position the hind fins toward the back of the turtle, approximately 8 stitches away from the front fins.
Sew each fin to the lower shell across approximately 3 stitches. Keep the curved sides facing forward, then secure the yarn tails inside the body.
The basic turtle is now assembled. Add the decorations below to create your chosen Christmas design.
Santa Claus Turtle Decorations
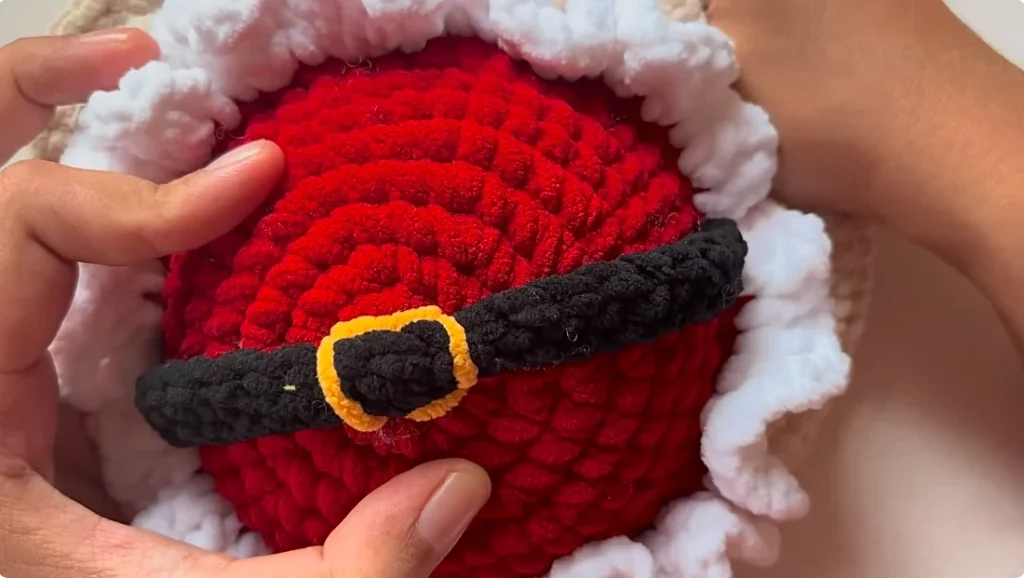
The Santa turtle has a red shell with a black belt and a small yellow buckle.
Make the Black Belt
- Make a slip knot with black yarn.
- Chain 23.
- Starting in the second chain from the hook, make 22 sc.
- Make ch1, leave a long sewing tail, and cut the yarn.
Position the strap horizontally across the center of the red upper shell and sew it in place.
Add the Yellow Buckle
Use yellow yarn to embroider a small square in the center of the black belt.
Secure the yarn ends neatly. Your Santa Claus turtle is finished.
Gift Box Turtle Decorations
The gift box turtle has two yellow straps crossing over its red shell, with a decorative bow on top.
Make the Yellow Straps
Make 2 identical straps using yellow yarn.
- Make a slip knot.
- Chain 23.
- Starting in the second chain from the hook, make 22 sc.
- Make ch1, leave a long sewing tail, and cut the yarn.
Position the first strap across the shell and sew it in place. Place the second strap across the first one in the opposite direction to create a crossed gift-box design.
Make the Bow
Use yellow yarn.
- Make a slip knot and chain 23.
- Starting in the second chain from the hook, make 1 sc.
- Make 2 hdc across the next 2 chains.
- Make 5 dc across the next 5 chains.
- Make 2 hdc across the next 2 chains.
- Make 1 sc in the next chain.
Repeat the same stitch sequence along the remaining foundation chain. Work the corresponding sections along the opposite side of the chain, completing 4 sections in total.
Join with a slip stitch to the first stitch. Make ch1, leave a long sewing tail, and cut the yarn.
Shape and Attach the Bow
Use a yarn needle to sew the two sides of the bow together.
Wrap yarn around the middle approximately 7–8 times and secure it to create the bow shape.
Sew the bow to the top of the crossed yellow straps. Secure and hide the remaining yarn tails.
Your gift box turtle is finished.
Christmas Tree Turtle Decorations
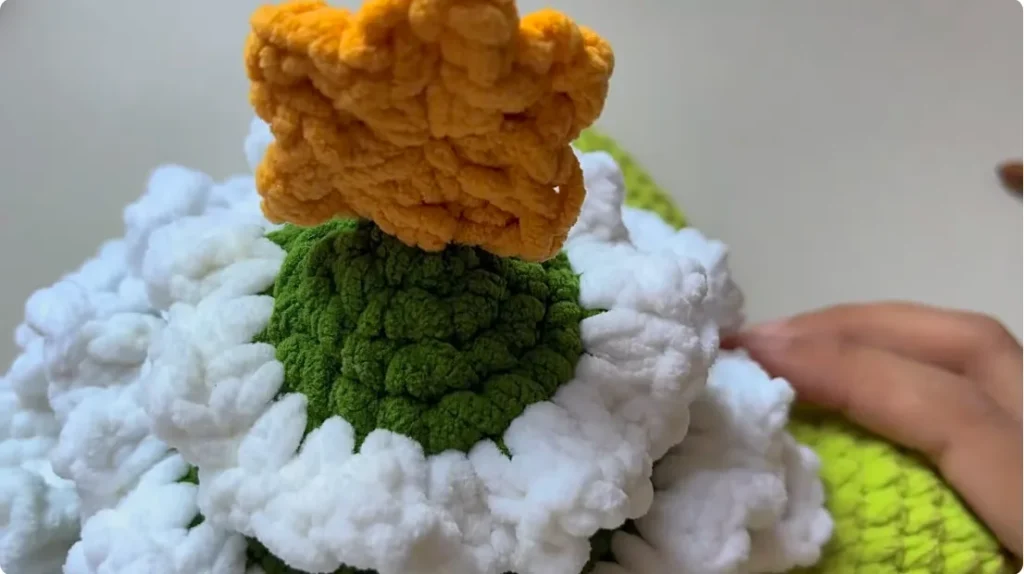
The Christmas tree turtle has two green tree layers with white edging and a yellow star on top.
Make the Top Tree Layer
Use light green yarn.
R1: Make 6 sc in a magic ring (6).
R2: Make 6 inc (12).
R3: Repeat (1 sc, 1 inc) 6 times (18).
R4: Repeat (2 sc, 1 inc) 6 times (24).
During the final stitch of R4, change to white yarn. Join with a slip stitch to the first stitch and make ch2.
White Edging – R5
In the same stitch, make 1 hdc, ch1, and 1 hdc.
Repeat this combination in every stitch around, making 24 decorative repetitions.
Join with a slip stitch to the first stitch. Make ch1, cut the yarn, and hide the tail.
Make the Middle Tree Layer
Use light green yarn.
R1: Make 6 sc in a magic ring (6).
R2: Make 6 inc (12).
R3: Repeat (1 sc, 1 inc) 6 times (18).
R4: Repeat (2 sc, 1 inc) 6 times (24).
R5: Repeat (3 sc, 1 inc) 6 times (30).
R6: Repeat (4 sc, 1 inc) 6 times (36).
R7: Repeat (5 sc, 1 inc) 6 times (42).
During the final stitch of R7, change to white yarn. Join with a slip stitch to the first stitch and make ch2.
White Edging – R8
In the same stitch, make 1 hdc, ch1, and 1 hdc.
Repeat this combination in every stitch around, making 42 decorative repetitions.
Join with a slip stitch to the first stitch. Make ch1, cut the yarn, and hide the tail.
Make the Yellow Star
- Make a magic ring.
- Make 1 sc and 1 dc into the ring.
- Chain 2, then make another 1 dc.
- Repeat the dc, ch2, dc combination four more times.
- Make 1 sc.
- Pull the yarn tail to close the ring.
- Join with a slip stitch to the first stitch.
- Make ch1 and cut the yarn.
This creates a five-point star. Hide the yarn tail and attach the star to the top tree layer.
Attach the Tree Layers
Position the middle layer on the upper shell. Apply craft glue around the inner edge, leaving a small space open.
Add a little stuffing underneath the layer, then apply glue to the remaining section and secure it in place.
Attach the top layer in the same way. Finish by attaching the yellow star to the top.
Keep the white edging visible so the layers look like snowy branches of a Christmas tree.
Your Christmas tree turtle is finished.
Final Finishing
Check that all yarn tails are secured and hidden inside the turtle. Make sure the head and fins are firmly attached and that the decorative pieces are positioned neatly.
You now have three festive crochet turtle designs: Santa Claus, Gift Box, and Christmas Tree. Each one uses the same basic turtle construction, with different colors and holiday decorations to give it a special Christmas look.