Hello Kitty Amigurumi Pattern
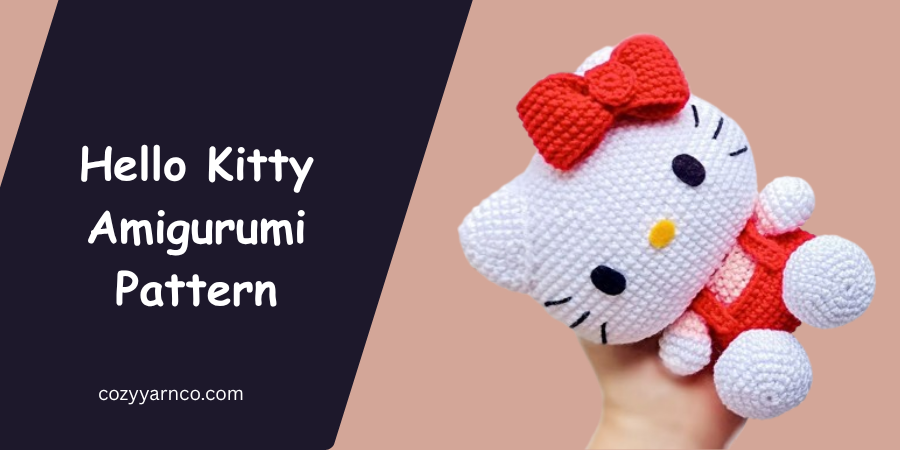
This Hello Kitty amigurumi pattern combines simple crochet stitches with a rounded oval head, soft ears, a red overall-style body, felt facial features, embroidered whiskers, and a raised bow. The project is made from separate crocheted pieces that are assembled together to create the finished character.
The head and body begin with foundation chains and are worked around both sides of the chain. The ears, arms, legs, tail, overall straps, and bow are crocheted separately and attached during assembly. The finished Hello Kitty is approximately 15 cm high and 12 cm wide.
Hello Kitty Amigurumi Pattern – The Short Answer?
Materials
- 2 mm crochet yarn in white
- 2 mm crochet yarn in red
- 2 mm crochet yarn in pink
- Black yarn for whiskers
- 2.0 mm crochet hook
- Fiberfill or silicone stuffing
- Black felt for the eyes
- Yellow felt for the nose
- Yarn needle
- Scissors
- Stitch marker
- Pins
- Liquid silicone or suitable craft adhesive
Abbreviations
- MR — magic ring
- ch — chain
- sc — single crochet
- inc — increase
- dec — decrease
- sl st — slip stitch
- hdc — half double crochet
- BLO — back loop only
- st — stitch
Head
Work the head in white.
The head begins with 14 chains and is worked around both sides of the foundation chain.
Round 1
Ch 14.
Starting in the second chain from the hook, work 1 inc, 11 sc, 2 inc, 11 sc, and 1 inc.
You should have 30 stitches.
Round 2
Work 2 inc, 11 sc, 4 inc, 11 sc, and 2 inc.
You should have 38 stitches.
Round 3
Work 2 sc, 1 inc, 13 sc, 1 inc, 4 sc, 1 inc, 13 sc, 1 inc, and 2 sc.
You should have 42 stitches.
Round 4
Work (6 sc, 1 inc) × 6.
You should have 48 stitches.
Round 5
Work 2 inc, 20 sc, 3 inc, 22 sc, and 1 inc.
You should have 54 stitches.
Round 6
Work (8 sc, 1 inc) × 6.
You should have 60 stitches.
Round 7
Work 2 inc, 26 sc, 3 inc, 28 sc, and 1 inc.
You should have 66 stitches.
Round 8
Work (10 sc, 1 inc) × 6.
You should have 72 stitches.
Rounds 9–18
Work 72 sc around.
You should have 72 stitches in each round.
Round 19
Work (10 sc, 1 dec) × 6.
You should have 66 stitches.
Round 20
Work 2 dec, 28 sc, 3 dec, 26 sc, and 1 dec.
You should have 60 stitches.
Round 21
Work (8 sc, 1 dec) × 6.
You should have 54 stitches.
Round 22
Work 2 dec, 22 sc, 3 dec, 20 sc, and 1 dec.
You should have 48 stitches.
Round 23
Work 48 sc around.
You should have 48 stitches.
Round 24
Work (6 sc, 1 dec) × 6.
You should have 42 stitches.
Round 25
Work (5 sc, 1 dec) × 6.
You should have 36 stitches.
Round 26
Work (4 sc, 1 dec) × 6.
You should have 30 stitches.
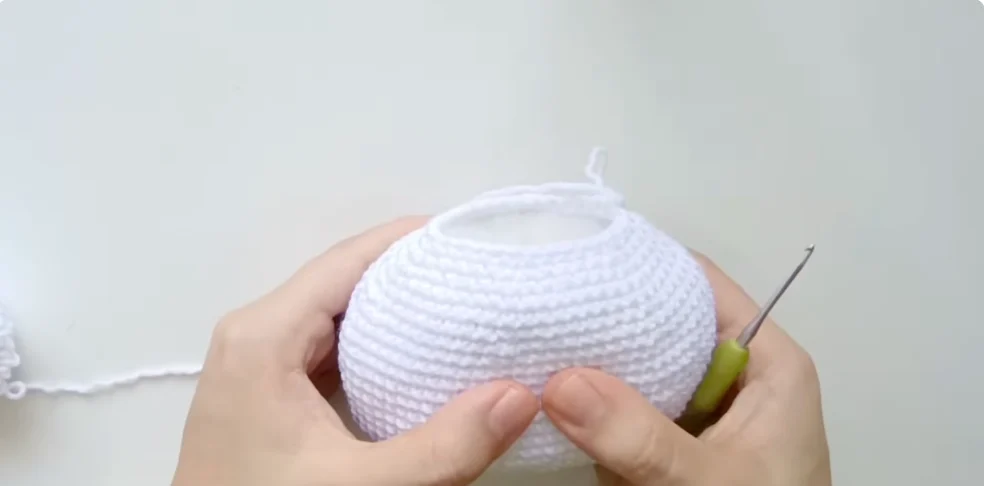
Begin stuffing the head. Shape it carefully as you continue so it keeps its rounded form.
Round 27
Work (3 sc, 1 dec) × 6.
You should have 24 stitches.
Continue stuffing and shaping the head.
Round 28
Work (2 sc, 1 dec) × 6.
You should have 18 stitches.
Finish adding the required stuffing.
Round 29
Work (1 sc, 1 dec) × 6.
You should have 12 stitches.
Round 30
Work 6 dec.
You should have 6 stitches.
Fasten off, leaving a tail. Using a yarn needle, pass the yarn through the front loops of the remaining 6 stitches. Pull to close the opening, pass the needle through the center, and hide the remaining yarn.
Ears
Make 2 in white.
The ears are lightly stuffed during assembly so they keep their gentle shape.
Round 1
Work 6 sc into MR.
You should have 6 stitches.
Round 2
Work 6 inc.
You should have 12 stitches.
Round 3
Work (1 sc, 1 inc) × 6.
You should have 18 stitches.
Round 4
Work (5 sc, 1 inc) × 3.
You should have 21 stitches.
Round 5
Work (6 sc, 1 inc) × 3.
You should have 24 stitches.
Round 6
Work (5 sc, 1 inc) × 4.
You should have 28 stitches.
Round 7
Work (1 inc, 13 sc) × 2.
You should have 30 stitches.
Fasten off and leave a long sewing tail. Make the second ear in the same way.
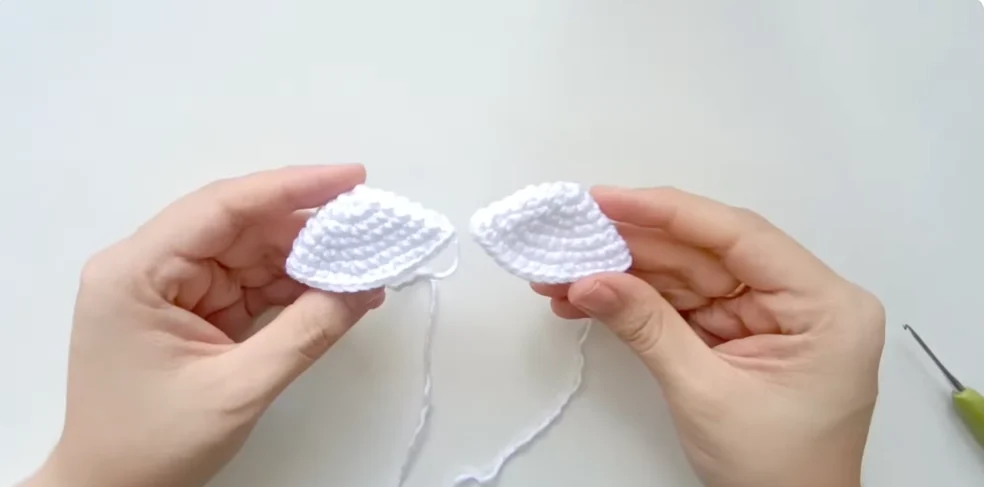
Attach the Ears
Place the ears on the head and check their position before sewing. Do not flatten them completely. Add a small amount of stuffing while sewing so they retain a gently rounded shape.
Sew both ears securely to the head.
Facial Features
Eyes
Cut two oval shapes from black felt.
Each eye should measure approximately 13 mm high and 10 mm wide.
Position the eyes beginning around Round 13 of the head. They should occupy approximately 3–4 rounds in height, with approximately 11 stitches visible between the two eyes.
Check the placement on the finished head before permanently attaching the felt.
Nose
Cut one oval from yellow felt.
The approximate measurement is 11 mm wide and 8 mm high.
Place the nose between the eyes and slightly below their center line.
Whiskers
Use black yarn and a yarn needle.
For each side of the face:
- Bring the yarn out approximately 3–4 stitches behind the eye.
- Bring the yarn out around the upper level of the eye.
- Count approximately 4 stitches and create the upper whisker diagonally.
- Place the second whisker more horizontally.
- Place the third whisker lower and at a slight diagonal.
The three whiskers should fan naturally outward from each side of the face.
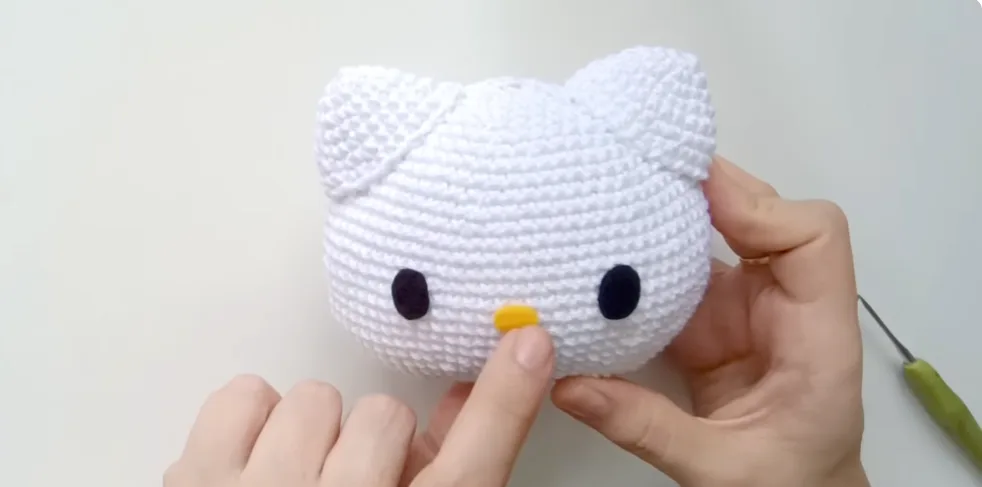
Body
Begin in the overall color. The supplied construction uses red for this section.
Chain 14 and begin in the second chain from the hook, working around both sides of the chain.
Round 1
Work 1 inc, 11 sc, 2 inc, 11 sc, and 1 inc.
You should have 30 stitches.
Round 2
Work 2 inc, 11 sc, 4 inc, 11 sc, and 2 inc.
You should have 38 stitches.
Round 3
Work (2 inc, 17 sc) × 2.
You should have 42 stitches.
Rounds 4–9
Work 42 sc around.
You should have 42 stitches in each round.
Round 10
Work (5 sc, 1 dec) × 6.
You should have 36 stitches.
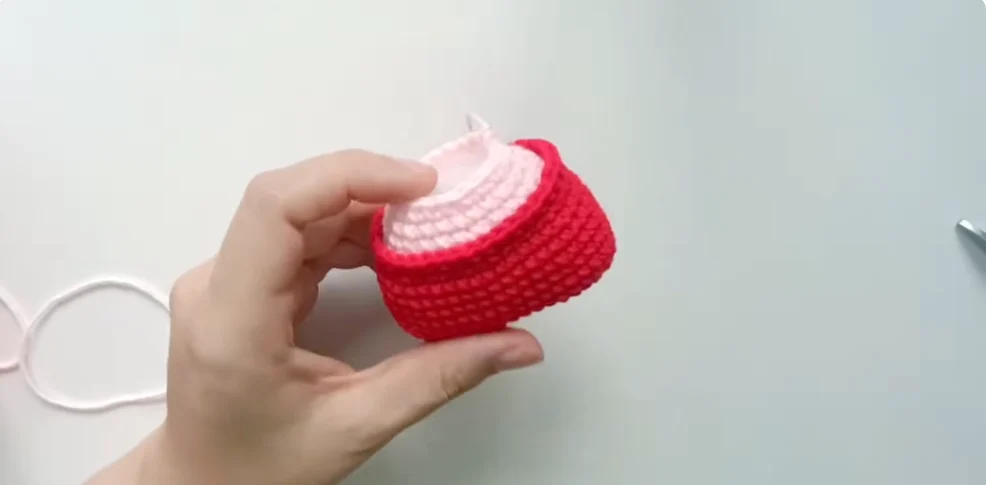
Before closing the final stitch, change from the overall color to pink.
Round 11 — BLO
Work in back loops only:
(4 sc, 1 dec) × 6.
You should have 30 stitches.
Round 12
Work (3 sc, 1 dec) × 6.
You should have 24 stitches.
Round 13
Work 24 sc around.
You should have 24 stitches.
Round 14
Work (4 sc, 1 dec) × 4.
You should have 20 stitches.
Fasten off and leave a long tail for sewing.
Restore the Overall Color
Take the red yarn and attach it to the loose loops at the back of the body.
Work one round of sc through these loops. Keep the stitches facing upward so the additional round creates a neat finished edge around the color-change area.
Stuff the body evenly and sew it securely to the underside of the head, keeping it centered.
Arms
Make 2 in white.
Round 1
Work 6 sc into MR.
You should have 6 stitches.
Round 2
Work 6 inc.
You should have 12 stitches.
Round 3
Work (1 sc, 1 inc) × 6.
You should have 18 stitches.
Rounds 4–5
Work 18 sc around.
You should have 18 stitches in each round.
Change to pink after the final stitch of the second 18-stitch round.
Round 6
Work (4 sc, 1 dec) × 3.
You should have 15 stitches.
Round 7
Work (3 sc, 1 dec) × 3.
You should have 12 stitches.
Round 8
Work (1 sc, 1 dec) × 4.
You should have 8 stitches.
Stuff only the white portion of the arm.
Flatten the opening and work 4 sc through the available stitches to close it. Fasten off and leave a sewing tail.
Make the second arm in the same way.
Attach the Arms
Sew the arms to the body approximately two rounds below the head/body seam, just above the red overall section.
Overall Straps
Make 2 in red.
Foundation
Ch 17.
Starting in the third chain from the hook, work 15 hdc.
Fasten off and cut the yarn.
Make the second strap in the same way.
Attach the straps to the front of the body using suitable adhesive, positioning them over the shoulders.
Legs
Make 2 in white.
Round 1
Work 6 sc into MR.
You should have 6 stitches.
Round 2
Work 6 inc.
You should have 12 stitches.
Round 3
Work (1 sc, 1 inc) × 6.
You should have 18 stitches.
Round 4
Work (2 sc, 1 inc) × 6.
You should have 24 stitches.
Round 5
Work (3 sc, 1 inc) × 6.
You should have 30 stitches.
Rounds 6–9
Work 30 sc around.
You should have 30 stitches in each round.
Round 10
Work (3 sc, 1 dec) × 6.
You should have 24 stitches.
Round 11
Work (2 sc, 1 dec) × 6.
You should have 18 stitches.
Round 12
Work (1 sc, 1 dec) × 6.
You should have 12 stitches.
Fasten off and leave a sewing tail. Stuff the legs and make the second leg in the same way.
Attach the Legs
Sew the legs to the lower body.
Position them so some of the red overall section remains visible between the legs, each leg sits beneath its corresponding arm, and the legs help create a stable sitting position.
Sew securely.
Tail
Work in white.
Round 1
Work 6 sc into MR.
You should have 6 stitches.
Round 2
Work 6 inc.
You should have 12 stitches.
Round 3
Work (1 sc, 1 inc) × 6.
You should have 18 stitches.
Rounds 4–6
Work 18 sc around.
You should have 18 stitches in each round.
Round 7
Work (1 sc, 1 dec) × 6.
You should have 12 stitches.
Round 8
Work (1 sc, 1 dec) × 4.
You should have 8 stitches.
Fasten off and leave a long sewing tail.
Stuff the tail.
Attach the Tail
Sew the tail to the body so that it functions as a support. Position it carefully to help Hello Kitty sit independently.
Bow
Work in red.
The bow is worked in joined rounds rather than a continuous spiral.
Foundation
Ch 38.
Make sure the chain does not twist. Join the chain with a sl st to form a ring.
Round 1
Ch 1.
From the same point, work 38 sc.
Close the round with a sl st in the first sc of the round.
Do not work into the joining slip stitch or the chain.
Rounds 2–7
For each round:
- Ch 1
- 38 sc
- Close with a sl st in the first sc of the previous round.
Continue until 7 total rounds have been completed.
On the final round, close with a sl st and fasten off, leaving a long tail.
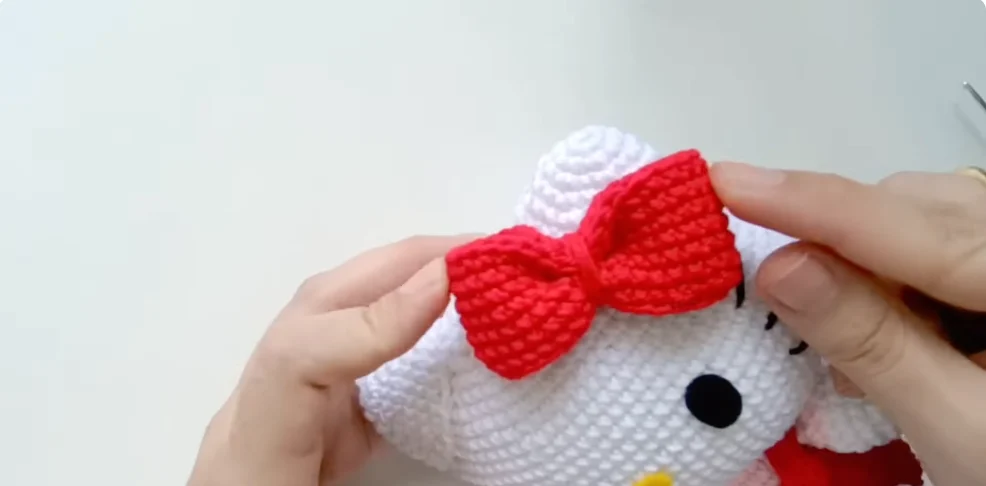
Shape the Bow
Pull the finished tube out so the closure sits toward the back.
Place the center of the piece together. Using the long yarn tail, wrap the center firmly several times.
Pull enough to define the center without breaking the yarn. Shape both sides until the bow has the desired raised appearance, then secure the center at the back.
Attach the Bow
Position the bow on the head.
Use suitable adhesive to attach the bow to the head. Pins can temporarily hold the bow in position while the adhesive dries.
Bow Center
Work in red.
Round 1
Work 6 sc into MR.
You should have 6 stitches.
Round 2
Work 6 inc.
You should have 12 stitches.
Fasten off.
Use a yarn needle to create an invisible closure. Attach the small center piece to the middle of the bow using suitable adhesive.
Final Assembly
Once all the pieces are complete, assemble Hello Kitty in this order:
- Confirm that the head is firmly stuffed and closed.
- Sew both ears to the head.
- Add the black felt eyes.
- Add the yellow felt nose.
- Embroider the three whiskers on each side.
- Stuff and sew the body beneath the head.
- Sew both arms approximately two rounds below the head/body seam.
- Attach the two red overall straps.
- Stuff and sew both legs to the bottom of the body.
- Stuff and attach the tail as a sitting support.
- Shape and attach the red bow.
- Attach the bow center.
- Check all seams and hide the remaining yarn tails.
Finishing Checks
Before calling the project finished, check the main construction points.
The head should have reached 72 stitches at its widest point and should finish with 6 stitches before closure. Each ear should finish at 30 stitches.
The body should begin with a 14-chain foundation, reach 42 stitches, decrease to 36 stitches, change to pink, use the BLO shaping round, and finish at 20 stitches.
The arms should finish with 8 stitches before flattening, the legs should finish with 12 stitches, and the tail should finish with 8 stitches.
Check the facial features before permanently fixing them. The eyes should be level, approximately 11 stitches should remain visible between them, and the nose should sit slightly below the eyes.
Finally, make sure the legs and tail allow the finished Hello Kitty to sit upright, with part of the red overall section still visible between the legs.
The finished Hello Kitty is approximately 15 cm high and 12 cm wide, with the rounded head, soft ears, red overall section, facial details, supportive tail, and raised bow completing the character.