Crochet Christmas Ornaments Free Pattern
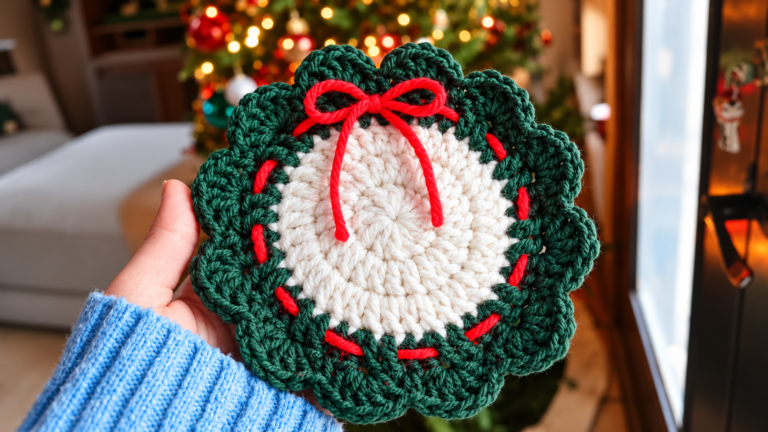
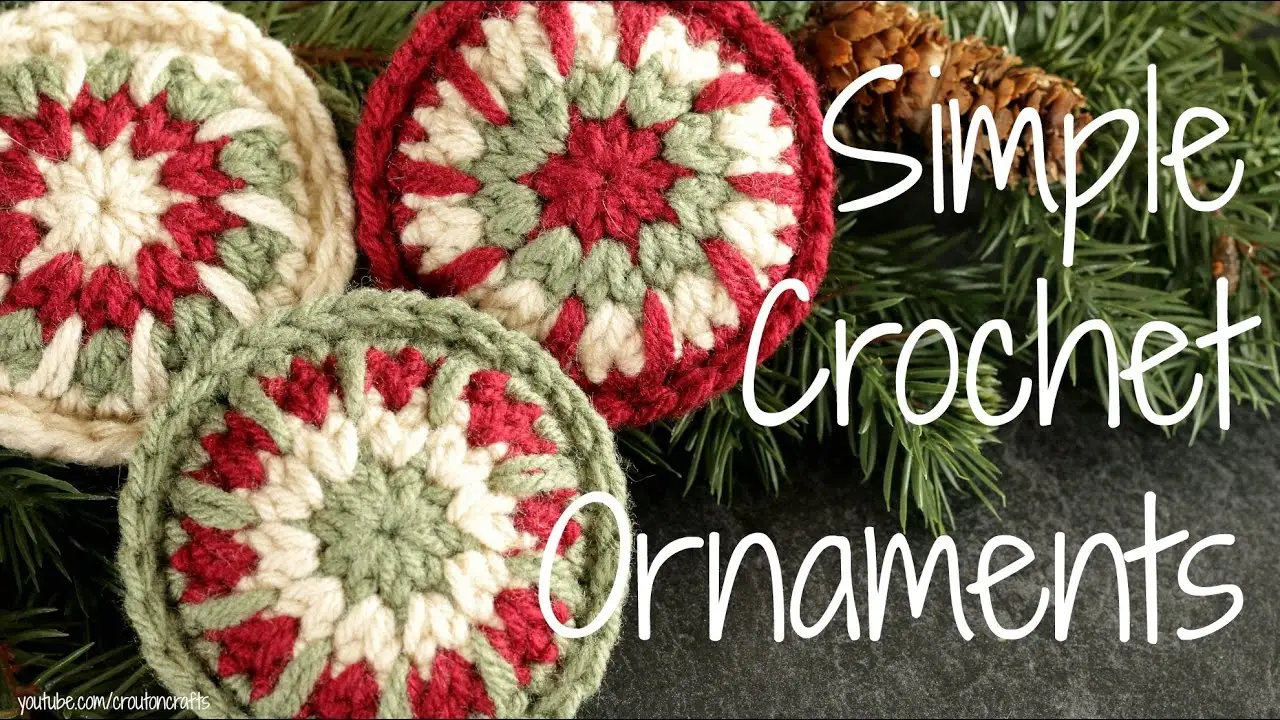
If you’re looking for a simple crochet project to add a handmade touch to your Christmas tree, these crochet Christmas ornaments are a lovely option. They’re made with just four rounds of crochet stitches, and each ornament comes together by joining two matching medallions.
The design is simple, colorful, and a great way to use up yarn scraps. You can choose traditional Christmas colors or mix and match three colors from your yarn stash. Each ornament takes about 20 minutes to make, so it’s easy to put together a few for your tree or to give as handmade gifts.
Crochet Christmas Ornaments Free Pattern – The Short Answer?
Pattern Overview
- Skill level: Beginner-friendly
- Construction: Two matching four-round medallions
- Time: Approximately 20 minutes per ornament
- Crochet hook: US Size H, approximately 5.0 mm
- Yarn: Three colors
- Stitches: Half double crochet, single crochet, and long half double crochet
- Finishing: Single crochet joining with an attached hanging loop
Materials
- Yarn in three colors:
- Color A: Used for Rounds 1 and 4
- Color B: Used for Round 2
- Color C: Used for Round 3
- US Size H crochet hook, approximately 5.0 mm
- Scissors
- Tapestry needle
- Optional fiberfill, if you prefer using it instead of the leftover yarn tails
You don’t need to use the exact colors shown in the demonstration. Traditional Christmas colors work nicely, but leftover yarn in three coordinating colors will work too. The original transcript doesn’t specify the yarn brand, weight, or quantity.
Abbreviations
- ch – Chain
- hdc – Half double crochet
- sc – Single crochet
- sl st – Slip stitch
- st – Stitch
- rnd – Round
Crochet Christmas Ornament Pattern
Each finished ornament has two identical crochet medallions, one for the front and one for the back. Make the first medallion using the four rounds below, then repeat the same instructions for the second one.
First Medallion
Round 1 – Color A
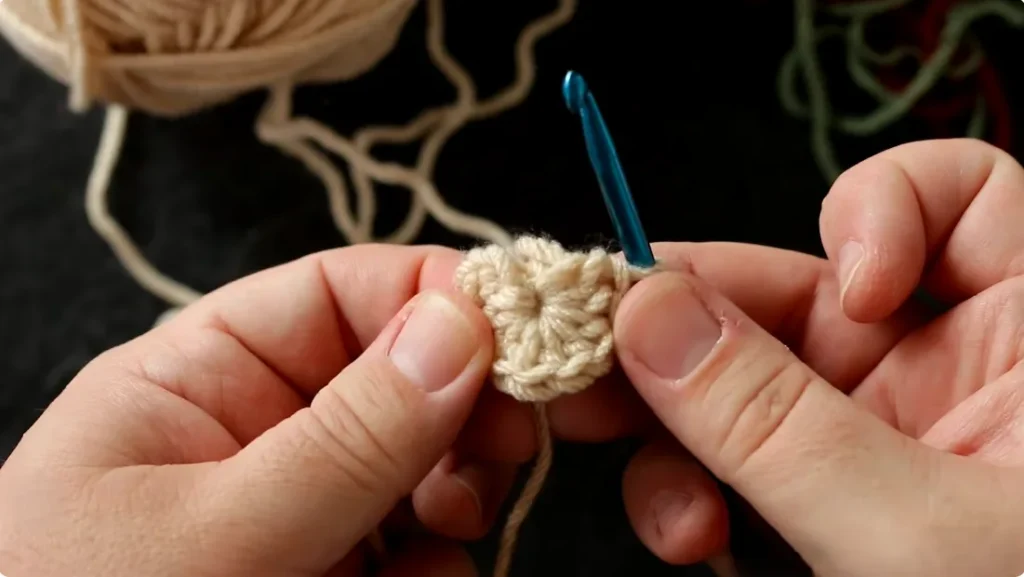
Start with a magic ring and chain 2. These beginning chains count as your first half double crochet.
Work 9 more half double crochets into the ring. You should have 10 hdc in total, including the beginning chain 2.
Pull the yarn tail to close the center, then join with a slip stitch at the top of the beginning chain 2.
Leave a long yarn tail before fastening off. You’ll use these leftover tails later when filling the ornament.
Round 2 – Color B
Join Color B in the space between two stitches from the previous round. For this round, you’ll be working between the stitches rather than into their top loops.
Chain 2, counting it as your first half double crochet. Work another hdc into that same space.
Continue around, placing 2 hdc between each pair of stitches from the previous round. By the end of the round, you should have 20 hdc.
Join with a slip stitch at the top of the beginning chain 2. Leave a long tail and fasten off.
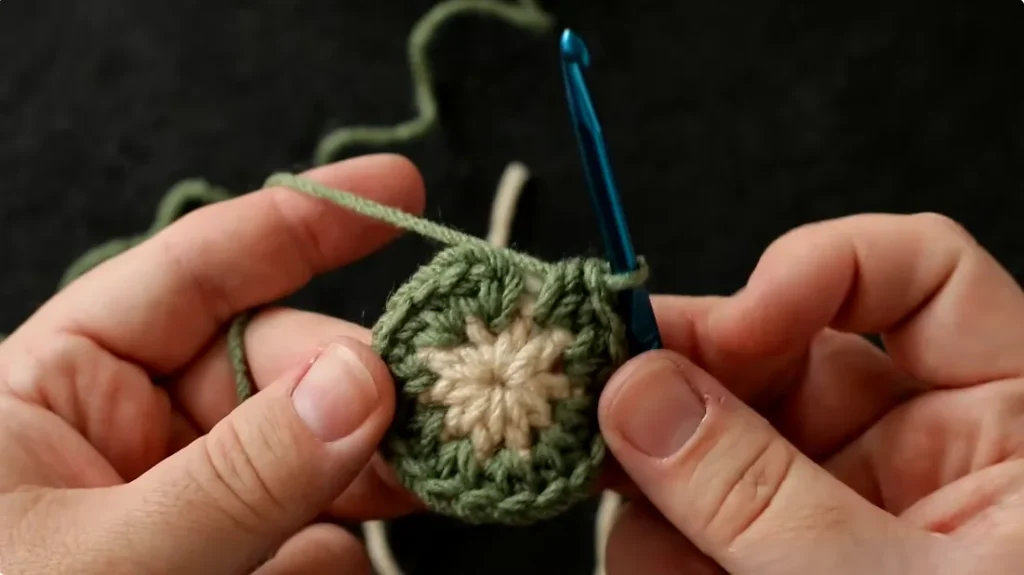
Round 3 – Color C
Join Color C between the V-stitches of the previous round. Just like in Round 2, work between the stitches instead of into their top loops.
Chain 2, which counts as your first half double crochet.
In the next V-stitch space, work 2 hdc between the two stitches. In the space between the next V-stitches, work 1 hdc.
Keep repeating this pattern all the way around:
- Work 2 hdc in each V-stitch space.
- Work 1 hdc in each space between the V-stitches.
Finish with 2 hdc in the final V-stitch space. You should have 30 hdc in total.
Join with a slip stitch at the top of the beginning chain 2. Leave a long yarn tail and fasten off.
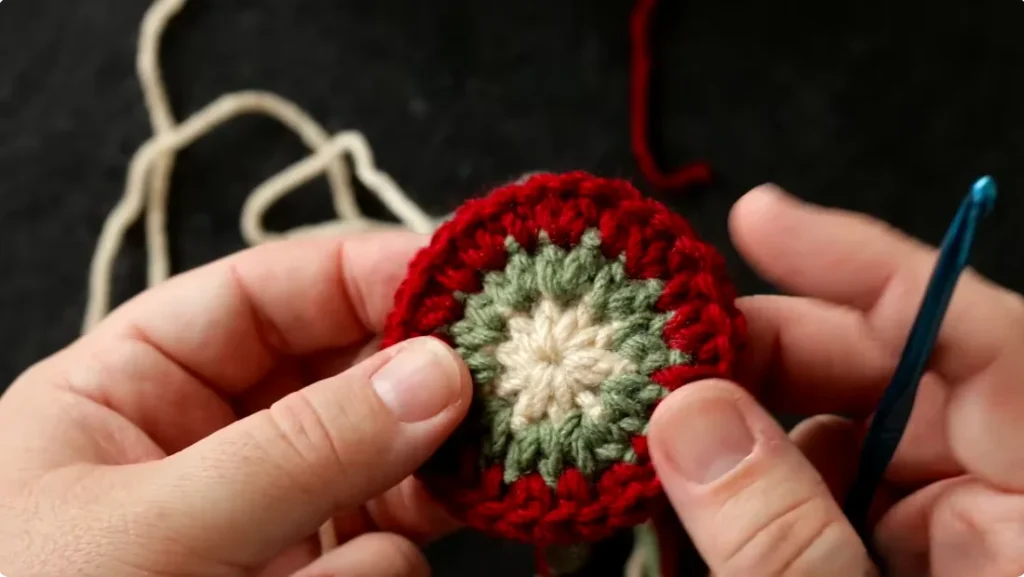
Round 4 – Color A
For the final round, use Color A again, the same color you used for the center. This time, work into the top loops of the stitches as you normally would in crochet.
Find the first V-stitch from the previous round and insert your hook into the top loops of its first half double crochet.
Chain 1 and work a single crochet into the same stitch. Work another single crochet into the next stitch.
Now find the single half double crochet between the V-stitches. This is where you’ll make the long half double crochet.
Yarn over and insert your hook down into the original spot where that single hdc was worked. Pull up a long loop, keeping it loose enough to reach the height of the surrounding stitches. Yarn over and pull through all 3 loops on your hook.
Since you’ve worked into the space below that original stitch, skip the stitch underneath. Then work 2 single crochets into the next V-stitch.
Continue around, repeating the same sequence:
- Work 2 sc over each V-stitch.
- Work 1 long hdc down into the single hdc between V-stitches.
As you come back around to the beginning, the remaining stitch should be a long half double crochet.
Join with a slip stitch at the top of the first single crochet. Leave a long yarn tail and fasten off.
Your first medallion is ready!
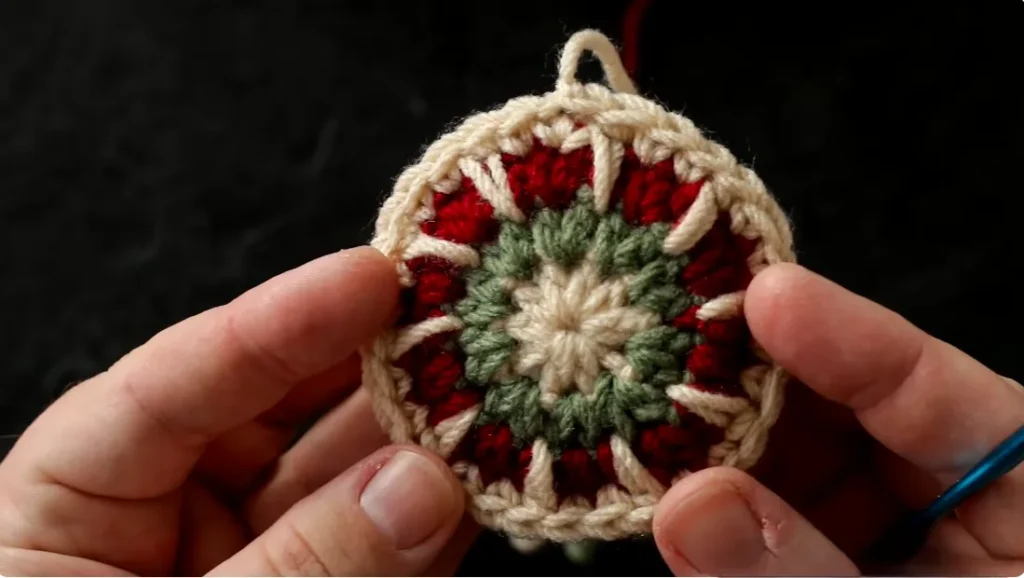
Second Medallion
Make a second medallion using exactly the same four rounds and color arrangement.
You don’t need to finish off the second piece completely before joining it to the first one. Once both pieces are ready, you can put them together to make the double-sided ornament.
Joining the Two Medallions
Place the two medallions together with their wrong sides facing each other and their right sides facing outward.
Start joining them with a chain 1, then work a single crochet through the corresponding top stitches of both layers. Continue around the edge, inserting your hook through the stitches of the front and back medallions together.
Keep working single crochet stitches around until most of the edge is joined.
If you prefer, you can sew the two pieces together with a tapestry needle. However, the original demonstration joins them with single crochet, which is a quick way to finish the edge.
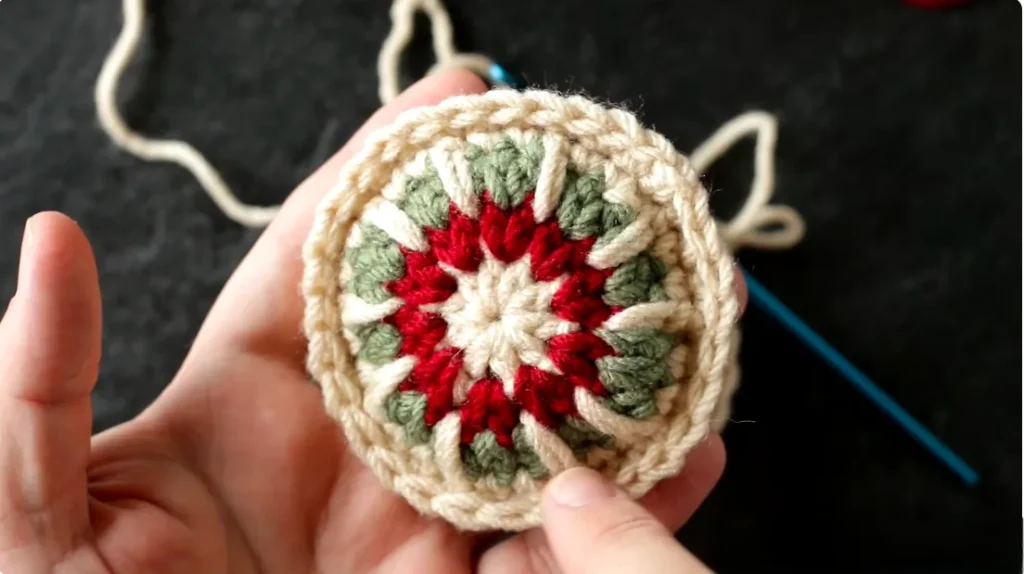
Filling the Ornament
Before closing the remaining opening, tuck the loose yarn tails from the previous rounds inside the ornament. These leftover ends help fill the inside, which is why they were left long.
If you’d rather have a neater inside, you can fasten off the ends and use a little fiberfill instead.
Just make sure the working yarn and the hanging loop stay outside while you’re tucking everything inside.
Adding the Hanging Loop
The hanging loop is added while you’re joining the two medallions, so there’s no need to attach it separately afterward.
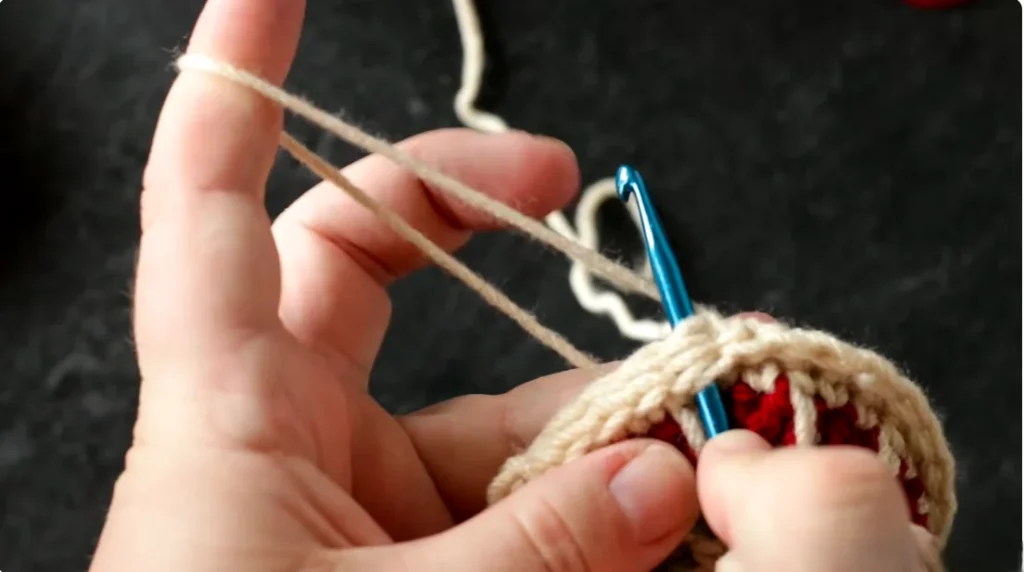
When you reach the spot where you’d like the hanger, pull the working yarn out to form a loop. A length of about 2–3 inches works well.
Take your crochet hook behind the yarn and catch both strands of the loop. Pull them through the stitches where you’re joining the two medallions.
Adjust the loop until you’re happy with its length. Then yarn over with your working yarn and pull through all three loops on your hook to complete the single crochet.
Your hanging loop is now attached. Continue joining the remaining stitches around the ornament.
Invisible Join and Finishing
Once you’ve worked all the way around, finish the joining round with an invisible join instead of a regular slip stitch.
Leave a long yarn tail and pull it through the final stitch. Thread the tail onto a tapestry needle.
Insert the needle underneath the bottom loops of the first single crochet in the joining round and pull the yarn through. Then take the needle back through the top of the final stitch where the yarn came out.
Pull gently until the join blends in with the surrounding stitches. Avoid pulling too tightly, as this can affect the look of the edge.
Weave in the remaining yarn tail and tuck it inside the ornament.
You can also gently adjust the long stitches with your fingers to help them sit neatly.
And that’s it! Your crochet Christmas ornament is finished, with two matching sides and a hanging loop ready for the tree. Make a few in different color combinations to create a cheerful handmade decoration for the holiday season.