crochet dragon pattern free amigurumi
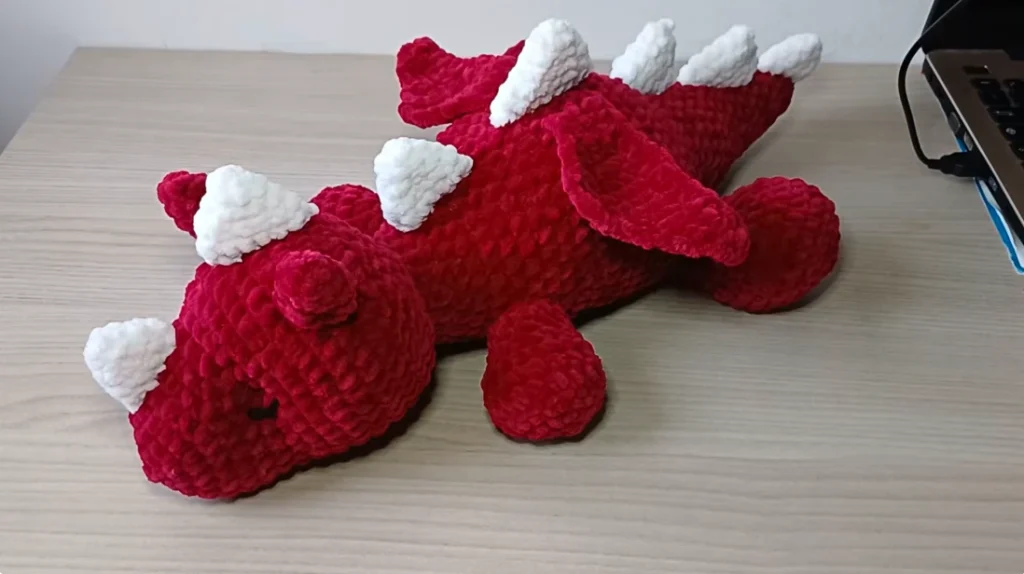
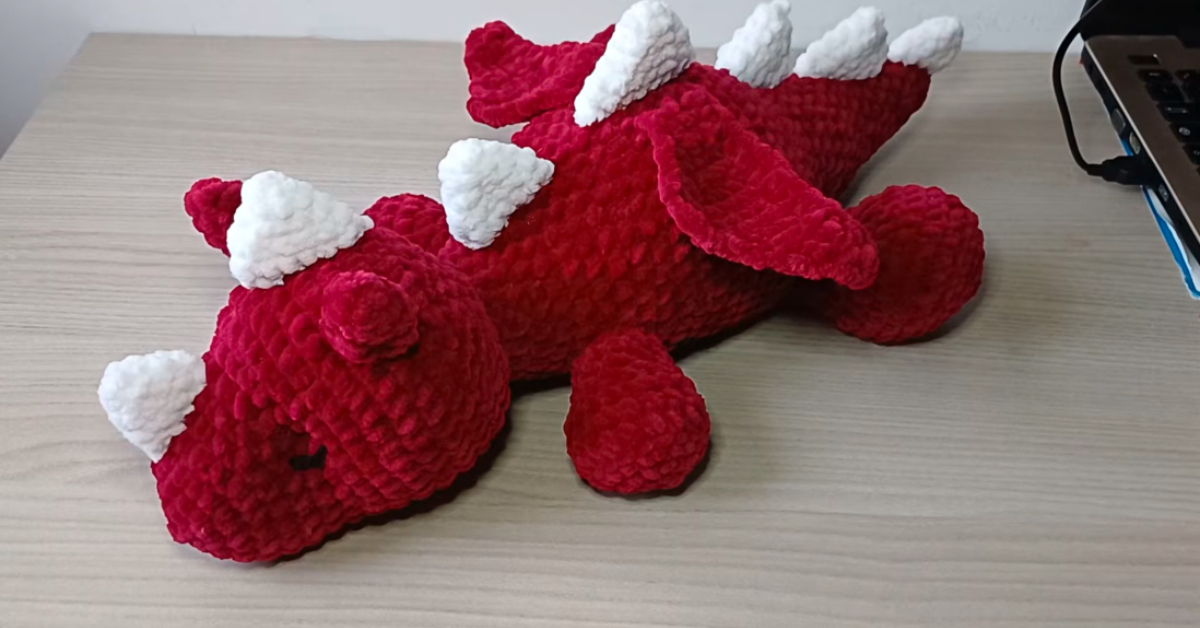
This crochet dragon is made with soft velvet yarn and features a rounded head and body, a shaped tail, folded ears, four paws, decorative spikes, and two wings. Most of the main pieces are worked in single crochet, with increases and decreases used to shape the dragon.
The head and body each include a deliberately flatter section that forms the underside and belly. Keeping these sections in the correct position is important when stuffing and assembling the dragon.
crochet dragon pattern free amigurumi – The Short Answer
Materials
- Velvet yarn for the head and body
- Velvet yarn for the wings
- Velvet yarn for the spikes
- Acrylic yarn for the embroidered eyes
- 5 mm crochet hook for the velvet yarn
- 3 mm crochet hook for the acrylic yarn used for the eyes
- Tapestry needle
- Scissors
- Pins
- Toy stuffing
You can use two or three velvet colors. The original project uses separate colors for the body, wings, and spikes, but fewer colors can also be used.
Crochet Abbreviations
- ch — chain
- sc — single crochet
- inc — increase
- dec — decrease
- sl st — slip stitch
- BLO — back loop only
- FLO — front loop only
- hdc — half double crochet
- dc — double crochet
- st/sts — stitch/stitches
- Rnd — round
Before You Start
The main amigurumi pieces are worked in continuous rounds unless the pattern specifically tells you to slip stitch.
Stuff the head and body gradually as instructed. When working with velvet yarn, take care with the magic ring because it can be fragile.
The head and body each have a fixed group of stitches at the beginning of certain rounds that creates a flatter section. Keep the head section toward the underside and the body section toward the belly while working and assembling the dragon.
Avoid unnecessary sewing passes through the velvet yarn, as the yarn can shed during construction.
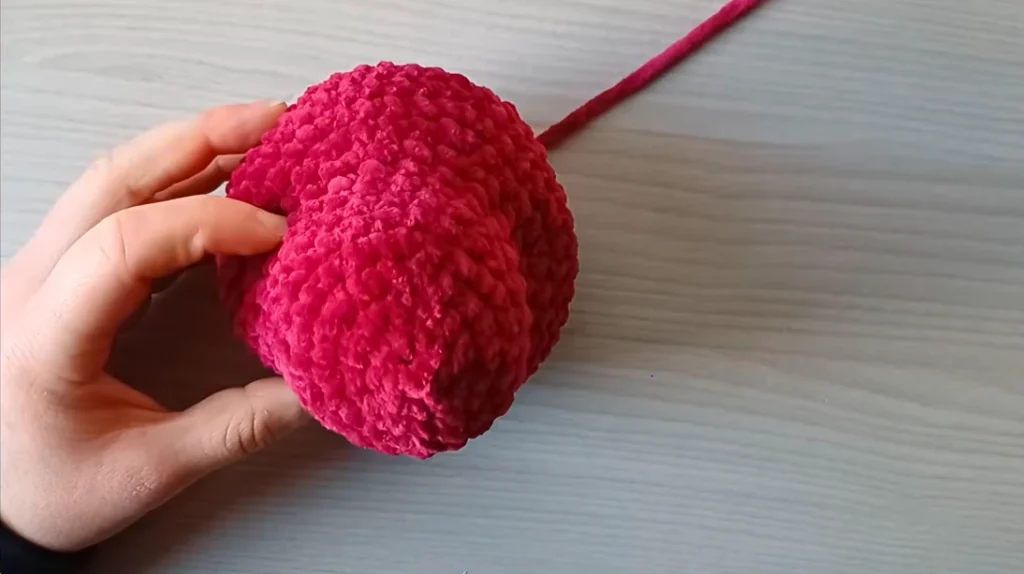
How to Crochet the Dragon Head
The head begins with a magic ring and increases gradually to create the rounded shape. After the front of the head is widened, the stitches decrease again to close the piece.
Round 1: Start with a Magic Ring
Make a magic ring.
R1: 6 sc into the magic ring. (6)
Round 2: Increase Around
R2: inc in each st around. (12)
Round 3: Increase the Head
R3: (sc, inc) x6. (18)
Round 4: Continue Increasing
R4: (2 sc, inc) x6. (24)
Rounds 5–8: Build the Head
R5–8: sc around. (24)
Shape the Front of the Head
The next three rounds widen the front of the head. The first six stitches are worked normally, followed by the increase sequence.
Round 9
R9: sc first 6, then FLO (2 sc, inc) x6. (30)
Round 10
R10: sc first 6, then (3 sc, inc) x6. (36)
Round 11
R11: sc first 6, then (4 sc, inc) x6. (42)
Rounds 12–15
R12–15: sc around. (42)
The six-stitch section at the beginning of these rounds creates the flatter underside of the head. Keep this section facing downward.
Decrease the Head
The head now narrows toward the final opening.
Round 16
R16: sc first 6, then (4 sc, dec) x6. (36)
Round 17
R17: sc first 6, then (3 sc, dec) x6. (30)
Round 18
R18: sc first 8, then (2 sc, dec) x6. (24)
Round 19
R19: (2 sc, dec) x6. (18)
Round 20
R20: (sc, dec) x6. (12)
Round 21: Close the Head
R21: dec x6. (6)
Sl st, cut the yarn, and fasten off.
Shape the Head
Head shaping is worked around the eye area after the ears are attached.
If the ear is made in the same color as the head, leave a longer yarn tail where appropriate. Use the tail through Round 9 around the eye area, working back and forth a few times.
Gently pull the yarn to bring the area inward. Do not over-tighten it.
This shaping is optional, but it creates the preferred facial contour.
Crochet the Dragon Ears
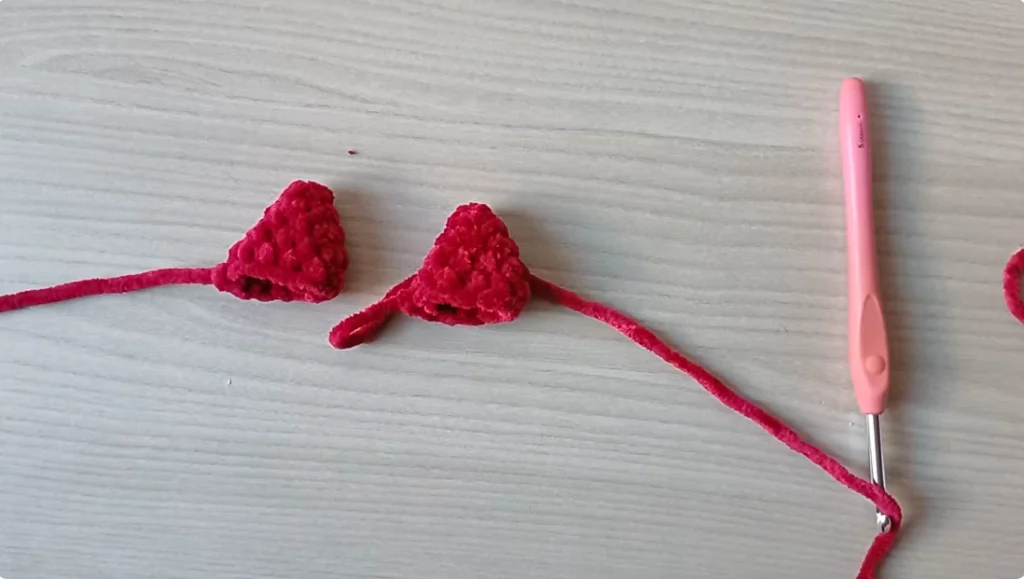
Make 2 ears.
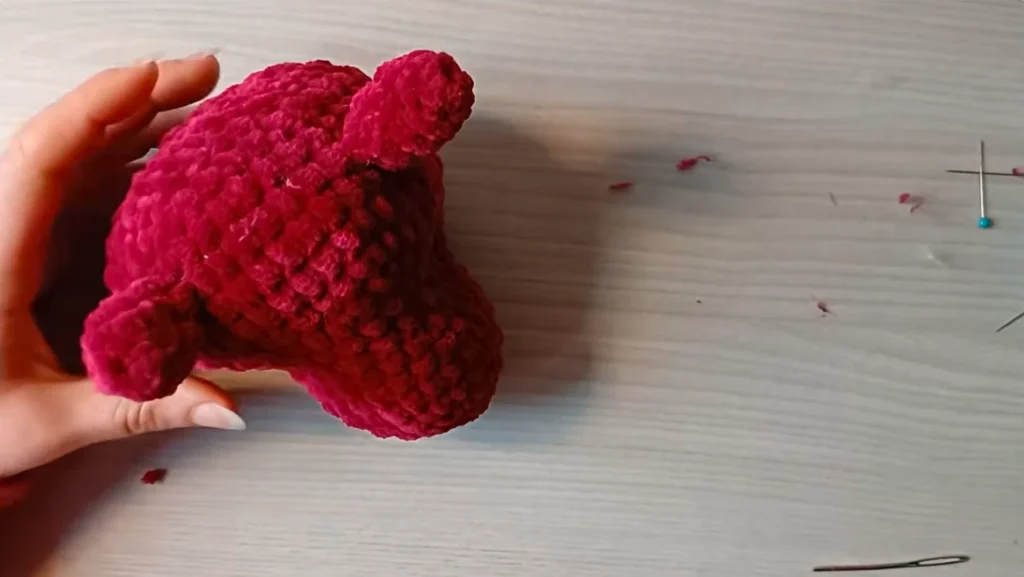
The ears are not stuffed. After crocheting, each ear is folded in half and sewn before being attached to the head.
Round 1
R1: 4 sc into a magic ring. (4)
Round 2
R2: (sc, inc) x2. (6)
Round 3
R3: (2 sc, inc) x2. (8)
Round 4
R4: (3 sc, inc) x2. (10)
Round 5
R5: sc around. (10)
Sl st, fasten off, and leave a sewing tail.
Attach the Ears
Fold each ear in half and sew the edges together.
Attach the ears to Round 14 of the head, leaving approximately 6 stitches between them.
Sew across the base of each ear and add a few stitches along the sides to help keep the ears upright.
The magic ring can help guide the center of each ear when positioning them.
Crochet the Dragon Body and Tail
The body and tail are worked as one continuous piece. The piece begins as a narrow tail and gradually increases into the body before decreasing toward the neck.
You may begin stuffing the tail before continuing into the body.
Round 1
R1: 6 sc into a magic ring. (6)
Round 2
R2: (2 sc, inc) x2. (8)
Round 3
R3: sc around. (8)
Round 4
R4: (3 sc, inc) x2. (10)
Round 5
R5: (4 sc, inc) x2. (12)
Round 6
R6: sc around. (12)
Round 7
R7: (5 sc, inc) x2. (14)
Round 8
R8: (6 sc, inc) x2. (16)
Round 9
R9: sc around. (16)
Round 10
R10: (7 sc, inc) x2. (18)
Round 11
R11: (8 sc, inc) x2. (20)
Round 12
R12: (9 sc, inc) x2. (22)
Round 13
R13: (10 sc, inc) x2. (24)
Round 14
R14: sc around. (24)
Round 15
R15: (11 sc, inc) x2. (26)
Round 16
R16: (12 sc, inc) x2. (28)
Round 17
R17: sc around. (28)
Round 18
R18: (13 sc, inc) x2. (30)
Shape the Main Body
The next three rounds widen the piece into the main body.
Round 19
R19: sc first 6, then (3 sc, inc) x6. (36)
Round 20
R20: sc first 6, then (4 sc, inc) x6. (42)
Round 21
R21: sc first 6, then (5 sc, inc) x6. (48)
Rounds 22–27
R22–27: sc around. (48)
Begin adding stuffing to the body as needed. Keep the six-stitch section toward the belly.
Decrease the Body
Round 28
R28: sc first 6, then (5 sc, dec) x6. (42)
Rounds 29–30
R29–30: sc around. (42)
Round 31
R31: sc first 6, then (4 sc, dec) x6. (36)
Round 32
R32: sc around. (36)
Round 33
R33: sc first 8, then (3 sc, dec) x6. (30)
Rounds 34–35
R34–35: sc around. (30)
Round 36
R36: sc first 6, then (2 sc, dec) x6. (24)
Round 37
R37: sc around. (24)
Round 38
R38: sc first 6, then (sc, dec) x6. (18)
Round 39
R39: sc around. (18)
Sl st, cut the yarn, and leave a long sewing tail.
Stuff the body before joining it to the head.
Make the Front Paws
Make 2 front paws.
The six-stitch section forms the bottom, while the decreased section creates the upper contour.
Round 1
R1: 6 sc into a magic ring. (6)
Round 2
R2: inc in each st around. (12)
Round 3
R3: (sc, inc) x6. (18)
Round 4
R4: sc around BLO. (18)
Rounds 5–6
R5–6: sc around. (18)
Round 7
R7: sc first 6, then dec x6. (12)
Rounds 8–9
R8–9: sc around. (12)
Sl st, cut the yarn, and leave a sewing tail.
Stuff the front paws lightly.
Make the Back Paws
Make 2 back paws.
Round 1
R1: 6 sc into a magic ring. (6)
Round 2
R2: inc in each st around. (12)
Round 3
R3: (sc, inc) x6. (18)
Round 4
R4: (2 sc, inc) x6. (24)
Round 5
R5: sc around BLO. (24)
Rounds 6–8
R6–8: sc around. (24)
Round 9
R9: sc first 6, then (sc, dec) x6. (18)
Round 10
R10: sc first 6, then dec x6. (12)
Rounds 11–12
R11–12: sc around. (12)
Sl st, cut the yarn, and leave a sewing tail.
Stuff the back paws before sewing them to the body.
Make the Dragon Spikes
The dragon has three spike sizes. Make the number listed for each size.
Small Spikes
Make 2.
Round 1
R1: 3 sc into a magic ring. (3)
Round 2
R2: inc in each st around. (6)
Round 3
R3: (sc, inc) x3. (9)
Round 4
R4: sc around. (9)
Sl st, cut the yarn, and leave a sewing tail.
Medium Spikes
Make 4.
Round 1
R1: 3 sc into a magic ring. (3)
Round 2
R2: inc in each st around. (6)
Round 3
R3: (sc, inc) x3. (9)
Round 4
R4: (2 sc, inc) x3. (12)
Round 5
R5: sc around. (12)
Sl st, cut the yarn, and leave a sewing tail.
Large Spike
Make 1.
Round 1
R1: 3 sc into a magic ring. (3)
Round 2
R2: inc in each st around. (6)
Round 3
R3: (sc, inc) x3. (9)
Round 4
R4: sc around. (12)
Round 5
R5: (3 sc, inc) x3. (15)
Round 6
R6: sc around. (15)
Sl st, cut the yarn, and leave a sewing tail.
Crochet the Dragon Wings
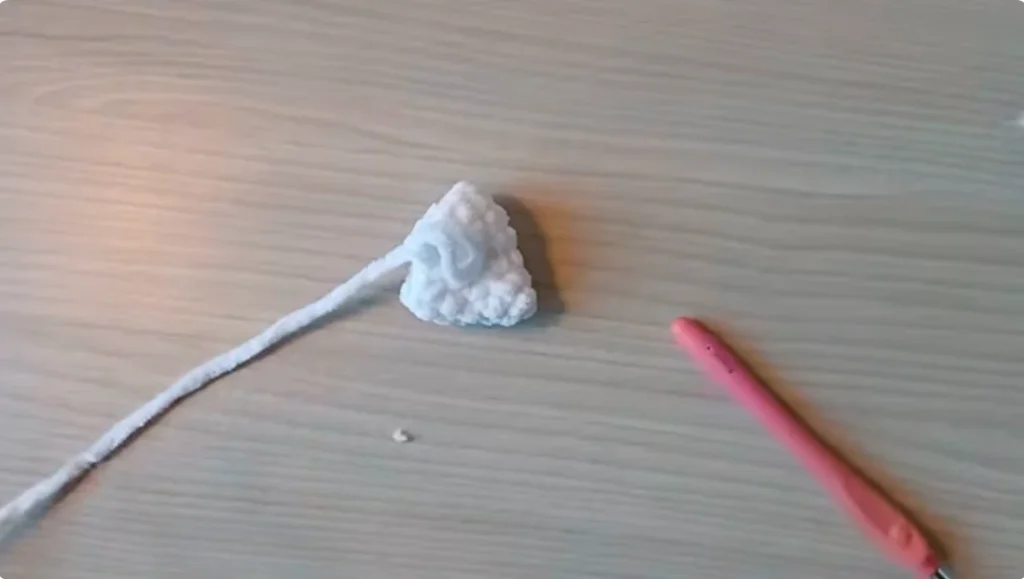
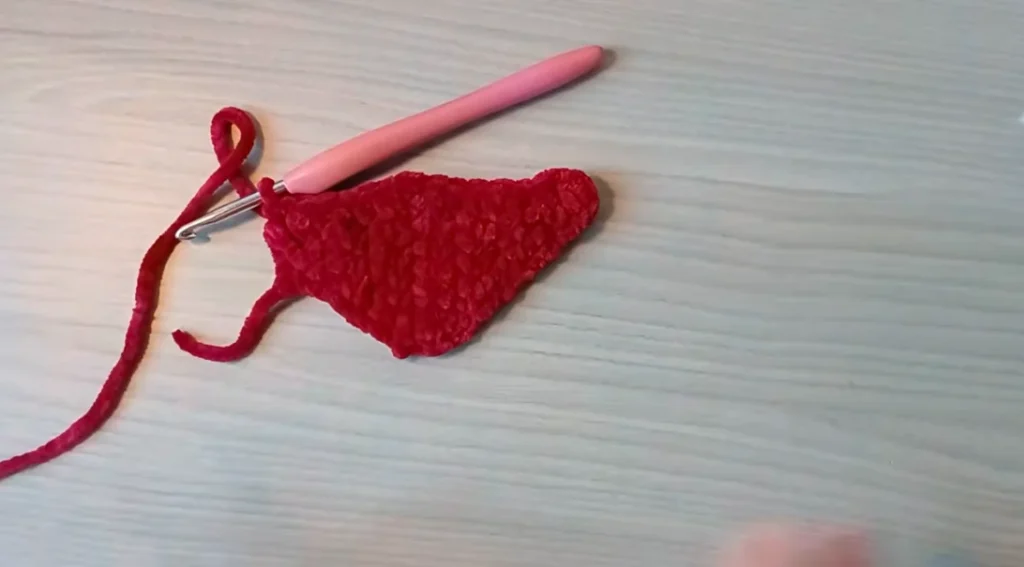
Make 2 wings.
The wings are worked in rows rather than continuous rounds.
Start with ch 3.
Row 1
Row 1: Starting in the second chain from the hook, sc in the next 2 stitches. (2)
Row 2
Row 2: Ch 1, turn, inc in the first sc, sc in the next. (3)
Row 3
Row 3: Ch 1, turn, sc in the first 2, inc in the last. (4)
Row 4
Row 4: Ch 1, turn, inc in the first, sc in the next 3. (5)
Row 5
Row 5: Ch 1, turn, sc in the first 4, inc in the last. (6)
Row 6
Row 6: Ch 1, turn, inc in the first, sc in the next 6. (7)
Row 7
Row 7: Ch 1, turn, sc across. (7)
Row 8
Row 8: Ch 1, turn, dec over the first 2, sc in the next 5. (6)
Row 9
Row 9: Ch 1, turn, sc in the next 4, dec over the final 2. (5)
Row 10
Row 10: Ch 1, turn, dec over the first 2, sc in the next 3. (4)
Row 11
Row 11: Ch 1, turn, sc in the first 2, dec over the final 2. (3)
Row 12
Row 12: Ch 1, turn, dec, sc in the next. (2)
Row 13
Row 13: Ch 1, turn, dec. (1)
Shape the Wing Edge
Turn the work and continue along the side edge.
Ch 2, dc into the last sc, hdc into the next row, then sc across the side toward the highest point.
Continue with hdc and dc along the edge, using hdc and sc where needed to create the three raised wing points.
The source does not provide a separate stitch count for this decorative edge, so the edge is shaped visually according to the described three-point construction.
Cut the yarn and leave a sewing tail.
Make 2 wings.
Assemble the Dragon
Once all the pieces are complete, assemble them in the following order. Pay particular attention to the flatter sections of the head and body so the dragon keeps its intended orientation.
1. Attach the Ears
Fold each ear in half and place it on Round 14 of the head, leaving approximately 6 stitches between the ears.
Sew across the base and add a few stitches along the sides to keep the ears upright.
2. Shape the Head
Use the reserved yarn tail around Round 9 near the eye area.
Pass the yarn back and forth a few times and gently pull the area inward.
Do not over-tighten the shaping. Hide the yarn tail when finished.
3. Embroider the Eyes
Use acrylic yarn for the eyes so the embroidery remains visible against the velvet yarn.
The original tutorial uses embroidered eyes rather than safety eyes.
Position the eyes according to the completed head shaping and desired expression.
Use the 3 mm crochet hook with the acrylic yarn for the eye work.
4. Join the Head to the Body
Press the body so the flatter section is facing the belly.
Center the body underneath the head and sew the last round of the body to the corresponding stitches on the head.
Keep the head from rotating while sewing.
Add stuffing around the neck as you close the seam. Make sure the neck is firmly stuffed and the seam is secure.
5. Attach the Spikes
Arrange the spikes in this sequence:
- Small
- Medium
- Large
- Medium
- Small
Establish a centered line along the head and body before sewing the spikes in place.
Place the first small spike around Round 5 of the head. Leave approximately four rounds between the first and second spikes, then continue the sequence along the center line.
Sew each spike securely and keep the entire row centered and aligned.
6. Attach the Wings
Place the wings around Rounds 11–14 of the body, counting backward from the neck area as described in the original tutorial.
Each wing is approximately one stitch from the nearby spike.
Secure the wing edge and hide the yarn tails.
7. Attach the Paws
Position the decreased section of each paw upward.
Place the front limbs approximately three rounds from the head.
Place the back limbs approximately ten rounds farther from the front limbs.
Spread the limbs naturally before sewing them securely to the body.
Finishing Your Crochet Dragon
Before finishing the project, check that:
- The head is centered on the body.
- The flatter section of the head faces the underside.
- The flatter section of the body forms the belly.
- Both ears are upright and positioned similarly.
- The spikes follow a centered line.
- Both wings are securely attached.
- The front paws are firmly sewn on.
- The back paws are firmly sewn on.
- The stuffing is evenly distributed.
- All yarn tails are hidden.
When sewing with velvet yarn, keep your stitches controlled and avoid unnecessary passes because the yarn can shed.
Take particular care with the orientation of the head and body during stuffing and assembly. Keeping the flatter sections toward the underside and belly helps maintain the intended construction and shape of the dragon.
Your velvet crochet dragon is now assembled and ready to enjoy.