Crochet No-Sew Buddy Scarf-Wearing Buddy Reindeer Plush
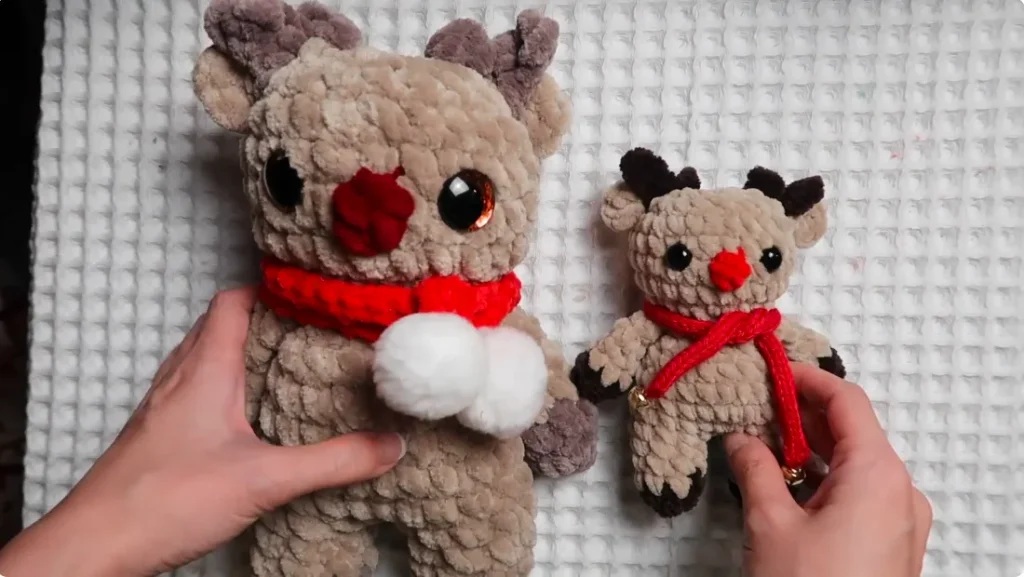
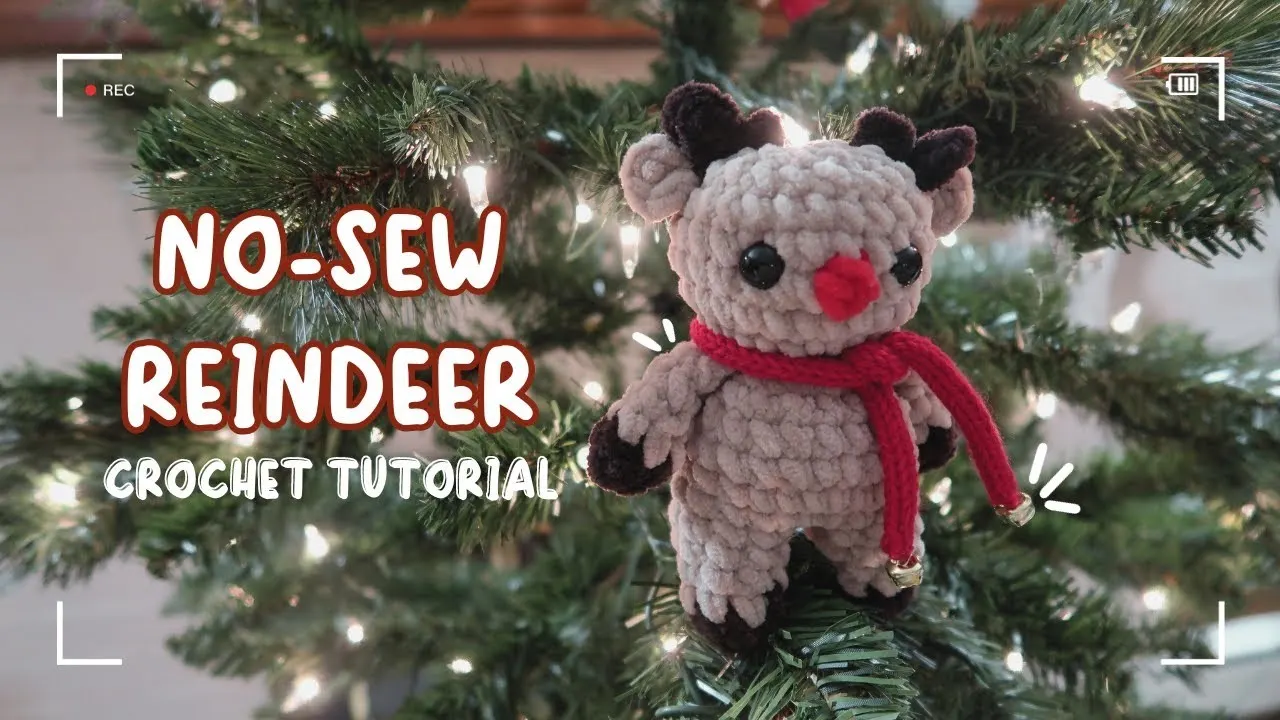
Looking for a cute crochet plushie to make for the holiday season? This no-sew buddy reindeer has a sweet little face, a tiny red bobble nose, small ears, and branching antlers. You can also give it a cozy finishing touch with a jumbo scarf and pom-poms or a miniature scarf with a jingle bell.
The reindeer is worked from the legs upward, with the body continuing into the head. The arms are attached as you crochet, the nose is made directly into the head, and the antlers are created using surface crochet. The ears are secured with their yarn tails and shaped after the head is closed.
One lovely feature of this project is that you can make a larger or smaller reindeer by changing your yarn and hook. The scarf is optional, so you can choose the style you like best.
Crochet No-Sew Buddy Scarf-Wearing Buddy Reindeer Plush – The Final Answer?
Materials and Supplies
Before starting, gather the following supplies:
- Main body color yarn
- Contrasting color yarn for the arms and legs
- Red yarn for the nose
- Yarn for the optional jumbo scarf
- Crochet hook suitable for your yarn
- Stuffing
- 23 mm safety eyes
- Stitch marker
- Yarn needle or darning needle
- Scissors
- Optional pom-poms
- Hot glue gun for attaching the pom-poms
- Optional miniature jingle bell
- Small crochet hook for pulling the I-cord through the bell
The yarn weight, exact yarn quantity, and crochet hook size are not specified. Choose your yarn and hook according to the size of reindeer you want to make.
Crochet Abbreviations
- MR: Magic Ring
- sc: Single Crochet
- inc: Increase
- dec: Decrease
- sl st: Slip Stitch
- ch: Chain
- BLO: Back Loop Only
- FLO: Front Loop Only
- st/sts: Stitch/Stitches
Making the Arms
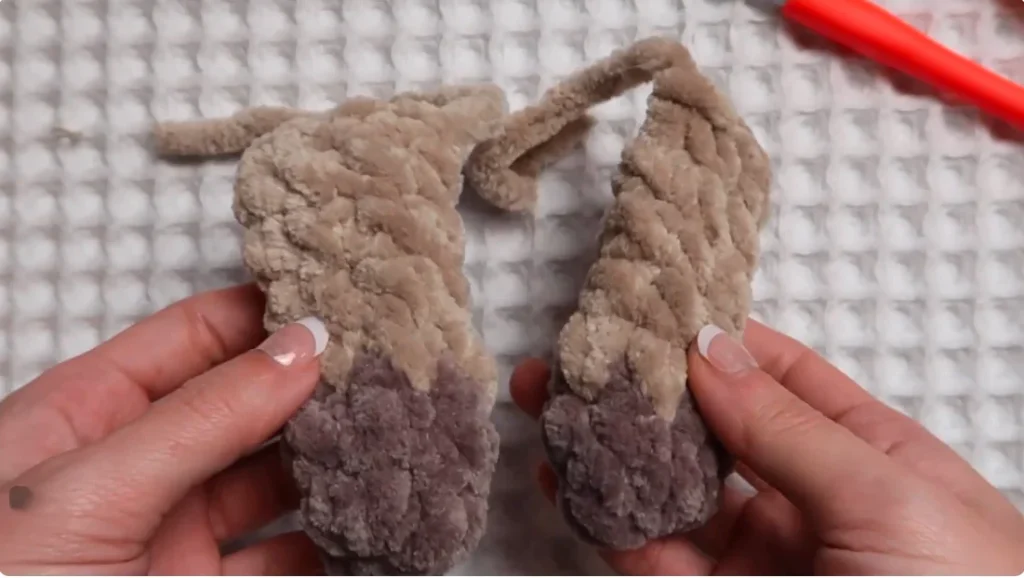
Start with the arms. You will need two, and each arm is worked in rounds.
Arms (make 2)
- Round 1: Make a magic ring and work 6 sc into it.
- Round 2: Work 6 sc around. On the final stitch, change to the contrasting yarn. Pull up a loop but do not pull through the last two loops. Attach the new yarn and pull it through those loops.
- Rounds 3–6: Work 6 sc in each round.
Once the arm is complete, it is time to close the opening. Do not add stuffing. Fold the arm in half so the stitches on both sides line up. Insert your hook through the corresponding stitches on both layers and work 3 sc to close it.
Repeat the same steps to make the second arm. Keep the arms ready for attaching them to the body.
Making the Ears
The ears are small and simple to make. You will need two, and it is important to leave long yarn tails because they will be used to secure the ears to the head.
Ears (make 2)
- Leave a long starting yarn tail.
- Make a magic ring and work 5 sc into it.
- Slip stitch into the first single crochet.
- Take the starting yarn tail and pull it through the first single crochet.
- Fasten off, leaving another long tail for attaching the ear.
Repeat the same steps to make the second ear.
Making the Legs
Next, work on the two legs. Each leg begins with a magic ring and is crocheted separately before they are joined together.
Legs (make 2)
- Round 1: Make a magic ring and work 8 sc into it.
- Round 2: Work 8 sc around. On the eighth single crochet, change to the contrasting yarn using the same color-change method as the arms.
- Rounds 3–5: Work 8 sc in each round.
After completing the first leg, fasten off. Make the second leg in the same way, but do not fasten off after Round 5. Instead, chain 1 to begin joining the legs.
Joining the Legs
Joining the legs is one of the more detailed parts of this project. Keep a stitch marker nearby so you can follow the round without losing track of the stitches.
- Take the second leg, with the chain 1 still attached.
- Insert your hook into the final single crochet of the first leg and make a single crochet to connect the pieces.
- Skip the next stitch as demonstrated, then continue around the first leg.
- Use your stitch marker to identify the beginning of the joined section.
- After the first leg, the creator counts 9 single crochet.
- Work an increase in the connecting chain space.
- Continue with 9 single crochet around the second leg.
- Work into the indicated stitch on the second leg and place one single crochet in the final chain space.
The completed joining round should have 21 single crochet in total. Because the chain spaces and joining stitches can be a little confusing, keep checking the stitch marker and the total count as you work.

Continuing After the Join
- Next 3 rounds: Work 21 sc around each round.
After completing these three rounds, begin stuffing the legs. Add the stuffing evenly so both legs keep their shape.
Shaping the Body
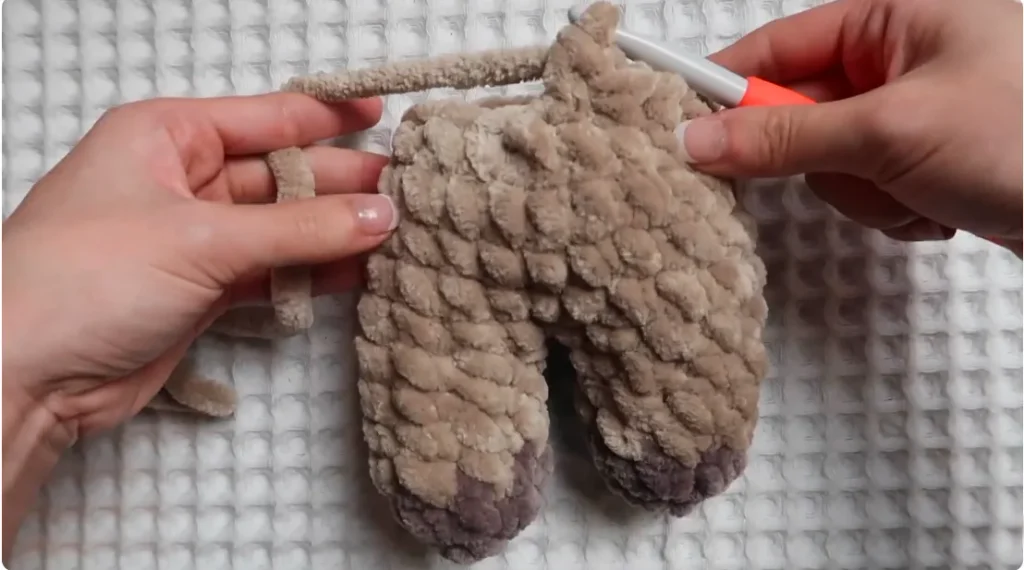
Once the legs are joined and stuffed, continue crocheting upward to shape the body.
- Round 5: Work 5 sc, then dec; repeat 3 times. You should have 18 stitches.
- Round 6: Work 4 sc, then dec; repeat 3 times. You should have 15 stitches.
- Round 7: Work 3 sc, then dec; repeat 3 times. You should have 12 stitches.
After Round 7, stuff the body before attaching the arms. Make sure the filling is distributed evenly.
Attaching the Arms
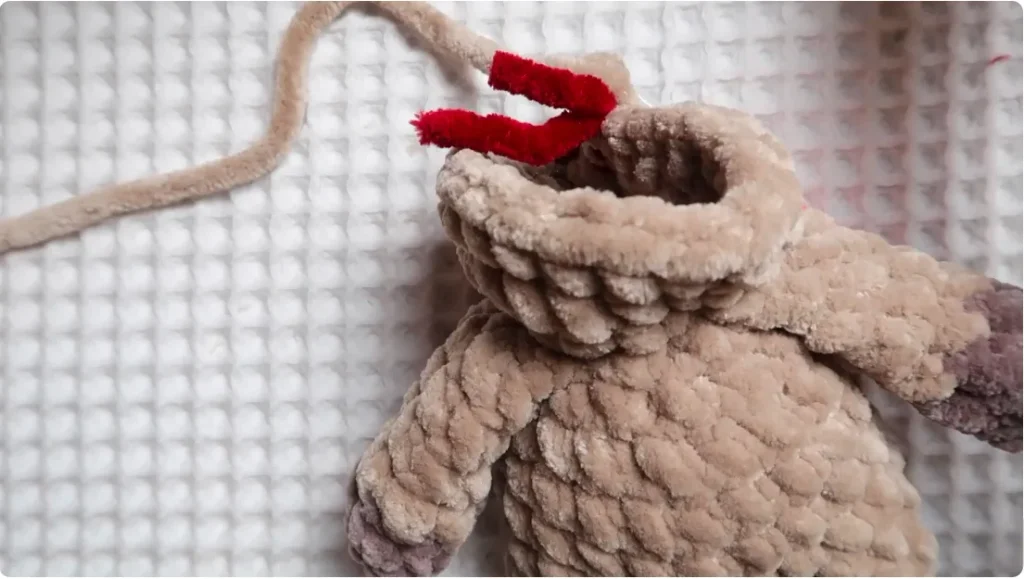
The arms are attached while working the next round. Instead of sewing them on afterward, crochet through the stitches of the arms and body to secure them.
Begin with 1 sc on the body, then attach the first arm. The creator initially describes using three single crochet stitches for the attachment but explains that four were used on this particular reindeer to make the arm more secure.
There is also a small flap beside the arm, which the creator attaches to the body. Continue working around the body, making sure to tuck the yarn tail inside as you go.
Work the next body stitches, then attach the second arm in the same way. The creator also uses four single crochet stitches for this attachment and crochets over the yarn tail to make it more secure.
The important part is to finish this round with 12 stitches in total. The spoken attachment groups are not fully consistent with that final count, so check your stitches as you work rather than treating every narrated group as a fixed formula.
Increasing for the Head
After attaching both arms, continue directly into the head.
- Round 9: Work in the front loops only. Place 2 sc in each stitch around, increasing from 12 to 24 stitches.
- Round 10: Work 24 sc around.
Keep your stitches even so the head develops a smooth, rounded shape.
Creating the Little Red Bobble Nose
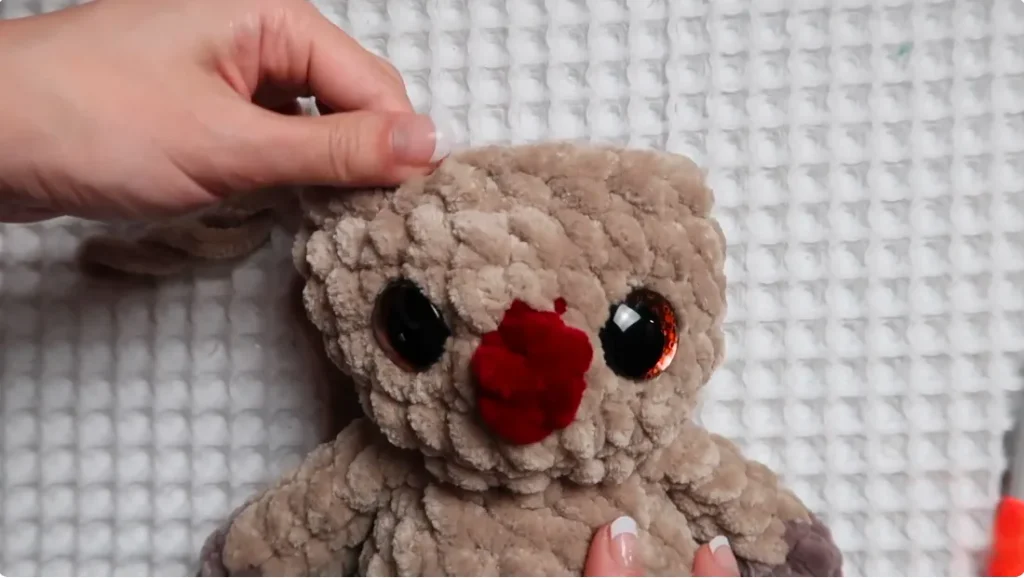
The little red nose is worked directly into Round 11, so you do not need to crochet it separately or sew it onto the face.
Start by working 13 sc in the main body color. On the 13th single crochet, stop before completing the final yarn-over. Attach the red yarn at this point and begin the mini bobble in the next stitch.
Making the Mini Bobble
- Yarn over and insert your hook into the next stitch.
- Yarn over and pull through the stitch.
- Yarn over and pull through 2 loops.
- Yarn over and insert your hook into the same stitch again.
- Pull up a loop, then yarn over and pull through 2 loops.
- You should now have 3 loops on your hook.
- Use the red yarn tail to tighten the bobble.
- Return to the main body color and pull through all 3 loops.
You may need to use your fingers to push the nose outward a little so it stands out from the face.
Continue the round with 10 more sc in the main body color. The creator works a few stitches in the main color before cutting the red yarn and continuing around.
At the end of Round 11, you should have 23 main-color single crochet and 1 red mini bobble, giving you 24 stitches altogether.
- Rounds 12–13: Work 24 sc around each round.
Positioning the Safety Eyes
The reindeer uses 23 mm safety eyes. Place them between Rounds 11 and 12.
For the face placement:
- Position each eye one stitch away from the nose.
- Leave 3 visible stitches between the eyes.
- Check the face from the front before securing the backs.
For larger safety eyes, the creator recommends using an eye jig because it can make the placement process easier. Take a moment to check that both eyes are level before securing them.
Attaching the Ears
After completing Round 14, attach the two ears to the head. The placement is guided by the safety eyes.
For each ear:
- Start counting 3 stitches outward from the eye.
- Move 2 rows upward.
- Find the position between Rounds 13 and 14.
- Insert your hook from inside the head.
- Take the long yarn tail from the ear and pull it through.
- Repeat the same process for the other ear.
- Tie the yarn tails securely inside the head.
The creator prefers using a double knot to make the ears feel more secure. They may still look a little wiggly at this point, but you can adjust their shape after closing the head.
Shaping and Closing the Head
Continue decreasing to close the top of the head.
- Round 14: Work 2 sc, then dec; repeat 6 times. You should have 18 stitches.
- Round 15: Work 1 sc, then dec; repeat 6 times. You should have 12 stitches.
After Round 15, add stuffing to the head. Then continue:
- Round 16: Dec 6 times. You should have 6 stitches.
Fasten off, leaving a long yarn tail. Thread the tail through a darning needle and pass it through the remaining stitches to close the opening.
Securing and Shaping the Ears
Once the head is closed, you can make the ears sit closer to the head.
Insert your needle into a stitch next to the ear and pass it through the central opening of the ear’s magic ring. Pull gently to bring the ear closer. Repeat where needed, adjusting the ear slightly so it has a neat shape.
Hide the remaining yarn tails inside the head. Gently squish and reshape the head with your hands until you are happy with its appearance.
Creating the Branching Antlers with Surface Crochet
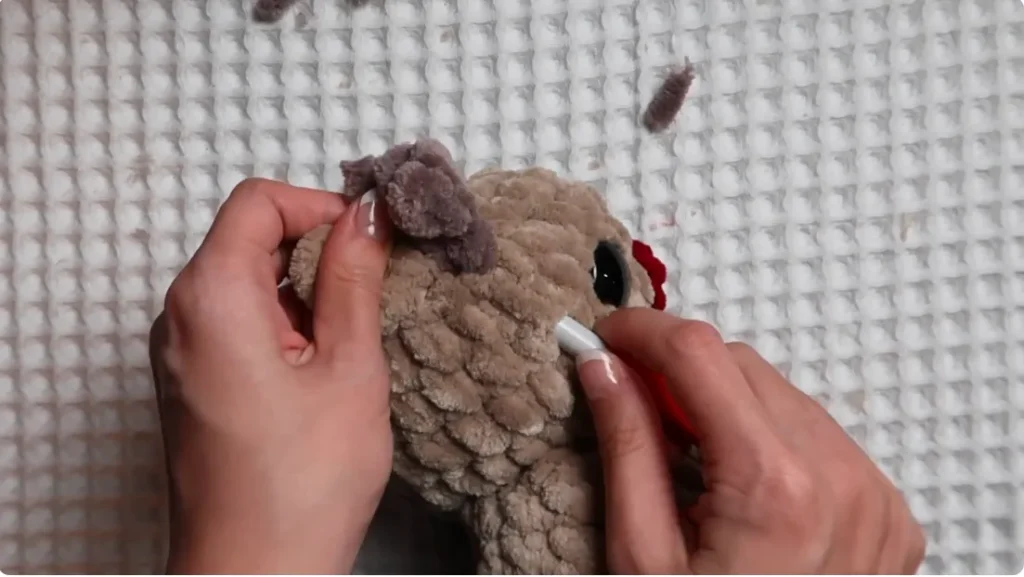
The antlers are worked directly onto the head using surface crochet. You will make two, one on each side, in the stitches directly in front of the ears.
First Antler
Start by making a slip knot on your hook. Find the stitch directly in front of the ear and insert your hook through it. Make a slip stitch to secure the yarn. Keep the starting yarn tail out of the way.
Main branch:
- Chain 3.
- Starting in the second chain from the hook, work 2 sc down the chain.
- Insert your hook into the next stitch on the head.
- Make a slip stitch.
Smaller branch:
- Chain 2.
- Starting in the second chain from the hook, work 1 sc.
- Slip stitch into the next stitch on the head.
Fasten off and pull the starting yarn tail through toward the finishing side. Tie the yarn tails securely and hide them inside the head.
Second Antler
Turn the reindeer around and repeat the same process on the opposite side, starting in the stitch directly in front of the other ear.
- Make a slip knot and secure it with a slip stitch.
- Chain 3 and work 2 sc down the chain.
- Slip stitch into the next stitch.
- Chain 2 and work 1 sc.
- Slip stitch into the next stitch.
- Fasten off and secure the yarn tails inside the head.
Both antlers should have the same branching shape. Adjust their position gently before hiding the yarn tails.
Adding an Optional Jumbo Crochet Scarf
The jumbo scarf is a fun finishing touch if you want your reindeer to have a cozy winter look. It is made in just two rows.
Scarf Instructions
- Foundation chain: Ch 70.
- Row 1: Starting in the second chain from the hook, work 69 sc along the chain.
- Row 2: Ch 1 and turn. Starting in the second chain from the hook, work 69 sc in the back loops only.
Finishing the Scarf
After completing the two rows, fold each end of the scarf slightly and sew it closed.
Pull the yarn through the middle of the folded section and tighten it gently. This makes the end look more rounded and creates a surface for attaching the pom-pom.
Repeat on the other end. Use a little hot glue to attach a pom-pom to each end, holding it in place for a few seconds until secure.
Wrap the scarf around the reindeer’s neck. The yarn is stretchy, so you can double it around the neck and adjust it until it sits comfortably.
Making the Miniature Scarf with a Jingle Bell
For the smaller reindeer, a miniature I-cord scarf with a jingle bell is another cute option.
The I-cord is made from yarn using a knitting machine. The cord-making process is covered separately, so the steps below focus on adding the bell and putting the scarf on the reindeer.
Adding the Jingle Bell
- Take the miniature jingle bell and the I-cord.
- Use a small crochet hook to pull the cord through the bell.
- Use a needle to secure the bell onto the cord.
- Repeat on the other side.
- Place the finished cord around the reindeer’s neck.
- Tie one simple knot to keep the miniature scarf in place.
The I-cord length and machine-making instructions are not specified here, so adjust the cord to fit your finished reindeer.
Final Touches
Your little reindeer is now ready for its scarf and final adjustments. Check that the safety eyes are secure, the ears sit neatly, and both antlers have a balanced shape.
Choose the jumbo scarf with pom-poms for a cozy look, or use the miniature I-cord and jingle bell for the smaller version. Either option adds a sweet finishing touch to this scarf-wearing crochet reindeer plushie.