Crochet Candy Cane Pattern Free
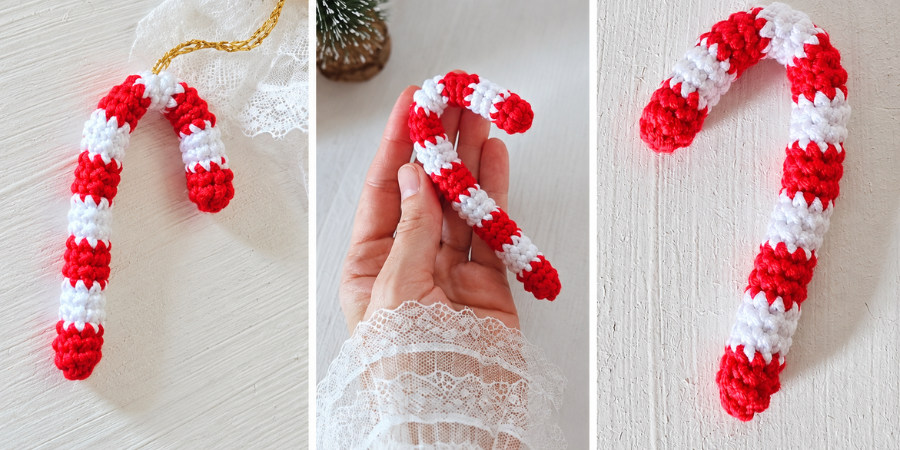
If you love making handmade Christmas decorations, this free crochet candy cane pattern is a fun little project to add to your holiday crafting list. The classic red and white stripes give it a festive look, while the pipe cleaners inside help you shape it into a traditional candy cane.
The candy cane is made with basic single crochet stitches worked in continuous rounds. You will change colors every three rounds to create the stripes, then insert pipe cleaners, close the opening, and bend the finished piece into shape. It is a lovely handmade decoration to make for Christmas.
Crochet Candy Cane Pattern Free – The Short Answer?
Materials
Gather the following supplies before you begin:
- Red yarn
- White yarn
- 3 mm crochet hook for DK-weight yarn
- 3 pipe cleaners
- Stitch marker
- Yarn needle
- Scissors
You will need approximately 2.5 grams of red yarn and 2.5 grams of white yarn. DK-weight yarn with a 3 mm crochet hook works well for this pattern. You can also use worsted-weight yarn with a 4 mm hook, as the finished size will vary depending on your yarn and hook.
If you choose a different yarn weight, use a suitable hook and check that you have enough pipe cleaners to support the finished candy cane.
Crochet Abbreviations
This pattern uses US crochet terminology.
- MR — magic ring
- sc — single crochet
- sl st — slip stitch
- st/sts — stitch/stitches
- Rnd — round
- FLO — front loop only
The candy cane is worked in continuous rounds, with eight single crochet stitches in every round. Place a stitch marker in the first stitch of each round and move it up as you work. This makes it easier to keep track of your rounds and color changes.
How to Make the Crochet Candy Cane
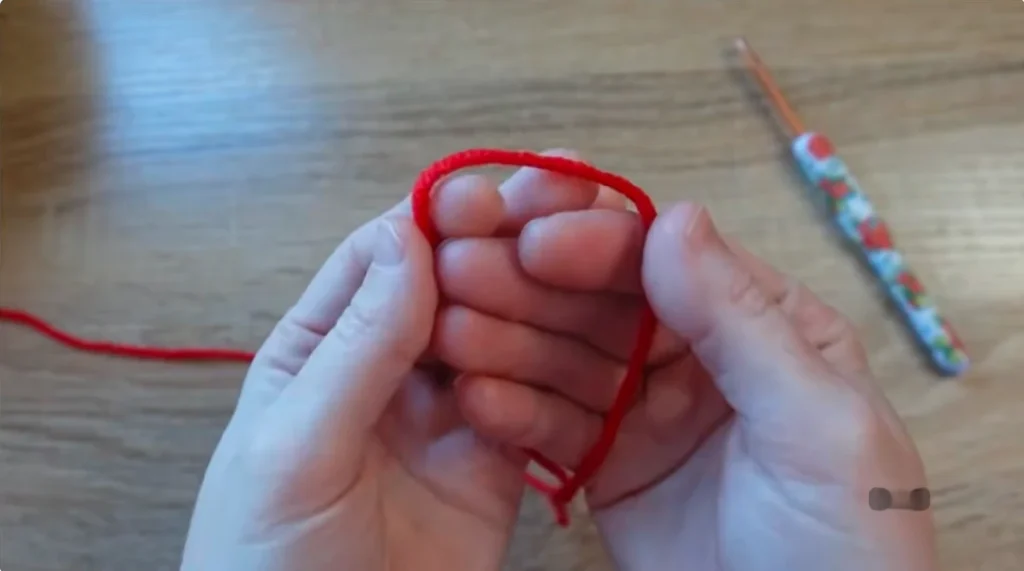
Round 1: Start with a Magic Ring
Begin with a magic ring, leaving a yarn tail of approximately 5 inches.
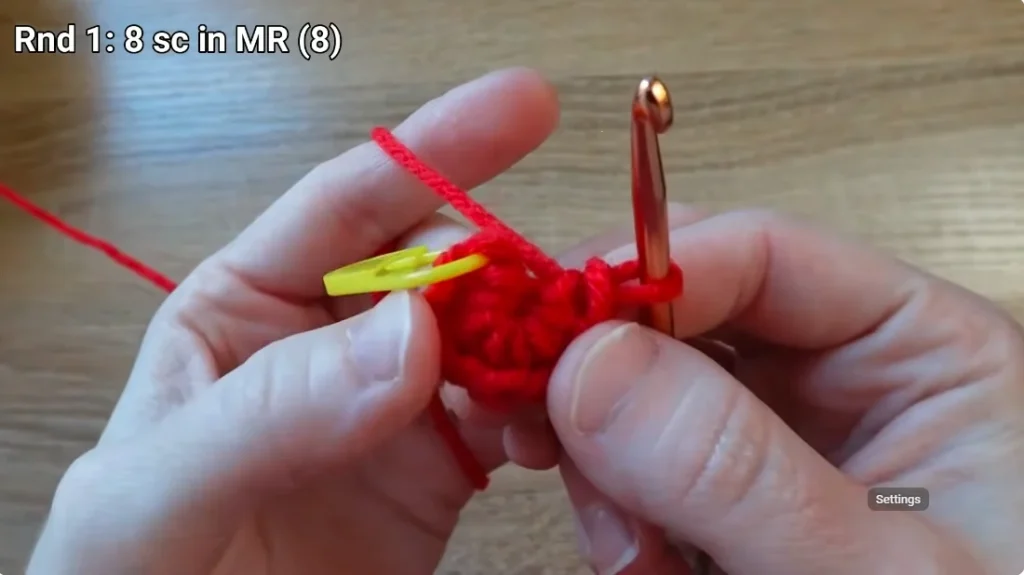
Work 8 single crochet stitches into the ring. To make each single crochet, insert your hook into the ring, pull up a loop, and complete the stitch using the yarn-under method.
Place a stitch marker in the first single crochet. Pull the yarn tail to close the ring tightly.
You should have:
8 stitches
Trim the tail if needed, leaving enough length for it to remain tucked inside the crocheted tube.
Round 2: Single Crochet Around
Work 1 single crochet into each stitch around.
Continue until you have worked all eight stitches. Move the stitch marker to the first stitch of the new round.
You should have:
8 stitches
Round 3: Prepare for the Color Change
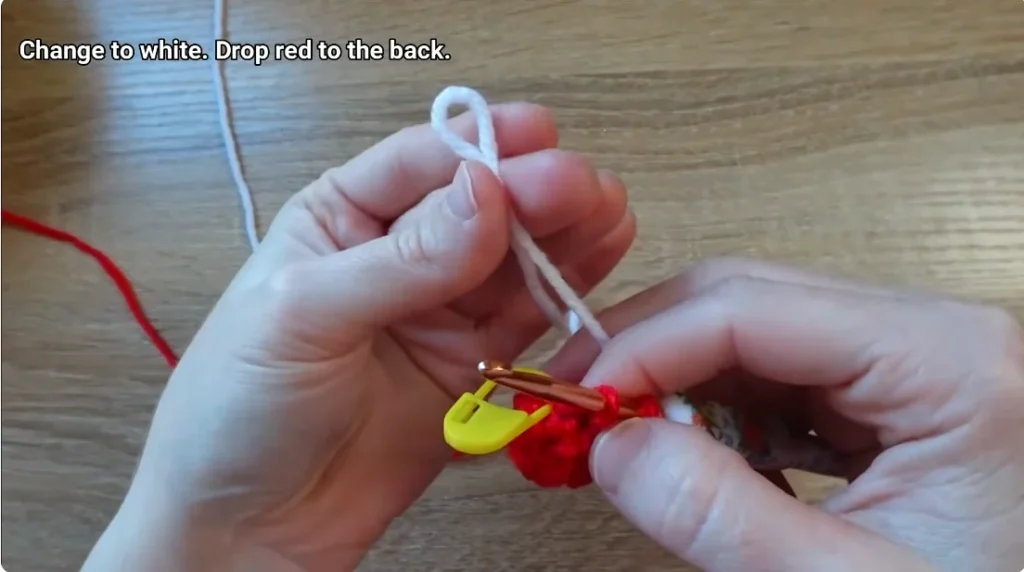
Continue working 1 single crochet into each stitch around using red yarn.
At the last stitch, begin the single crochet with red yarn. Before completing the stitch, switch to white yarn and pull the white yarn through the loops on your hook.
Leave the red yarn attached at the back of the work so you can use it again for the next stripe.
You should have:
8 stitches
The first three rounds form the initial red section of the candy cane.
Make the First White Stripe
Round 4
Work 1 single crochet into each of the eight stitches using white yarn.
At the beginning of the round, crochet over the white yarn tail for the first three stitches. Then tuck the remaining tail inside the tube.
You should have:
8 stitches
Round 5
Continue working 1 single crochet into each stitch around with white yarn.
Keep your stitches even and move the stitch marker to the first stitch of the round.
You should have:
8 stitches
Round 6
Work 1 single crochet into each stitch around using white yarn.
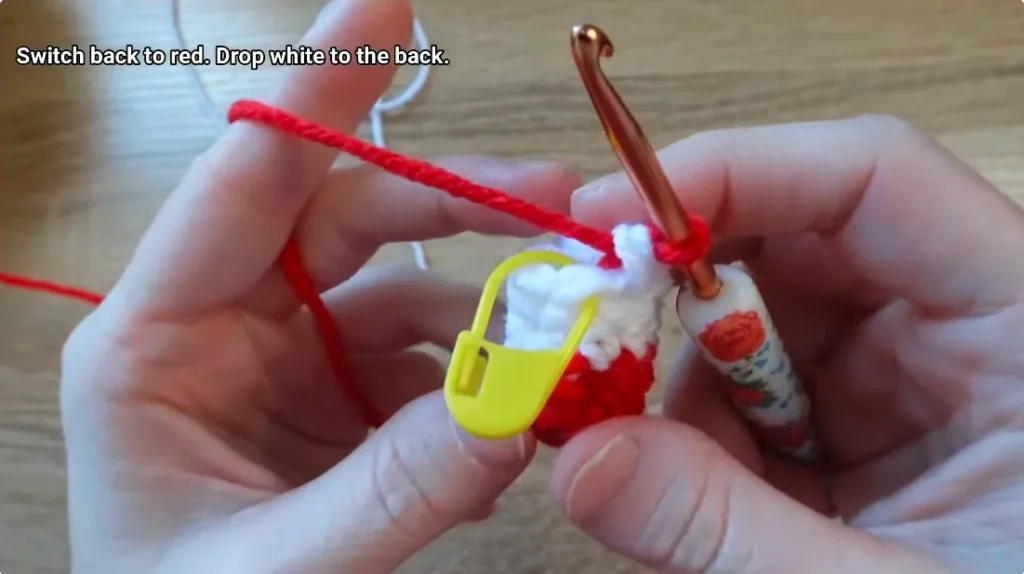
At the last stitch, begin with white yarn and switch to red yarn to complete the stitch. This prepares you for the next red section.
You should have:
8 stitches
Your first white stripe is complete.
Make the First Red Stripe
Round 7
Work 1 single crochet into each stitch around using red yarn.
You should have:
8 stitches
Round 8
Continue working 1 single crochet into every stitch around with red yarn.
Keep the tube even and make sure you do not skip any stitches.
You should have:
8 stitches
Round 9
Work 1 single crochet into each stitch around using red yarn.
At the last stitch, begin with red yarn and switch to white yarn to complete the stitch.
You should have:
8 stitches
Your first red stripe is complete, and you are ready to make the next white stripe.
Continue the Red and White Stripes
Repeat the six-round color sequence four more times. Each sequence consists of three white rounds followed by three red rounds.
Continue working 1 single crochet into every stitch, keeping eight stitches in each round. Change colors at the end of the appropriate round to maintain the striped pattern.
Use this round guide to keep track of your progress.
| Round | Color | Instructions |
|---|---|---|
| 1–3 | Red | 8 sc in each round |
| 4–6 | White | 8 sc in each round |
| 7–9 | Red | 8 sc in each round |
| 10–12 | White | 8 sc in each round |
| 13–15 | Red | 8 sc in each round |
| 16–18 | White | 8 sc in each round |
| 19–21 | Red | 8 sc in each round |
| 22–24 | White | 8 sc in each round |
| 25–27 | Red | 8 sc in each round |
| 28–30 | White | 8 sc in each round |
| 31–33 | Red | 8 sc in each round |
Continue until you have completed all 33 rounds.
You will have six red sections and five white stripes, with eight single crochet stitches in every round.
Fasten Off the Yarn
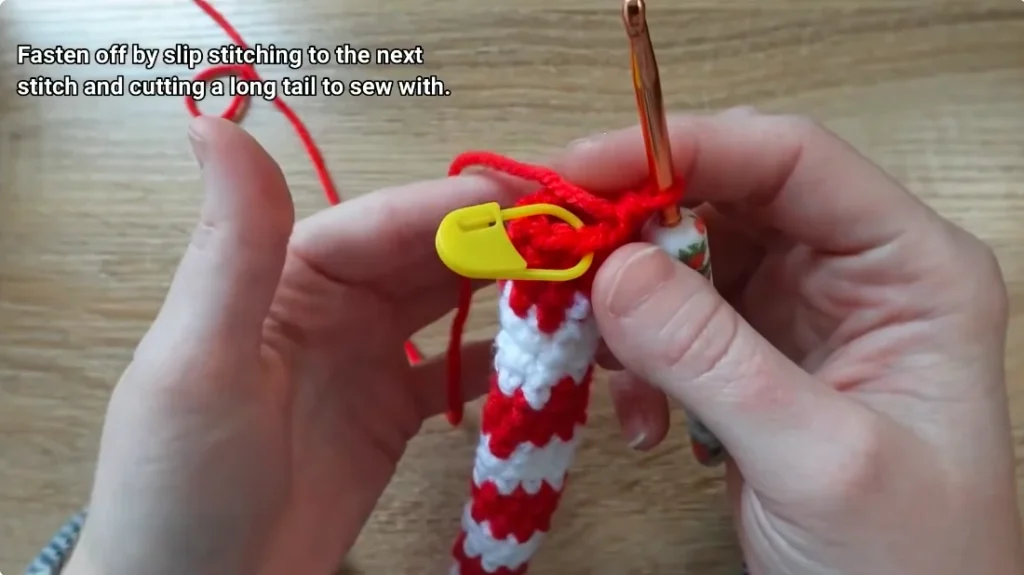
After completing Round 33, remove the stitch marker.
Work a slip stitch into the stitch you have just completed. Cut the red yarn, leaving a tail of approximately 6 inches.
Pull the yarn tail through the loop on your hook and tighten it to secure the end. Keep the remaining tail long enough to sew the top closed.
Insert the Pipe Cleaners
Pipe cleaners help the crocheted tube hold its candy cane shape.
Take three pipe cleaners and fold one end down to match the length of the crocheted piece. Twist the ends together to keep them in place.
Carefully insert the pipe cleaners into the tube, pushing them all the way to the far end. Check the top opening to make sure none of the ends are sticking out.
If any pipe cleaners extend beyond the top, trim the excess carefully with scissors before closing the opening. Keep all the ends tucked inside the crocheted fabric.
Close the Top of the Candy Cane
Thread the remaining yarn tail onto your yarn needle.
Sew through the front loops only of each of the eight stitches in the final round. Continue around the opening until you have passed through all eight stitches.
Pull the yarn tail gently to close the opening. The stitches should come together neatly, keeping the pipe cleaners inside the tube.
To secure the yarn, make a small knot on the surface. Loop the yarn tail over the crochet, then insert the needle through the fabric of the last stitch. As you bring the needle back up, pass it through the loop and pull gently to form a knot.
Weave the yarn tail in and out through the crocheted fabric a couple of times. Remove the yarn from the needle, pull the tail tight, and trim the excess close to the fabric.
Shape the Candy Cane
Now comes the fun part: shaping your crocheted tube into a candy cane.
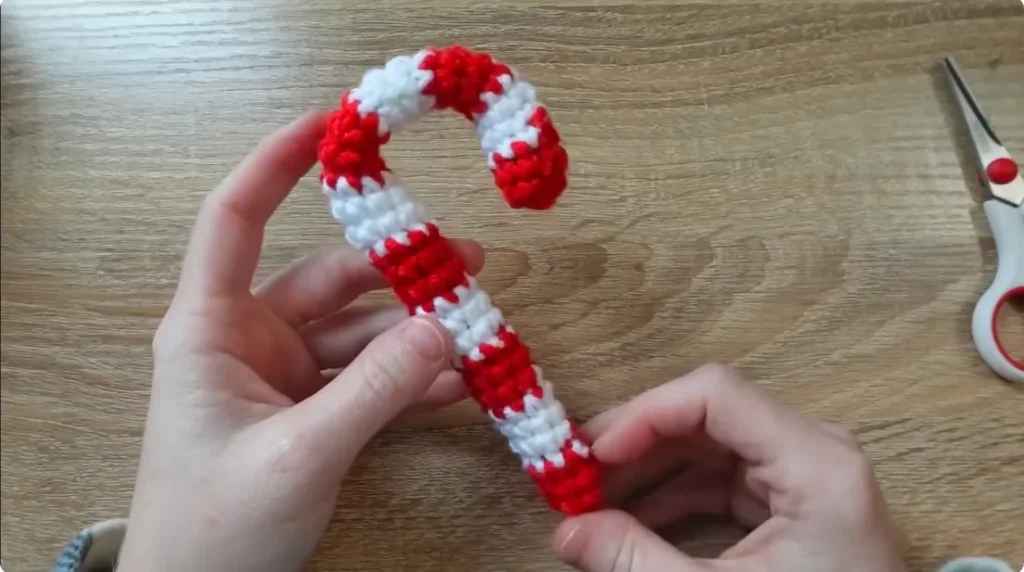
Gently bend the upper end into a curve while keeping the longer section relatively straight. The pipe cleaners inside help the piece hold its shape.
Adjust the curve gradually until you are happy with the result. Check the tube along its length to make sure the stripes remain visible and the shape looks even.
Your crochet candy cane is now ready to use as a Christmas ornament or handmade seasonal decoration.
Finishing Your Crochet Candy Cane
Before displaying your finished candy cane, take a moment to check the details.
Make sure:
- The red and white stripes are arranged correctly.
- Each round has eight single crochet stitches.
- The top opening is securely closed.
- The pipe cleaners are tucked inside the tube.
- No pipe cleaner ends are sticking out.
- The yarn tails are secured and trimmed.
- The upper end has a neat candy cane curve.
The finished size will depend on the yarn weight and hook you choose, so your candy cane may be slightly larger or smaller than another version of the same pattern.
Final Thoughts
This free crochet candy cane pattern is a simple way to add a handmade touch to your Christmas decorations. With basic single crochet stitches, red and white yarn, and a few pipe cleaners, you can create a festive striped ornament in 33 rounds.
Once you have finished the stripes, close the top, insert the pipe cleaners, and shape the tube into a candy cane. Enjoy making this little Christmas project for your own decorations or as a handmade seasonal gift.