
Crochet Snowflake – Free Crochet Pattern
Create a tiny crochet snowflake with a textured bobble-stitch center and eight decorative points. This project uses medium-weight acrylic yarn and a 5 mm crochet hook to create a small, puffy snowflake that works well as a Christmas decoration or handmade gift embellishment.
The snowflake is made in two main stages: first, crochet the center using a magic ring, eight bobble stitches, and chain-3 sections. Then work the outer points into the chain spaces using single crochet, slip stitch, chain stitches, and treble crochet.
Crochet Snowflake – Free Crochet Pattern: The Short Answer?
Pattern Details
- Project: Tiny crochet snowflake
- Skill level: Beginner-friendly with basic crochet knowledge
- Yarn: Medium-weight acrylic yarn
- Hook: 5 mm crochet hook
- Terminology: US crochet terms
- Construction: Bobble-stitch center with eight outer points
- Separate pieces: None
- Finishing: Fasten off and weave in both yarn ends
- Optional addition: Hanging loop
The finished dimensions, yarn quantity, and completion time are not specified in the original tutorial.
Materials
- Medium-weight acrylic yarn
- 5 mm crochet hook
- Scissors
- Yarn needle for weaving in the ends
Choose a yarn that works comfortably with your hook. White yarn gives the snowflake a classic winter appearance, while blue, silver, or other seasonal colors offer alternative looks.
Abbreviations
The pattern uses US crochet terminology.
- MR: Magic ring
- ch: Chain
- sc: Single crochet
- sl st: Slip stitch
- tr: Treble crochet
- st: Stitch
- ch-sp: Chain space
- YO: Yarn over
- FO: Fasten off
Special Stitch: Bobble Stitch
The bobble stitch creates the raised, puffy texture in the center of the snowflake.
- Yarn over and insert the hook into the magic ring.
- Yarn over and pull up a loop.
- Yarn over and pull through two loops on the hook.
- Repeat this partial double-crochet-style process four times in total.
- After the four repetitions, five loops should remain on the hook.
- Yarn over and pull through all five loops to close the bobble.
Keep the unfinished loops on the hook until the bobble is closed. Hold the magic ring securely while working each repetition.
Instructions
Step 1: Make the Magic Ring
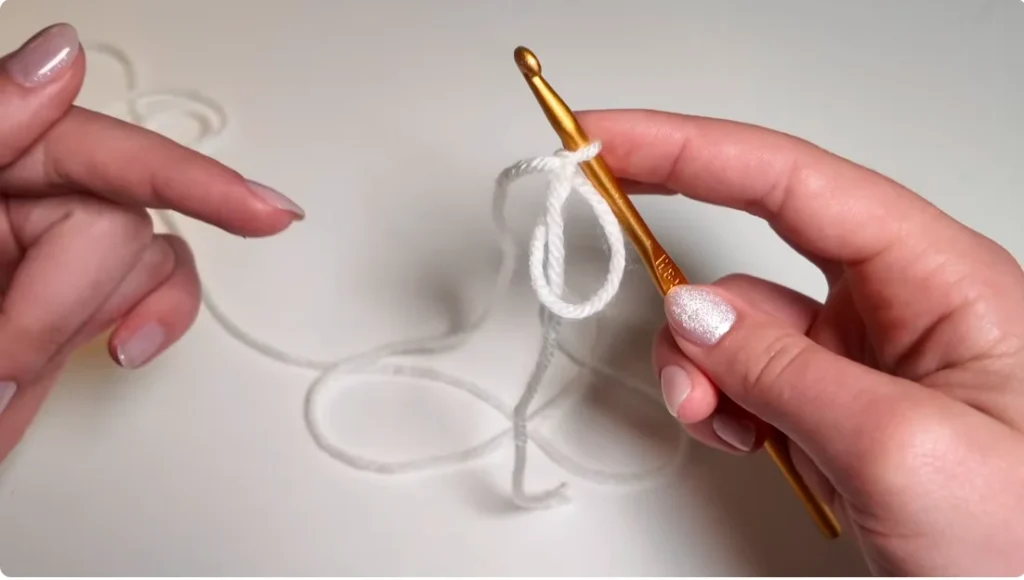
Hold the yarn tail in your left hand and wrap the working yarn around two fingers to form a loop. Cross the strands to create an X, then insert your hook under the first strand and pull the working yarn through.
Twist the hook and chain through the loop to secure the ring. You should now have a magic ring ready for the center stitches.
Step 2: Chain Three
Make 3 chain stitches.
These are the starting chains shown in the original tutorial. Keep the chains loose enough to work comfortably without distorting the center.
Step 3: Make the First Bobble Stitch
Work the first bobble into the magic ring.
Yarn over, insert the hook into the ring, yarn over again, and pull up a loop. Yarn over and pull through two loops. Repeat the partial stitch three more times, for four repetitions altogether.
When five loops remain on your hook, yarn over and pull through all five loops. Your first bobble is complete.
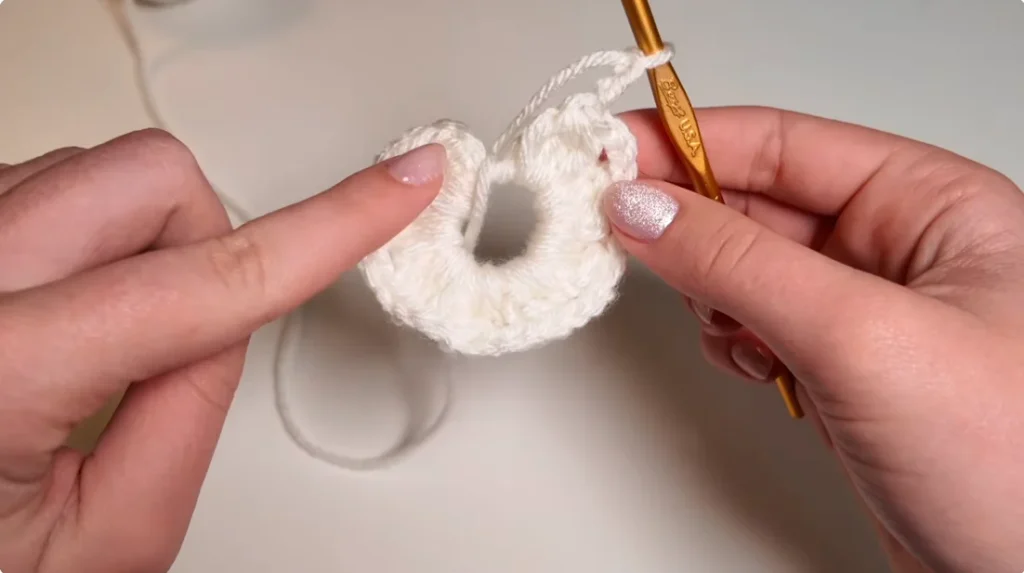
Step 4: Make Eight Bobbles
Chain 3 after the first bobble. Make the next bobble into the magic ring using the same method.
Continue alternating between a bobble stitch and 3 chain stitches until you have completed eight bobbles. Follow the tutorial’s sequence by making the chain-3 section after the eighth bobble as well.
After completing the final chain section, slip stitch into the top of the first bobble to join the center. Pull the magic-ring tail to close the hole.
Check that the center has eight bobbles and that the chain sections are positioned around them as shown in the tutorial.
Step 5: Make the First Snowflake Point
Work into the first chain-3 space between the bobble stitches.
Follow this sequence, keeping all the stitches of the point in the same chain space:
- Make 1 single crochet.
- Chain 2.
- Make 1 slip stitch in the same chain space.
- Chain 2.
- Make 1 treble crochet in the same chain space.
- Chain 2.
- Make 1 slip stitch in the same chain space.
- Chain 2.
- Make 1 single crochet in the same chain space.
The single crochets form the sides of the point, while the treble crochet and chain sections create its shape.

Step 6: Make the Remaining Seven Points
After completing the first point, slip stitch into the top of the next bobble stitch.
Locate the next chain-3 space and repeat the full point sequence from Step 5.
Continue around the center until you have made eight snowflake points in total. Keep your tension consistent so the points look as even as possible.
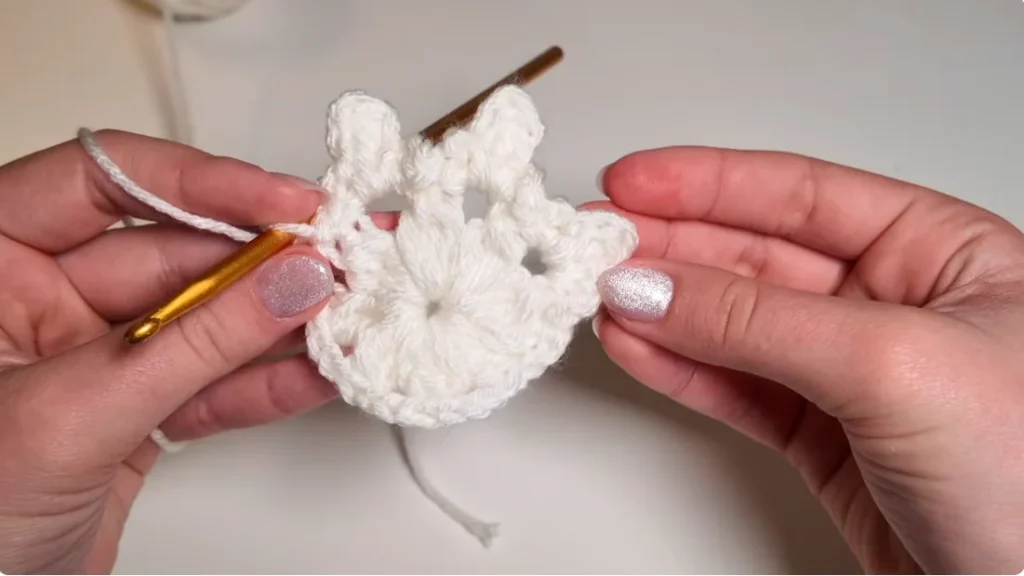
Step 7: Fasten Off and Weave in the Ends
Once all eight points are complete, cut the yarn while leaving a tail long enough to weave in securely.
Pull the hook out until the yarn tail passes through the final loop. Gently tighten it to fasten off.
Thread one tail through a yarn needle and weave it through several tight stitches so it stays secure. Repeat with the other tail, then trim the excess yarn.
Your tiny crochet snowflake is complete.
Optional Hanging Loop
The original tutorial finishes the snowflake without adding a loop. If you want to hang it on a Christmas tree, leave a longer yarn tail and use it to form a loop. Secure the loop and weave in the ends neatly.
This is an optional finishing adaptation rather than a separate part of the main pattern.
Tips for a Neat Finish
- Hold the magic ring securely while making the bobbles.
- Pull through all five loops when closing each bobble.
- Keep the chain-3 sections consistent.
- Work every point into its intended chain space.
- Slip stitch into the top of the next bobble between points.
- Weave in both yarn ends securely to help prevent unraveling.
- Adjust the points gently after finishing to help the snowflake lie evenly.
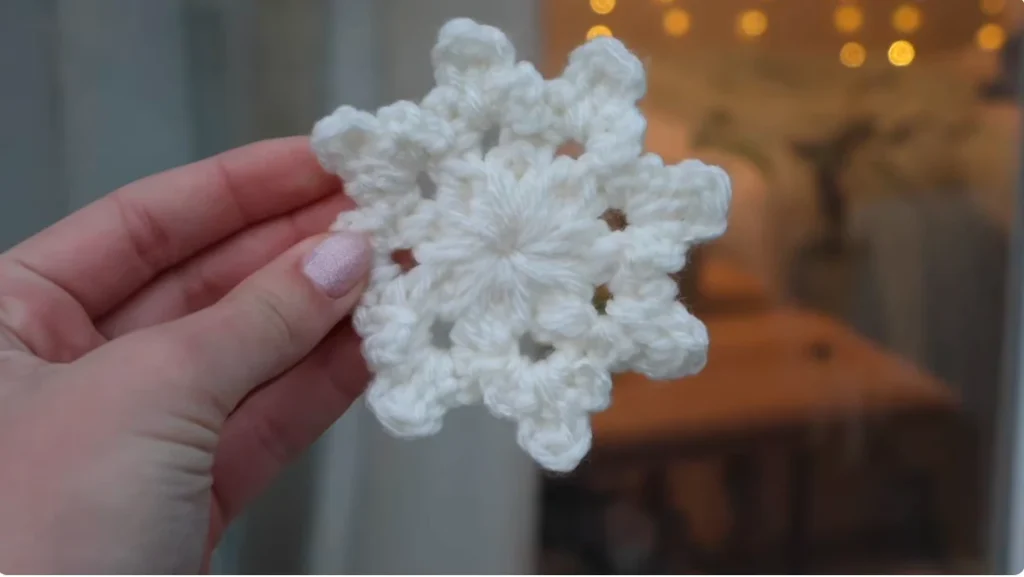
Color Ideas
White is a classic choice for a snowflake, but you can use other colors to suit your decorations. Light blue creates a soft winter look, dark blue gives a richer finish, and silver-colored yarn adds a festive touch.
These are optional color choices and do not change the core stitch sequence.
Ways to Use Your Crochet Snowflake
Use your finished snowflake as a Christmas tree decoration, a window display, a handmade gift embellishment, or a small seasonal accent around your home. You can also add a hanging loop if you want to display it as an ornament.
Final Pattern Checklist
Before finishing, check the following:
- Eight bobble stitches in the center
- Chain-3 sections worked in the sequence shown in the tutorial
- Eight outer snowflake points
- One treble crochet in each point
- Two single crochets in each point
- Chain-2 sections and slip stitches worked as instructed
- Slip-stitch connections at the tops of the bobbles between points
- Both yarn ends woven in securely